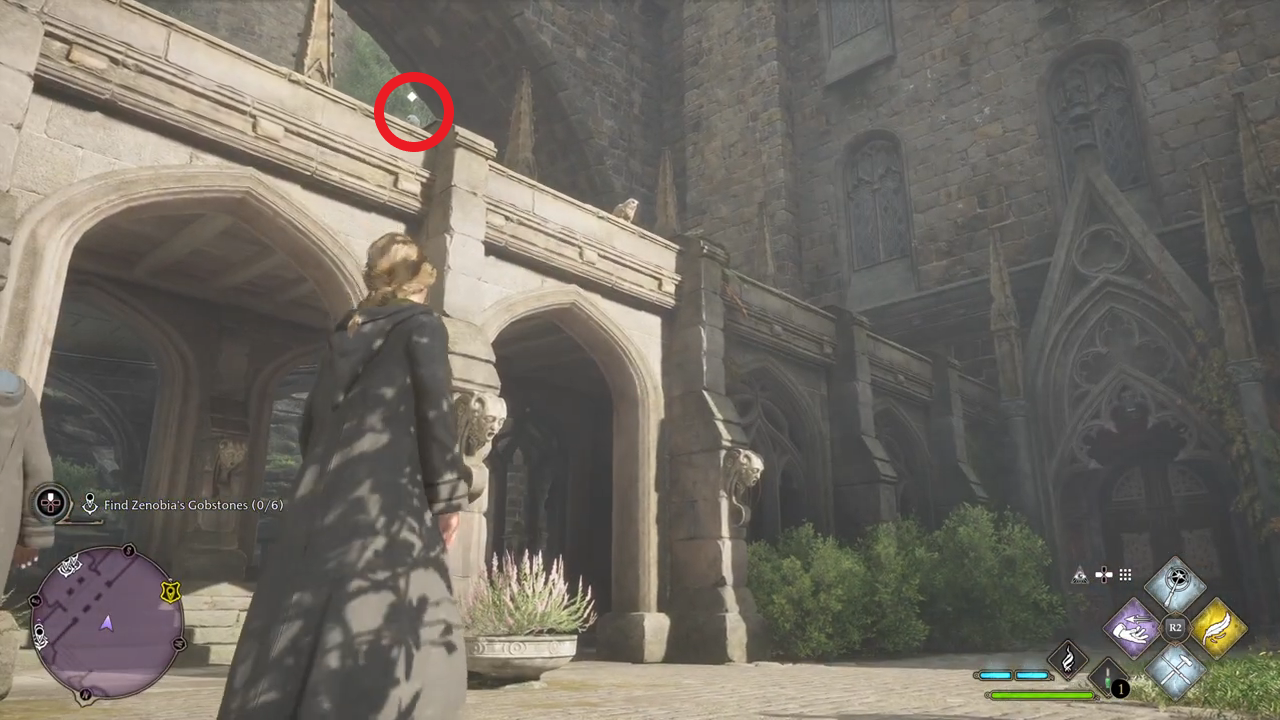
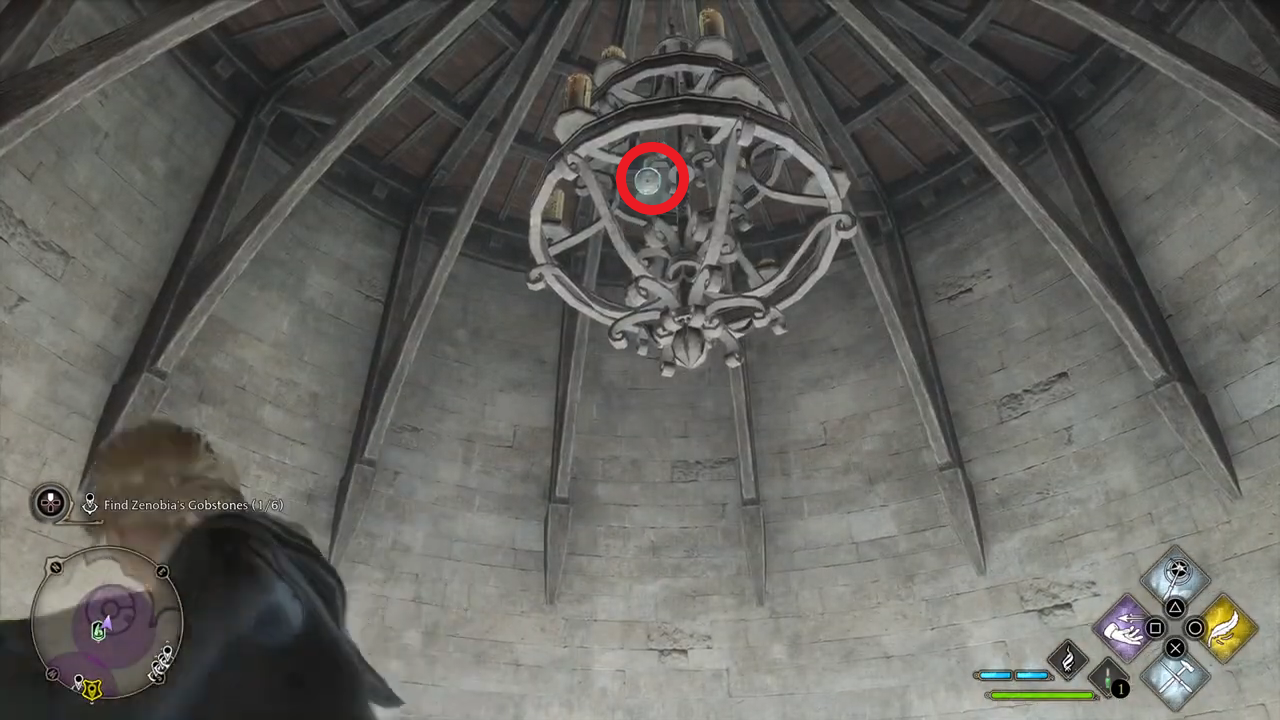
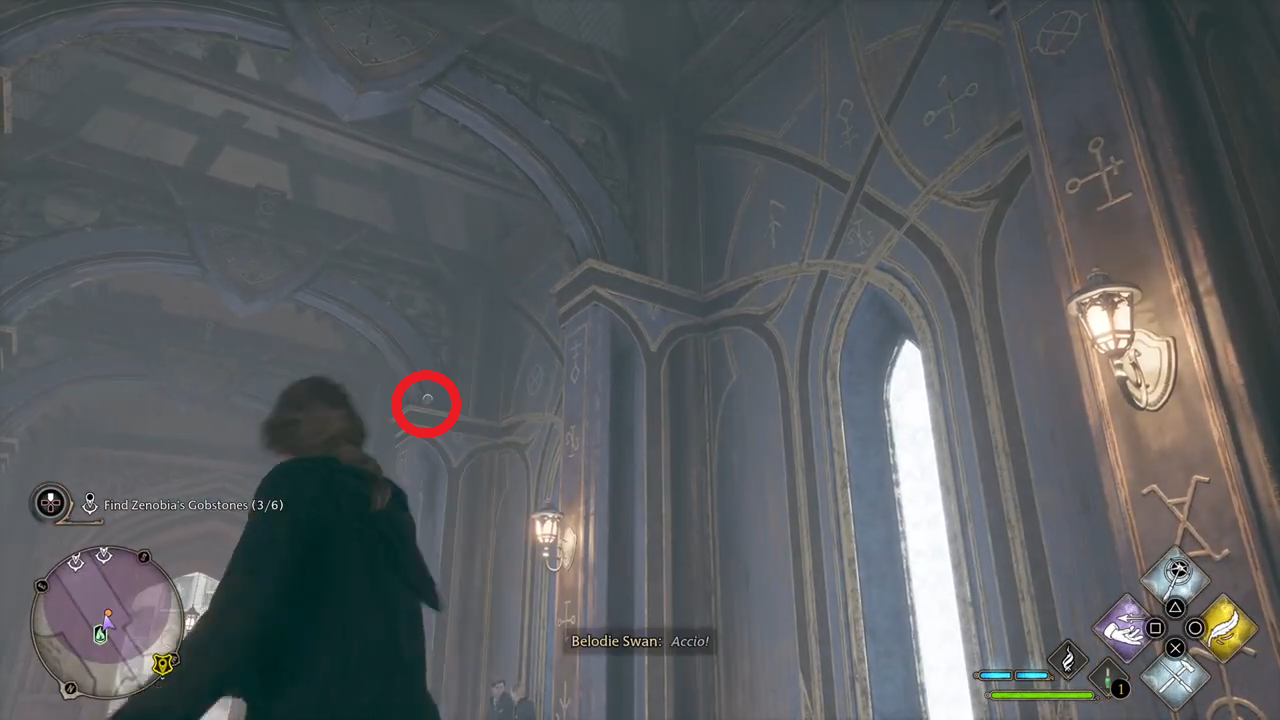
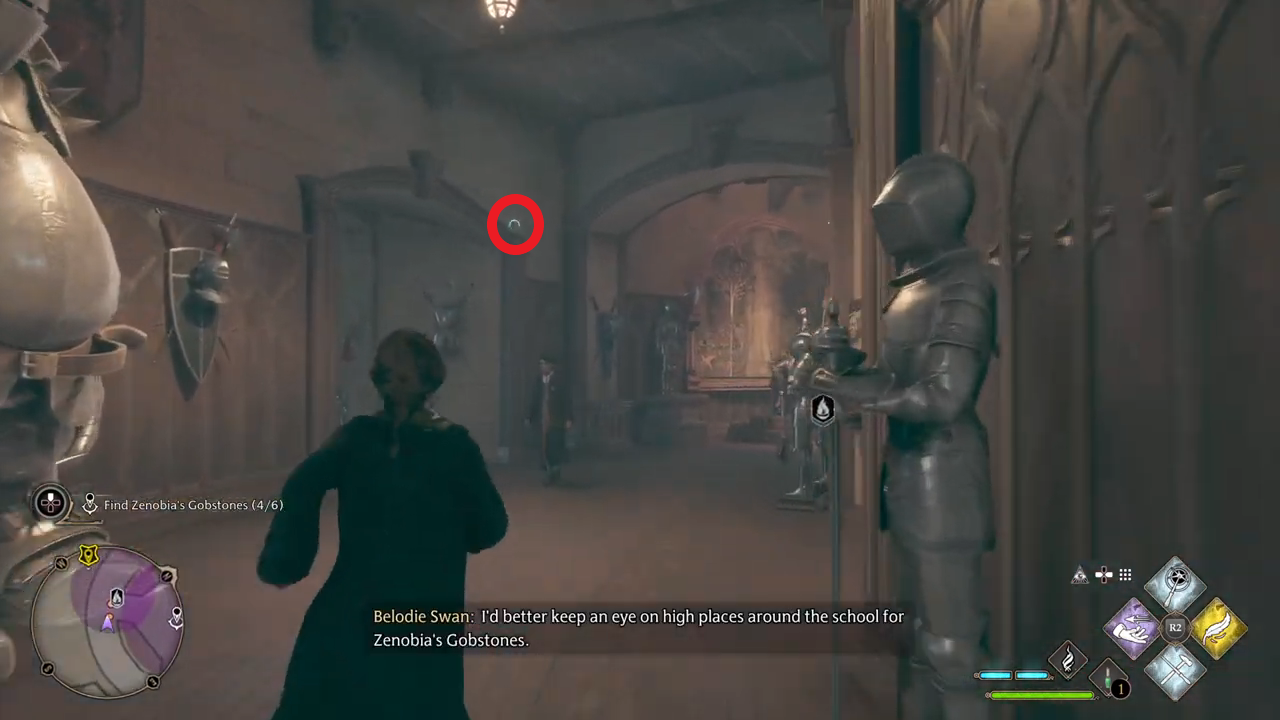
Gobs of Gobstones Some people stole Zenobia’s Gobstones and hide them at high places. Will you get them back for her? Here you can find all your subjects for the quest and explanations behind it. I will also put photo’s of the places of the 6 Gobstones here.
Talk to Zenobia Noke: talking with her will start the side quest.
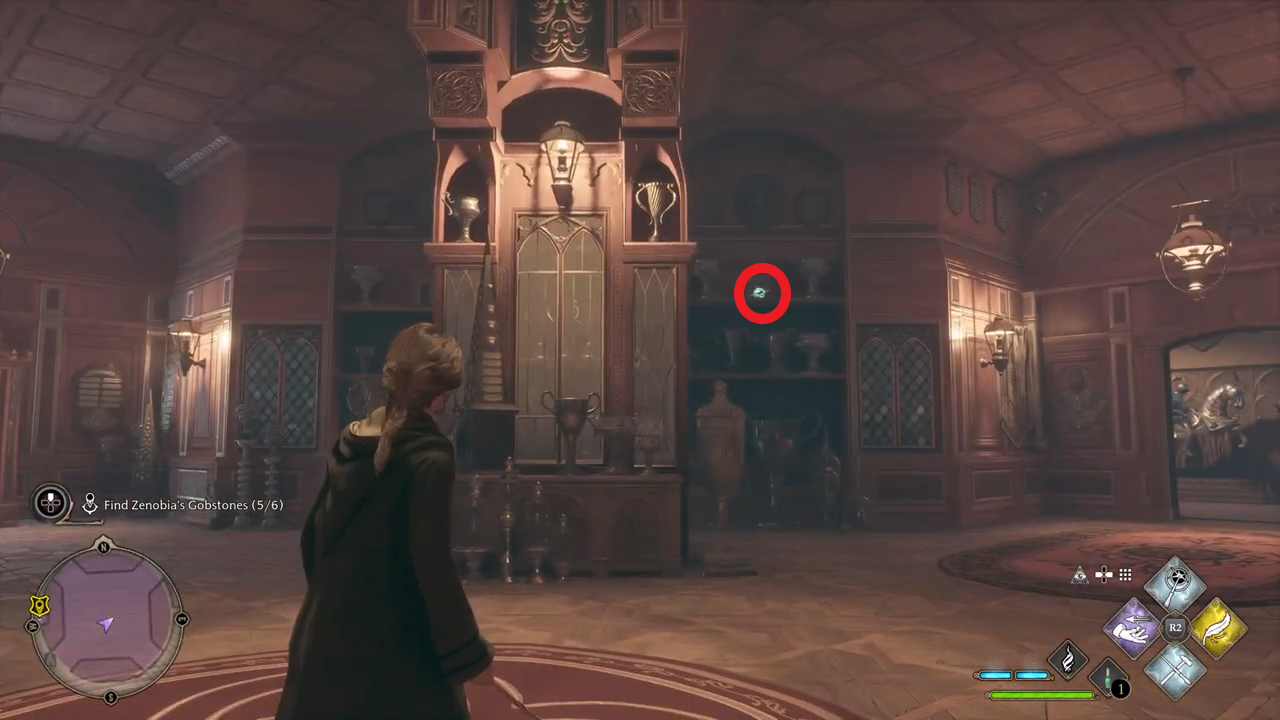
Find Zenobia’s Gobstones: there are 6 Gobstones hiding in the castle. Cast Accio on them and they will come towards you.
Return to Zenobia: bring the Gobstones back you found for her.
At 00:00 starts Gobs of Gobstones quest.
Transfiguration Courtyard
Divination Classroom Tower
Divination Classroom Tower
Ravenclaw Tower
Trophy Room
Trophy Room
Crossed Wands, Round 1 You have to practice dueling. You will be teamed up with Sebastian and duel against two other students. There are no subjects for the quest. You just have to win. If you fail, you can try again.
At 00:00 starts Crossed Wands, Round 1 quest.
Crossed Wands, Round 2 You have to practice dueling. You can choose to be teamed up with Sebastian or Natty and duel against three other students. There are no subjects for the quest. You just have to win. If you fail, you can try again.
At 00:15:48 starts Crossed Wands, Round 2 quest.
Spell Combination Practice 1 You have to practice spell combinations with Lucan. He will give you a dummy to practice on. If you make a mistake, he will let you try the combinations again. These are the combinations you have to make.
Cast Accio and four Basic spells.
Cast Levioso and four Basic spells.
Cast Levioso, three Basic spells, Accio, and four Basic spells.
At 00:20:47 starts Spell Combination Practice 1 quest.
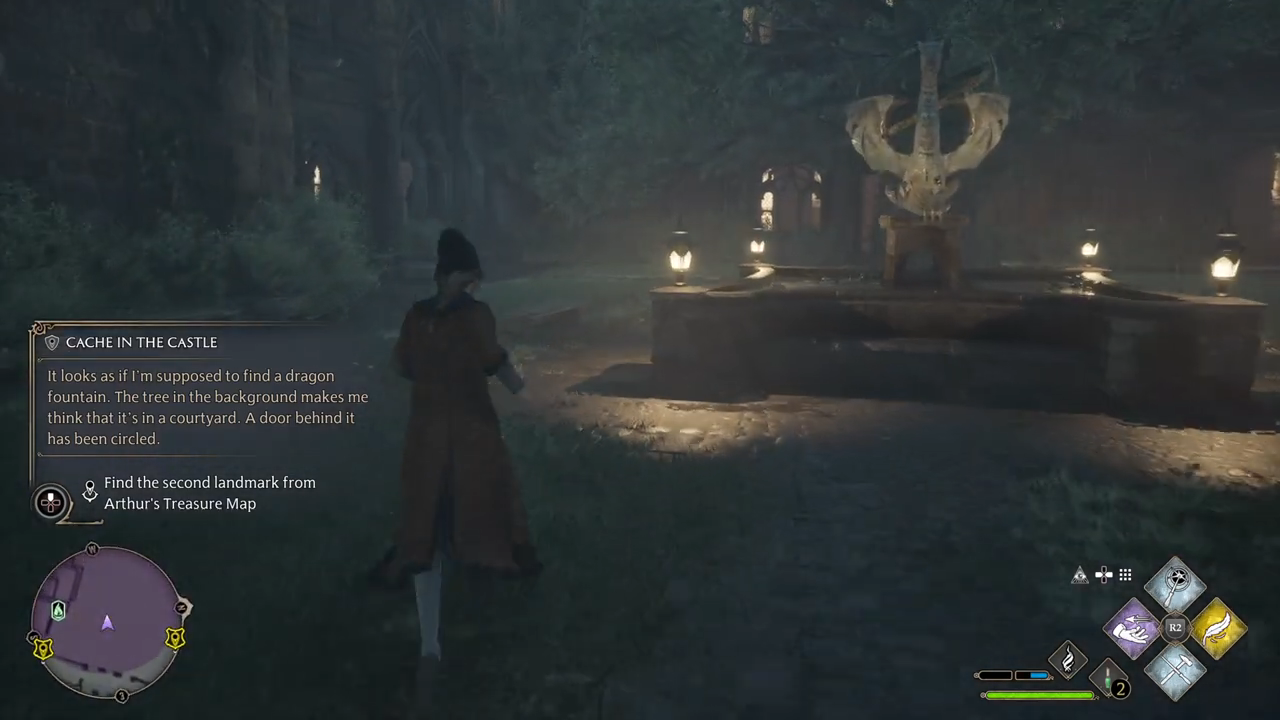
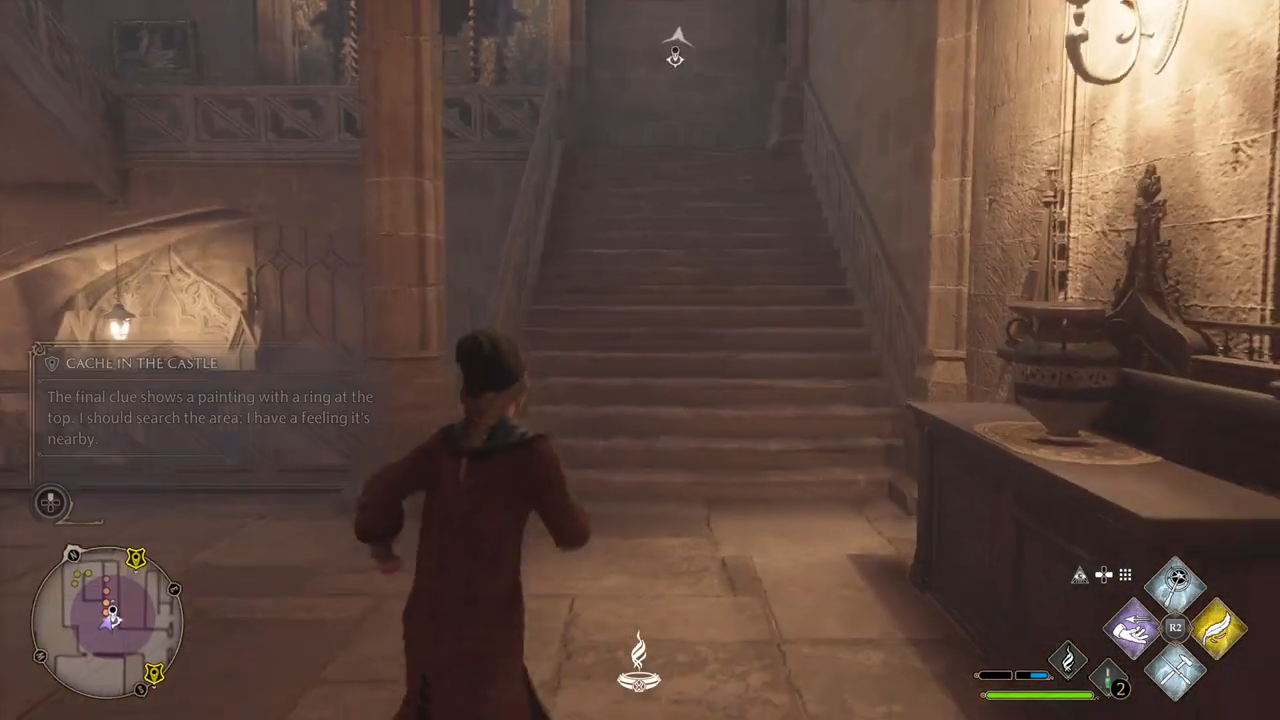
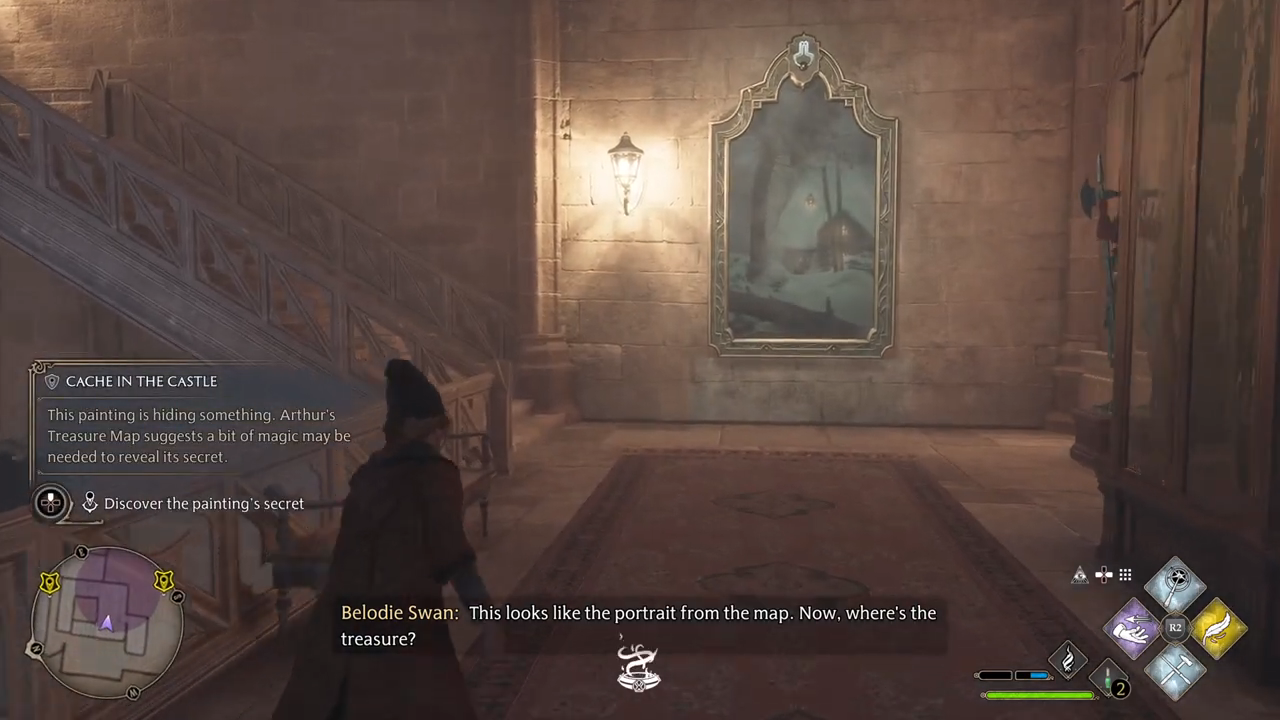
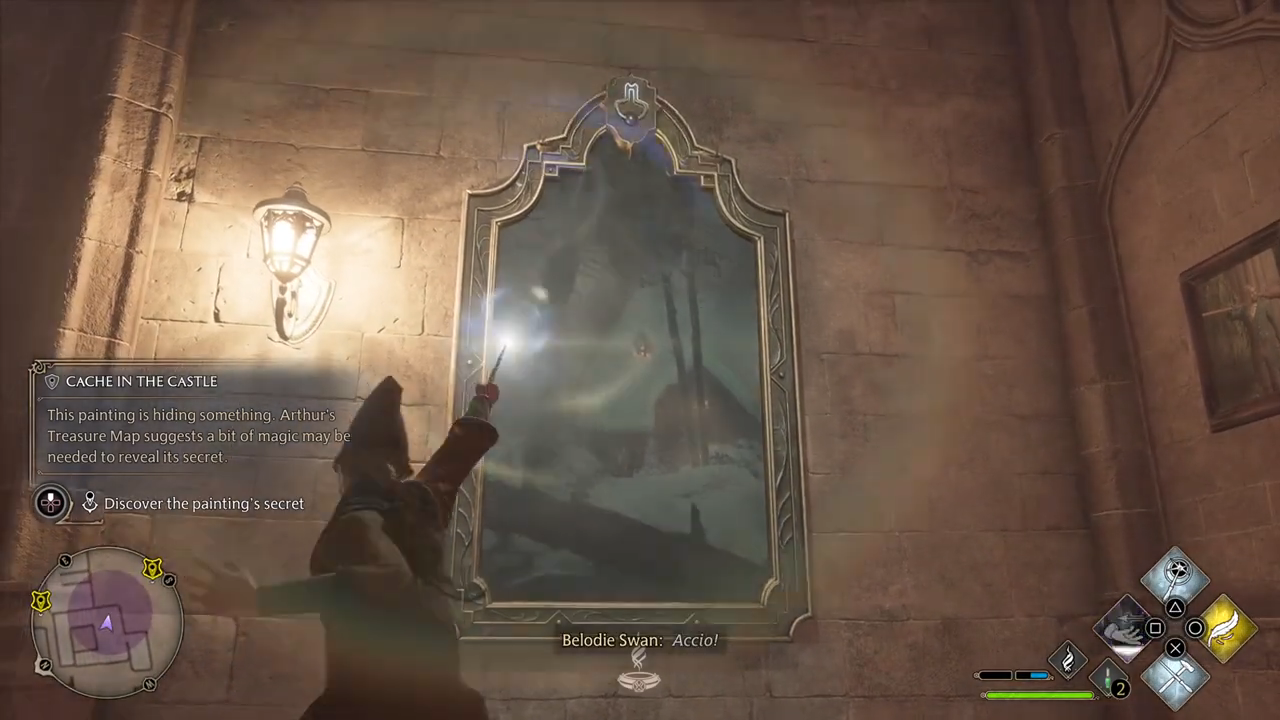
Cache In The Castle Arthur has a treasure hunt for you. He will give you a map. You have to figure out the clues. Here are the subjects of the quest with explanations behind it.
Find the first landmark: you have to find a skeleton. Go to the defence against the dark arts tower and start walking down the stairs. You will see the skeleton.
Find the second landmark: walk further down the stairs and leave the building by using the big doors. You are now in the courtyard. There you see a fountain.
Find the third landmark: leave the courtyard to the north hall. There you find the stairs.
Find the painting: go up two stairs and go right. There you see the painting.
Discover the painting’s secret: use Accio at the handle above the painting.
Return to Arthur Plummly: the map will lead you towards him, and talking to him will end this quest.
At 06:32 starts Cache In The Castle quest.
First landmark
Second landmark
Third landmark
The painting
Using accio on the painting
Crossed Wands, Round 3 You have to practice dueling. You can choose to be teamed up with Sebastian or Natty and duel against four other students. There are no subjects for the quest. You just have to win. If you fail, you can try again.
At 00:31 starts Crossed Wands, Round 3 quest.
Spell Combination Practice 2 You have to practice spell combinations with Lucan. He will give you a dummy to practice on. If you make a mistake, he will let you try the combinations again. These are the combinations you have to make.
Cast Accio, Incendio and Levioso.
Cast Levioso, three Basic spells, Accio and Incendio
Cast Accio, Basic spell, Incendio, three Basic spells, Levioso, three Basic spells, Accio, Incendio and four Basic spells
At 09:27 starts Spell Combination Practice 2 quest.
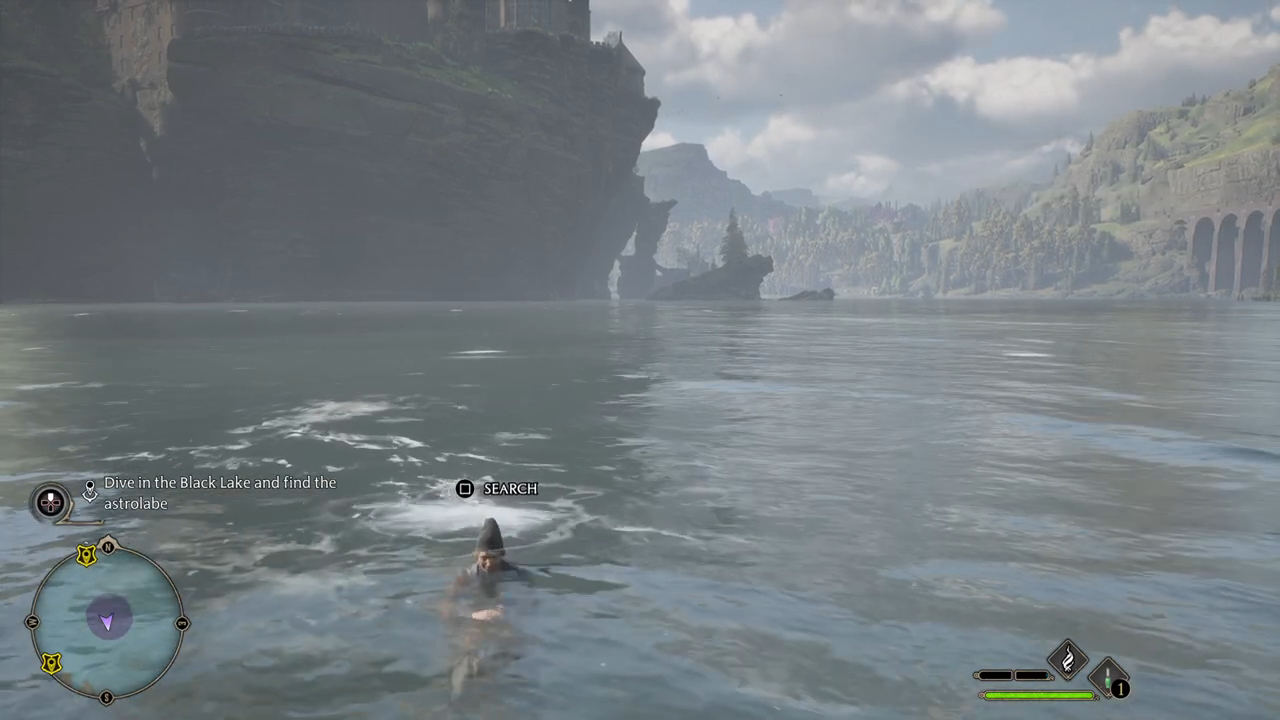
The Lost Astrolabe Grace wants to give back to her family the Lost Astrolabe. It lies in the Black Lake. She asks you to get it. Here are all the subjects for the quest with explanations behind it.
Dive in the Black lake and find the astrolabe: swim to the purple spot on the map in the Black lake. There are 5 Spots you can dive. At one of them you find the astrolabe, at the others you find gear.
Return to Grace: follow the map back to Grace. Talking with her will end this quest.
At 04:25 starts The Lost Astrolabe quest.
Diving at the Blake Lake
Like A Moth To A Frame Lenora tries to figure out how the empty frame puzzle works. She asks you for help. Here are all the subjects for the quest with explanations behind it.
Discover the painting’s secret: cast Lumos in front of the painting.
Find the location depicted in the painting: to find the location go left, down the stairs and then left again.
Return the moth to the painting: walk back to the painting and cast Lumos.
Talk to Lenora: follow the map to Lenora. With talking to her, you end this quest.
At 00:24:07 starts Like A Moth To A Frame quest.
Location depicted in the painting
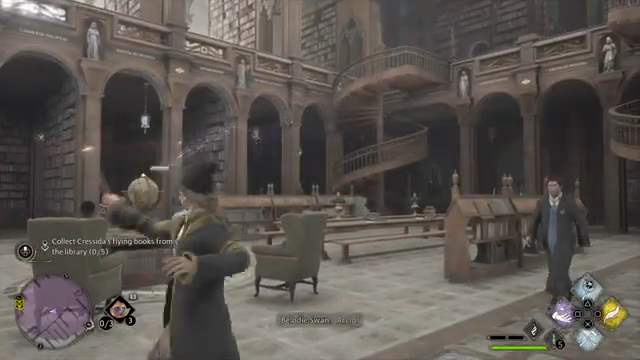
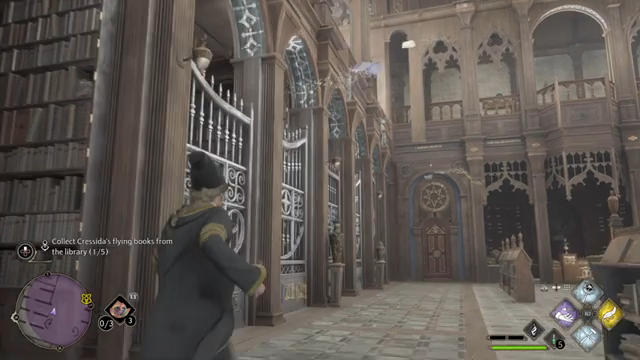
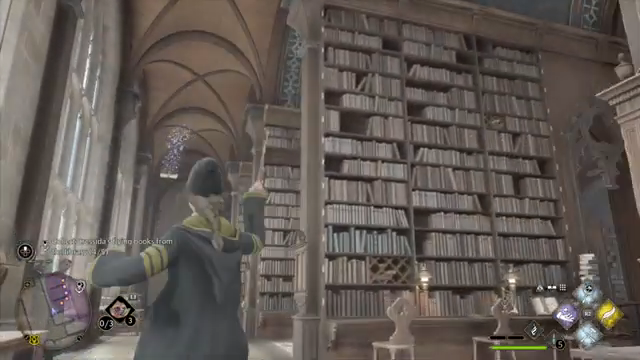
Flying Off The Shelves Cressida has lost her books in the library. She asks you to return them to her. Here are all the subjects for the quest with explanations behind it.
Collect Cressida’s five flying books from the library: Go to library. Cast Accio on the flying books and one diary, and they will come towards you.
Talk to Cressida: follow the map back to Cressida. Talking with her will end this quest.
At 00:43:09 starts Flying Off The Shelves quest.
Book 1
Book 2
Book 3
Book 4
Book 5
Summoner’s Court: Match 1 You have to beat Leander in a summoner’s Court round. There are no subjects for the quest. You just have to win. If you fail, you can try again.
At 00:08:18 starts Summoner’s Court: Match 1 quest.
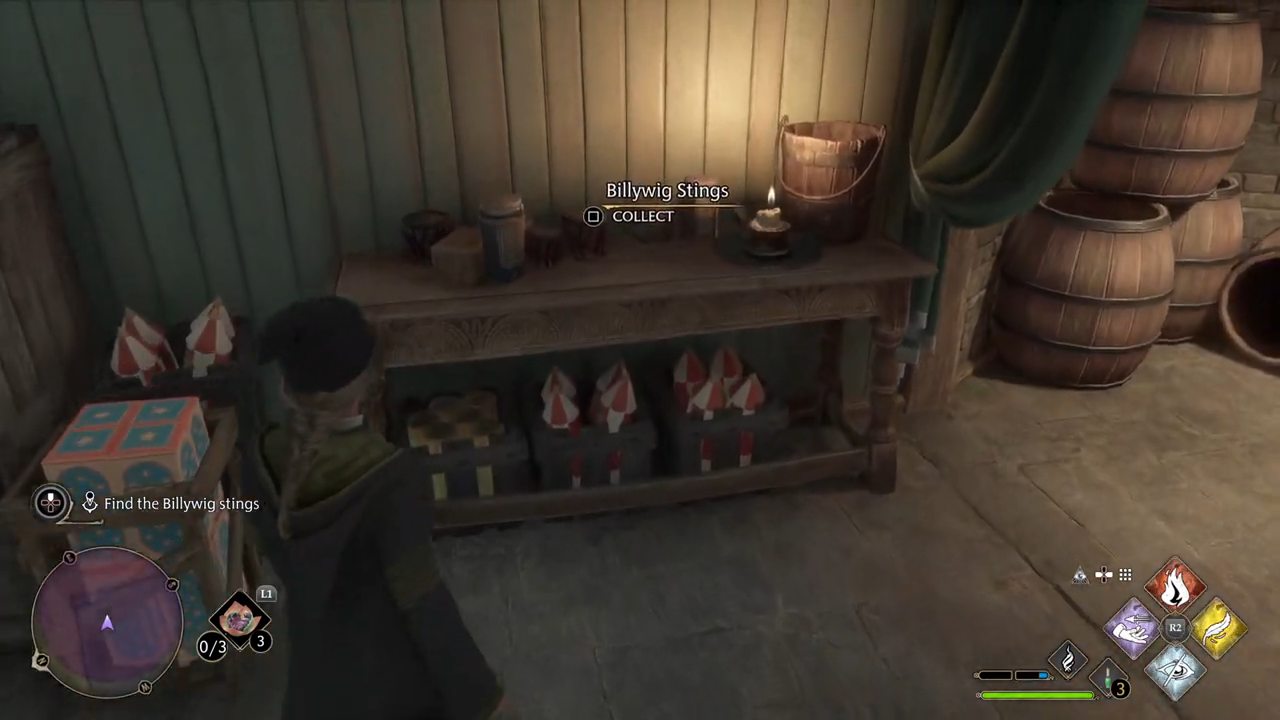
Dissending For Sweets Gareth wants you to get Billiwig Stings from Honey Ducks for him. He advises you to take a secret way to the shop. Here are all the subjects for the quest with explanations behind it.
Find the statue of the one-eyed witch; follow the map to the grand staircase. On the left side you will find the statue.
Open the one-eyed witch statue: interact with the statue.
Explore the secret passage: while using the passage way. You need a few spells to get to some places: Reparo, Incendio, Levioso and Accio.
Find a way out of the secret passage: Use the ladder that leads to the shop.
Find the Billiwig stings: go right into a hall, follow that you will find a closet where they lie on.
Return to Gareth: take the secret way back to Gareth.
At 00:23:23 starts Dissending For Sweets quest.
One-eyed witch statue
Billiwig Stings
Carted Away A goblin outside Lower Hogsfield seems distraught over his missing cart. He doesn’t seem to be aligned with Ragnok’s Loyalists. Perhaps you should investigate. Here are all the subjects for the quest with explanations behind it.
Talk to the Goblin outside Lower Hogsfield: select the quest and follow the map to the Goblin, then talk with him.
Go to the Goblin Camp: follow the map to the camp.
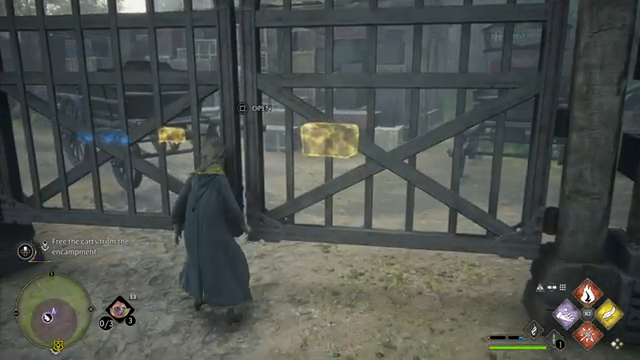
Free the carts from the encampment: you have to duel some Goblins. Then you can open the door that keeps the carts from going back.
Return to Arn: follow the back to him. You don’t have to follow the carts, they Will come there on their own. With talking to Arn, you end this quest.
At 00:00:00 starts Carted Away quest.
Opening up the gate.
Breaking Camp The local vendor in Upper Hogsfield, Clair Beaumont, seems worried about something. You should ask her what’s wrong. Here are all the subjects for the quest with explanations behind it.
Talk to Claire Beaumont: select the quest and follow the map to Clair, then talk to her.
Clear two Goblins encampments: the map will lead you to the camps. You have to defeat the Goblins in a duel.
Return to Claire Beaumont. Go back to her, to tell her the good news. With talking to her, you end this quest.
At 00:35:07 starts breaking camp quest.
Ghost Of Our Love The map portrays a forest, bridge and candles. You have put it into your bag for reference.
To get this quest is different for each house.
Hufflepuff You can find this map in a chest behind Claire Beaumont’s vendor stall, after you have completed the main quest: prisoner of love.
Here are all the subjects for the quest with explanations behind it.
Use the Map with floating candles to find the treasure: go to the entrance of the forbidden forest. Walk towards the bridge. There you find a letter. On the place where you find the letter, you have to cast Lumos. Some candles will appear, follow them into the forest. They will lead you to a picnic place where you find a chest. After opening the chest, the quest is completed.
At 00:47:25 starts Ghost Of Our Love quest.
Hufflepuff: Chest with the map in it
Candles appear
Brother’s Keeper Dorothy Sprottle is concerned about a missing person. Perhaps you can help track them down. Bardolph allegedly practiced Dark Magic near the Forest. You should start your search there. Here are all the subjects for the quest with explanations behind it.
Speak with Dorothy Sprottle: select the quest and follow the map to Dorothy and talk with her.
Discover what happened to Bardolph Beaumont: follow the map, to the place where Bardolph practice magic. When you can get to the place, you need to duel with Inferius. You have to hit them with a fire to get your basic spell working on them.
Report back to Clair Beaumont: follow the map back to her. With talking to her, you end this quest.
At 00:00 starts Brother’s Keeper quest.
Follow The Butterflies You overheard Clementine Willardey talking to herself in the Three Broomsticks. She mentioned something about a swarm of butterflies. Here are all the subjects for the quest with explanations behind it.
Talk to Clementine Willardsey: select the quest and follow the map to Clementine and talk with her.
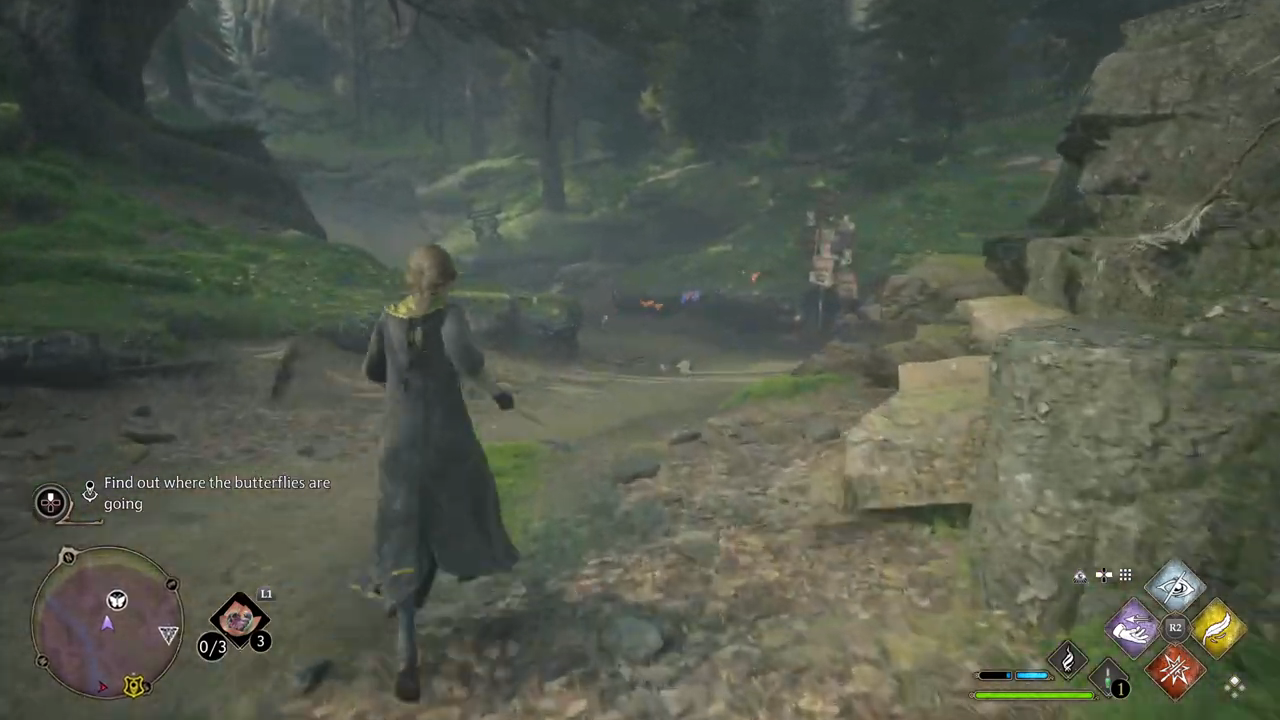
Find the butterflies in the forbidden forest: go to the entrance of the forbidden forest. Start walking on the path. The Butterflies appear.
Find out where the butterflies are going: try to follow them, they will lead you to a chest, open it.
Return to Miss Willardsey: go back to her. With talking to her, you end this quest.
At 28:38 starts Follow The Butterflies quest.
The Butterflies
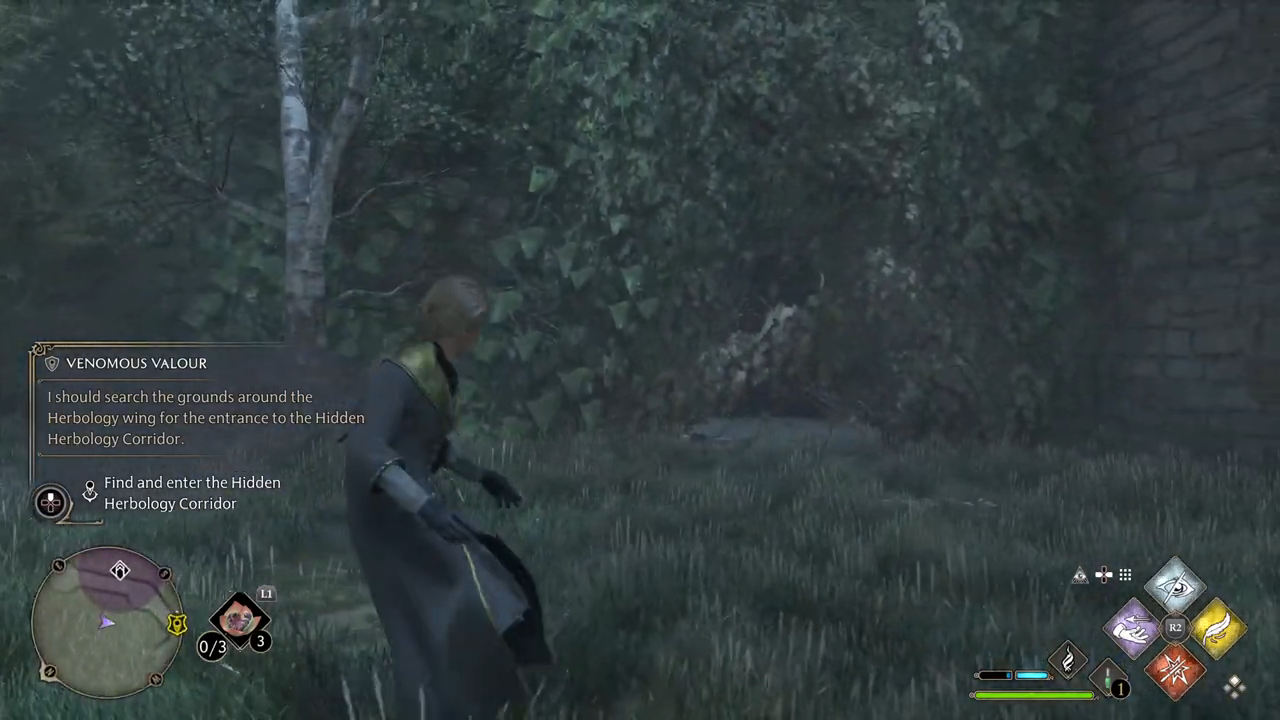
Venomous Valour Duncan Hobhouse seems to have a Puffskein problem. You wonder if you can help him out. You should search the grounds around the Herbology wing for the entrance to the Hidden Herbology Corridor. Here are all the subjects for the quest with explanations behind it.
Talk to Duncan Hobhouse: select the quest and follow the map to Duncan and talk with him.
Find and enter the Hidden Herbology Corridor: follow the map to the corridor. You need to use a fire spell to open the entrance.
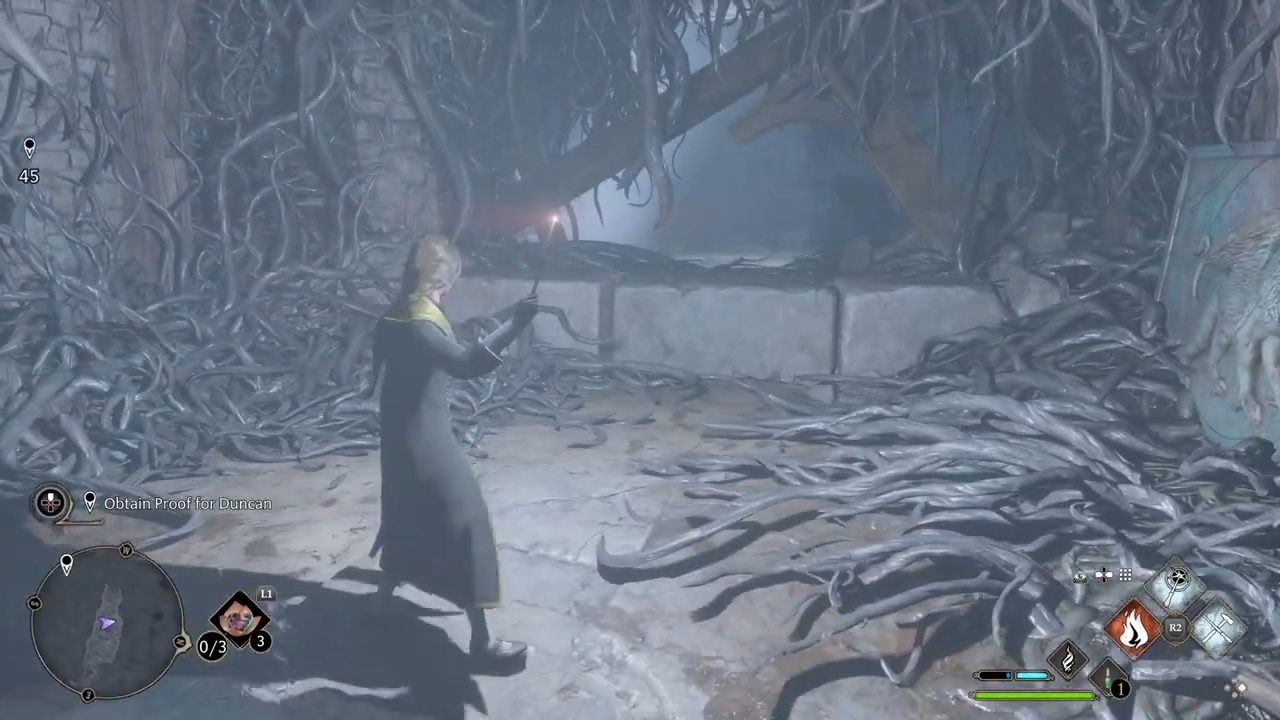
Obtain proof for Duncan: Keep following the corridor. You find Devil’s Snare. Use Lumos to get past it.
Collect a Giant Venomous Tentacula leaf: interact with the plant to take it.
Return to Duncan: follow the map back to Duncan. With talking to him, you end this quest.
At 00:00 starts Venomous Valour quest.
Entrance of the corridor
Using Lumos on Devil's Snare
Interacting with Venomous Tentacula
Interior Decorating Professor Weasley would like to meet with you in the Room of Requirement. Here are all the subjects for the quest with explanations behind it.
Speak with Professor Weasley: go to the Room of Requirement and talk with her.
Gather 50 Moonstones: you can gather it by using Evanesco in the room of requirement. Or you can find outside Hogwarts.
Return to Professor Weasley: go to the Room of Requirement and talk with her.
Conjure 5 wall decorations: use the conjure spell 5 times on the wall.
Conjure 5 floor decorations: use the conjure spell 5 times on the floor.
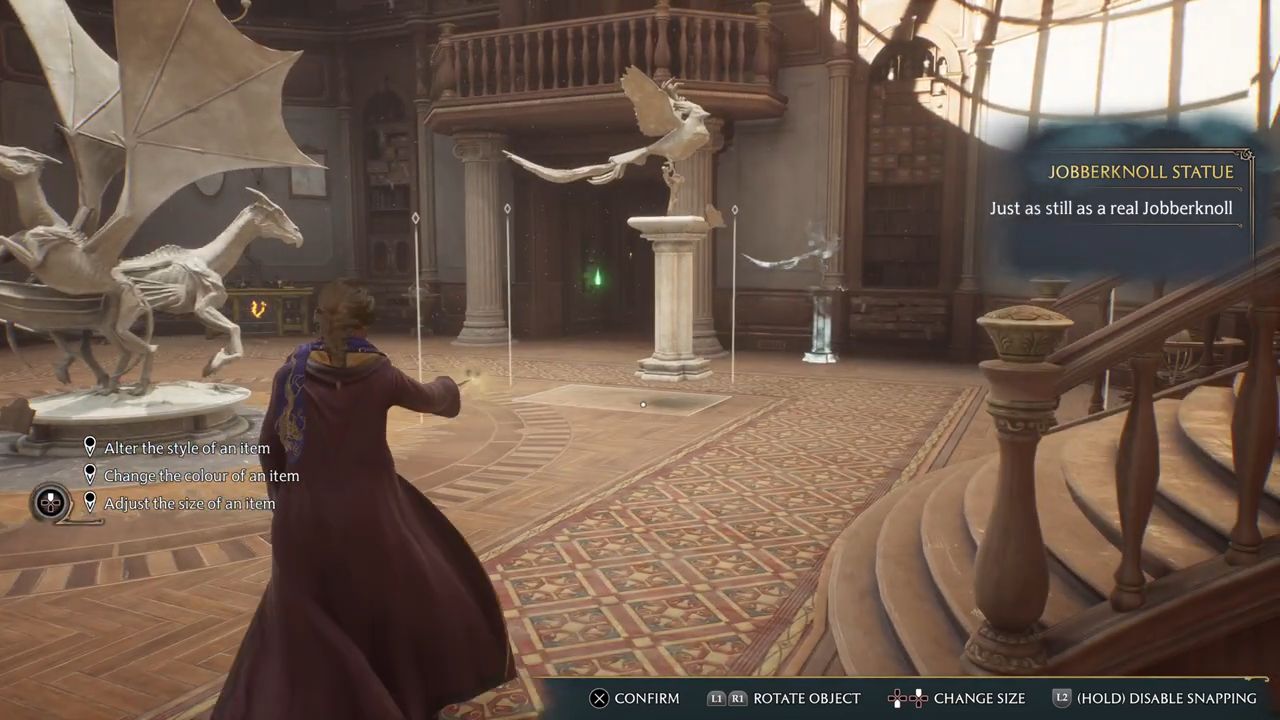
Speak to Professor Weasley in the Room of Requirement: talk with the professor. She will teach you the altering spell.
Alter the style of an Item: use the altering spell for this.
Change the color of an item: use the altering spell to change the color of an item.
Adjust the size of an item: use the altering spell to change the size of an item.
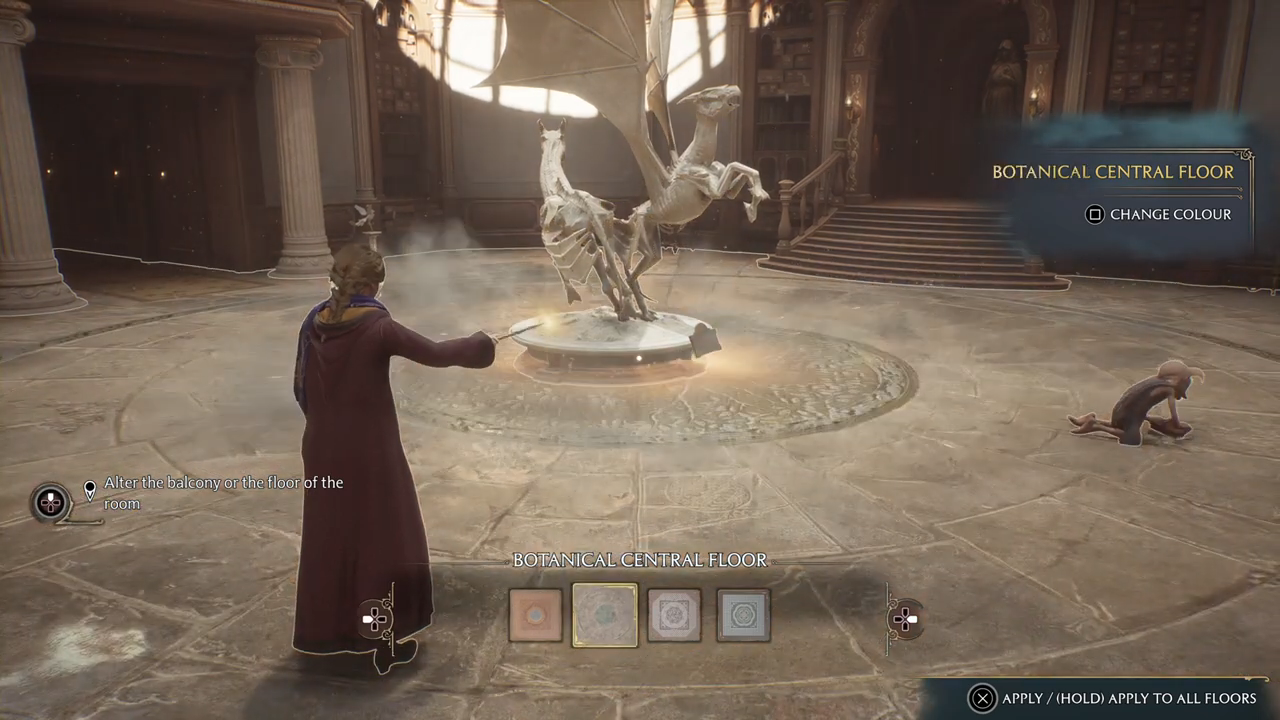
Alter the balcony or the floor of the room: use the altering spell on the floor or the balcony.
Speak to Deek: talk with Deek and answer his question. You will then get a conversation with Professor Weasley and the room will get bigger. Then the quest will be completed.
At 00:36:25 starts Interior Decorating quest.
Altering Items
Altering the floor
Flight Test After completing your broom flight training in Madam Kogawa’s Flying class. Everett mentioned checking with Albie Weekes at Spintwitches to get a broom. Here are all the subjects for the quest with explanations behind it.
Purchase a broom at Spintwitches: talk to the owner of the shop and buy your first broom.
Speak with Imelda Reyes at the Quidditch pitch: follow the map to Imelda.
Place in the Quidditch pitch Broom Trial: fly through 22 rings and beat the best score. If you fail, you can try again.
Return to Albie Weekes: go back to the shop and talk with Albie. After this conversation, your quest will be completed.
At 00:00 starts Flight Test quest.
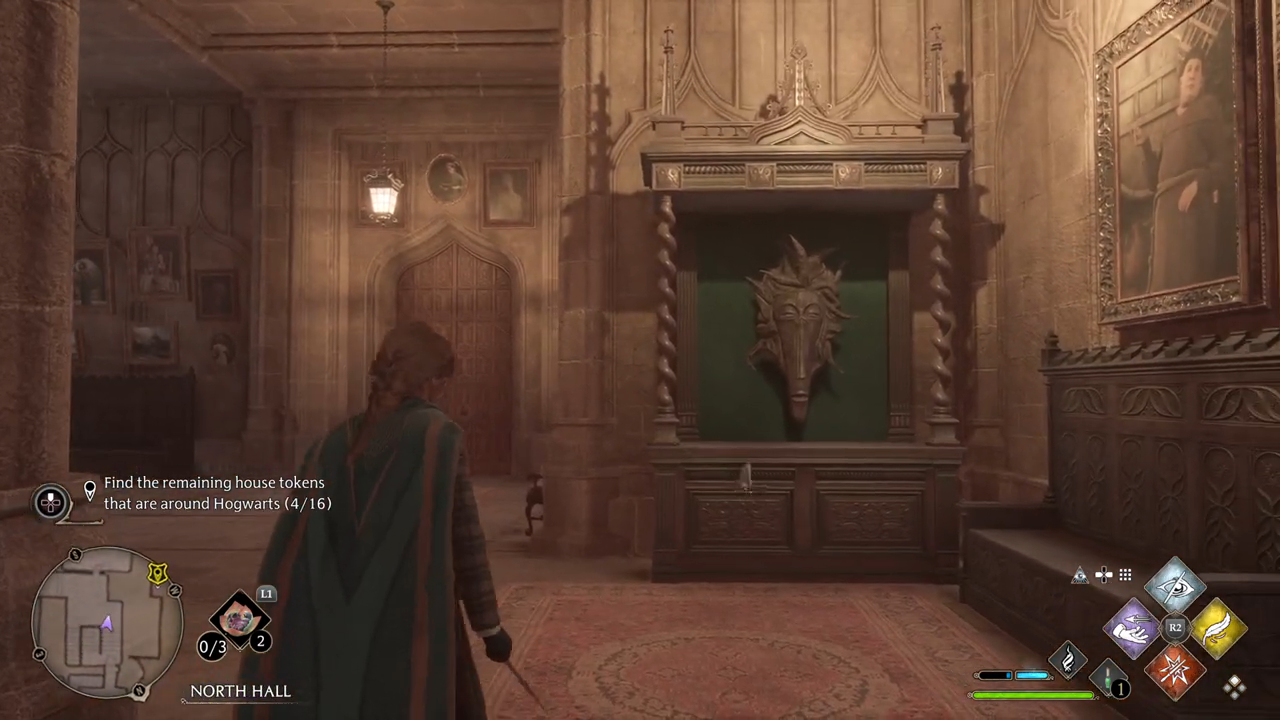
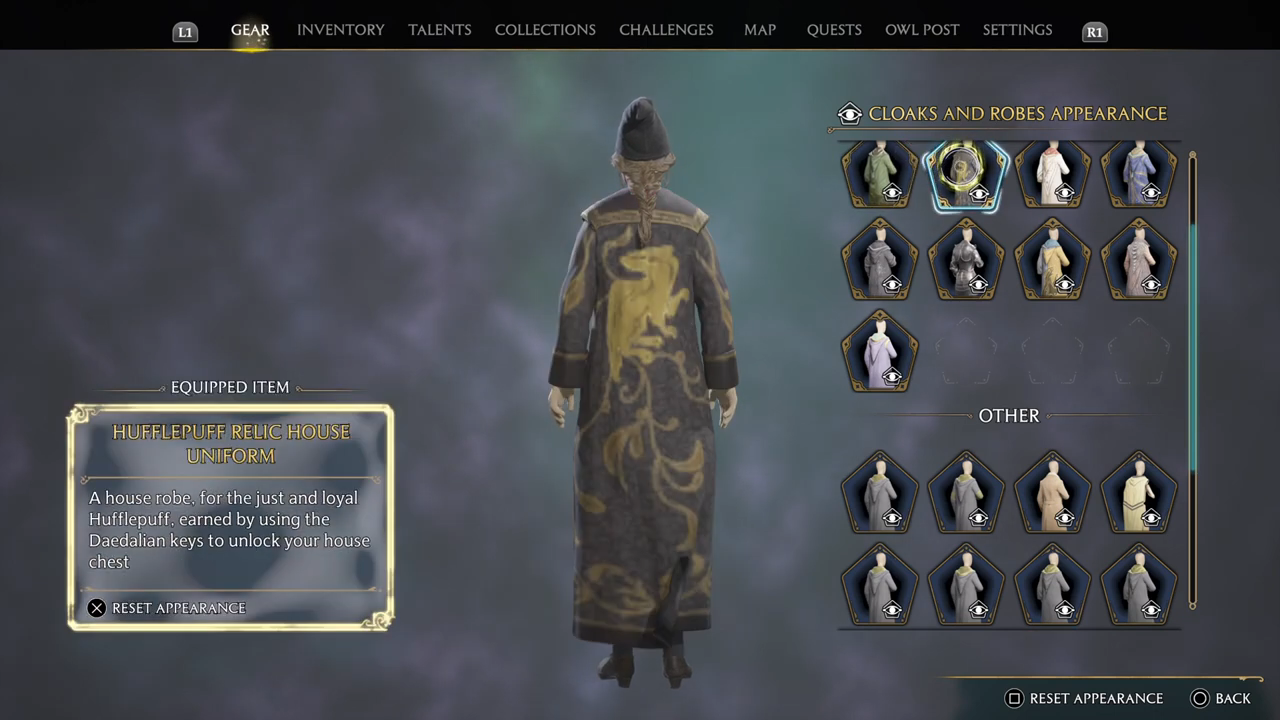
The Daedalian Keys Nellie Oggspire is in the Transfiguration Courtyard and seems elated by something. You are interested to learn what’s so exciting. Nellie mentioned hearing a Daedalian Key in the Astronomy Tower. You are sure you can find it if you look around and listen. You found a Daedalian Key, and it flew off, trying to reunite with the cabinet to which it belongs. You should try and find it. You found the cabinet that the Daedalian Key led to. Now to try to open it. Opening the cabinet with the Daedalian Key revealed a token with your house insignia on it. You should show this to Nellie. Nellie said your House Chest should be in your house common room. You should search there. It looks like my House Chest has room for more Tokens. You should look for more Daedalian Keys around Hogwarts. I’ve managed to find all sixteen house tokens. I must remember to deposit them into my house chest to see what’s inside! Now that I’ve opened the house chest, I should share what I’ve learned with Nellie. After completing this quest, you get your relic house uniform. Here are all the subjects for the quest with explanations behind it.
Speak with Nellie Oggspire: follow the map to Nellie and talk with her.
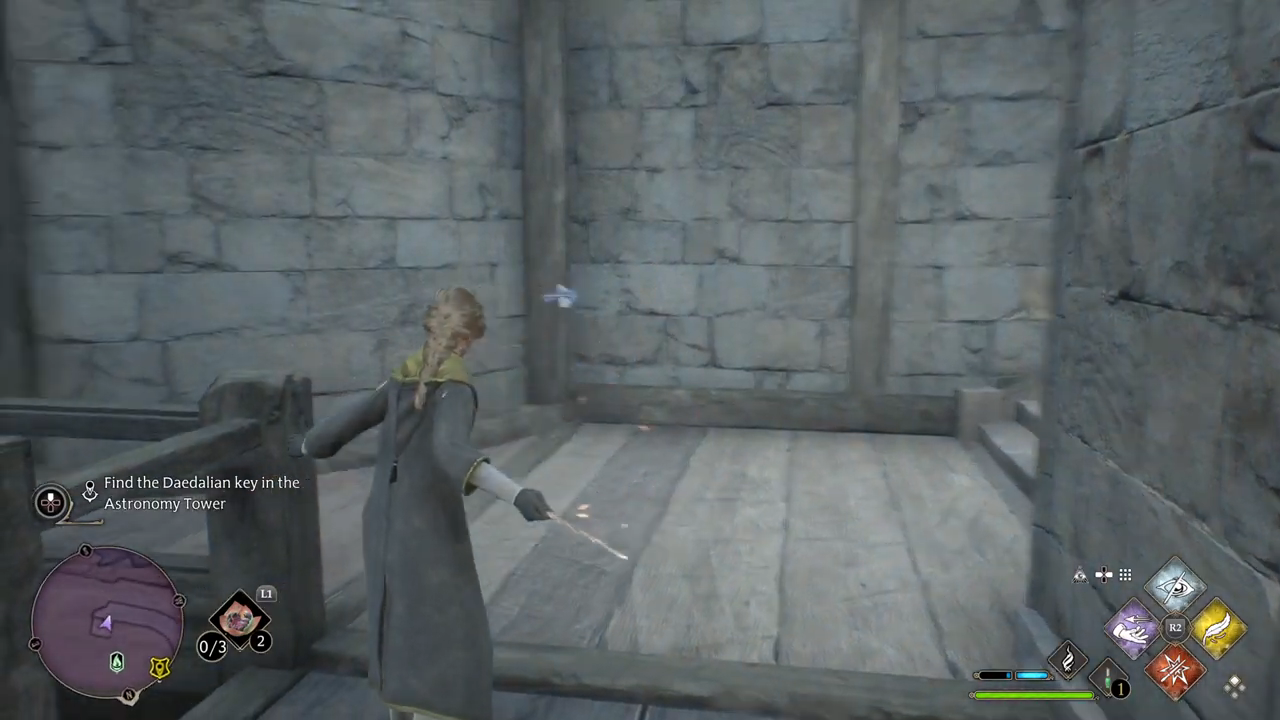
Find the Daedalian key in the Astronomy Tower: follow the map towards the Astronomy Tower, it will lead you directly to the key.
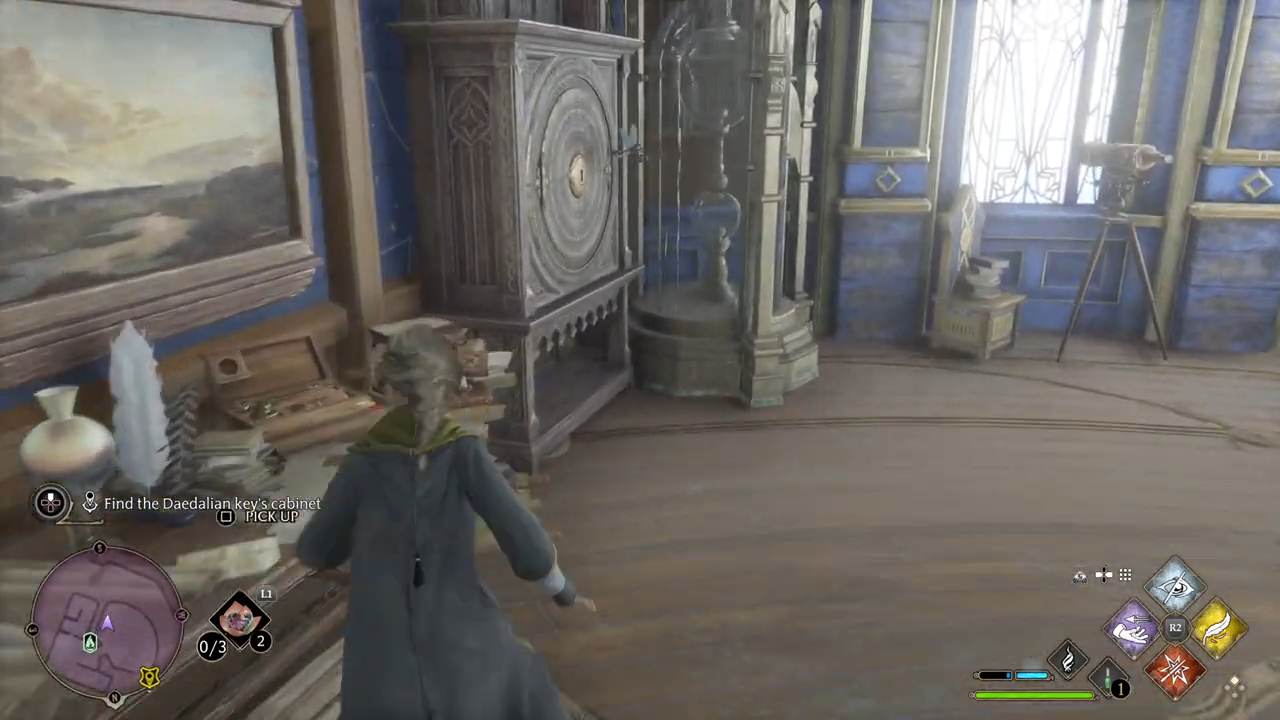
Find the Daedalian key’s cabinet: go back down to the astronomy classroom.
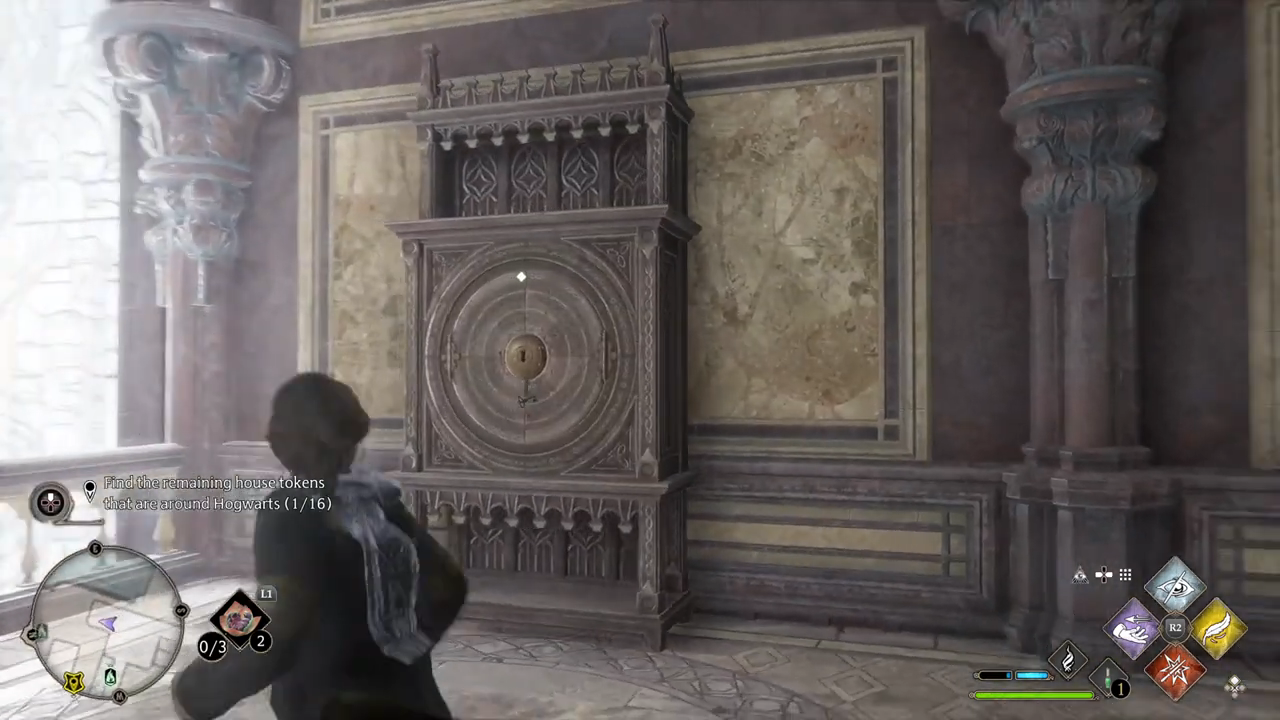
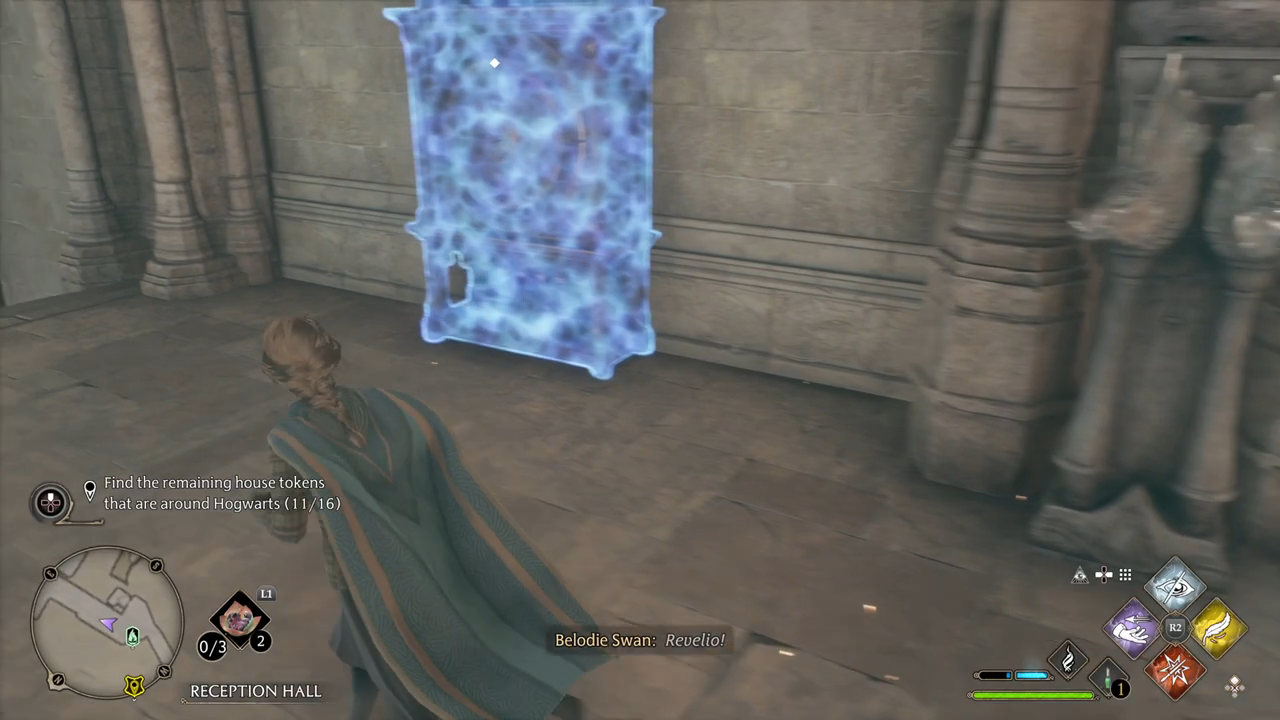
Open the Daedalian lock: try to hit the key when it moves over the cabinet en goes over the keyhole.
Return to Nellie with the token: follow the map back to Nellie and talk with her.
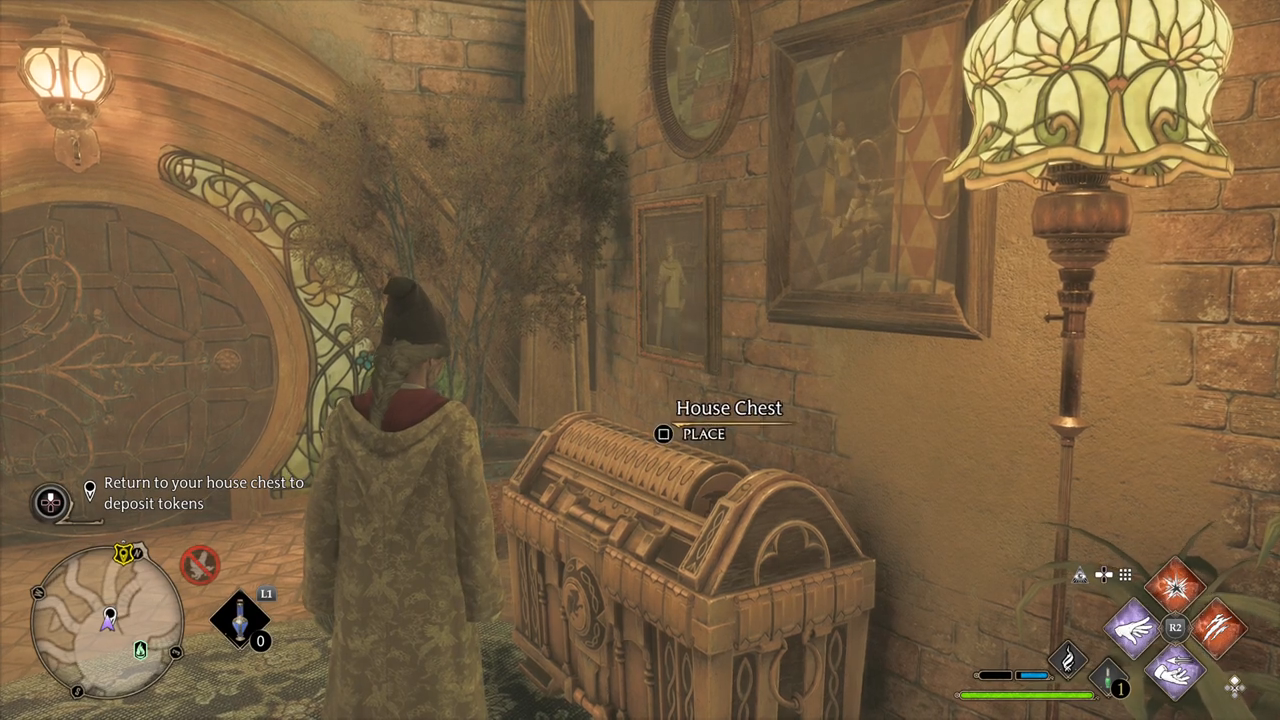
Insert the house token into your house chest: follow the map back to your common room and put the token in your house chest.
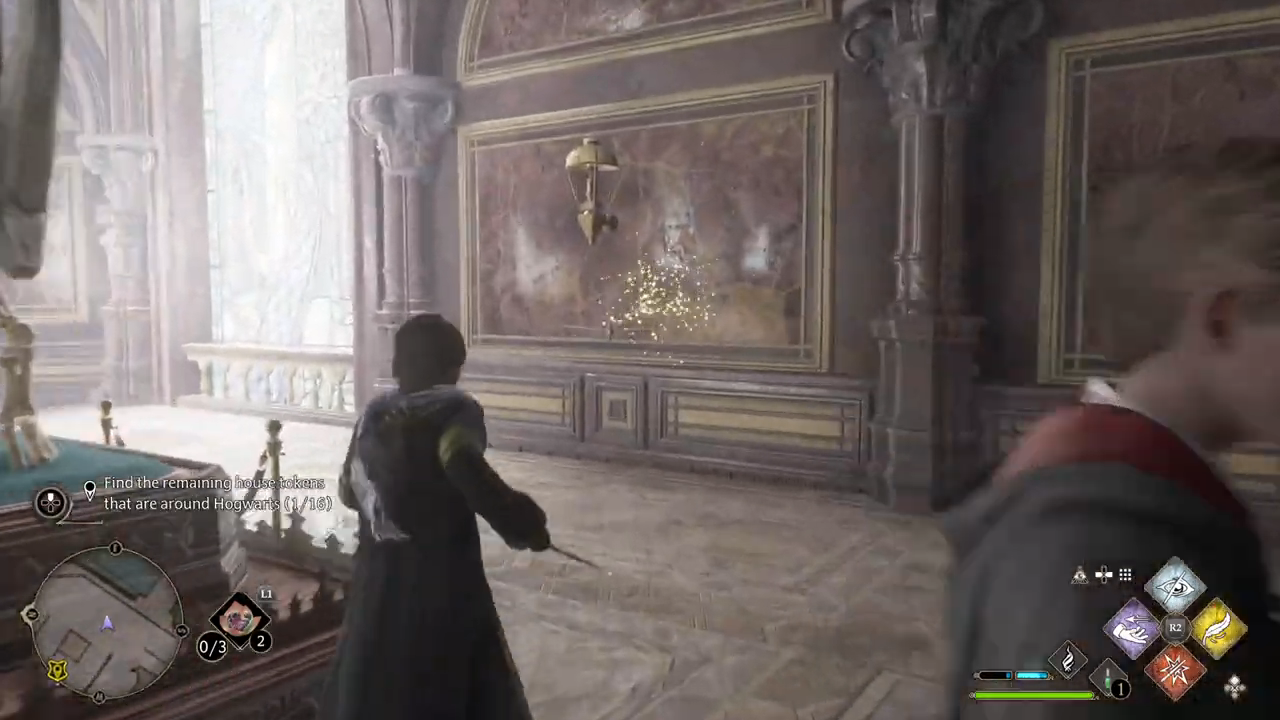
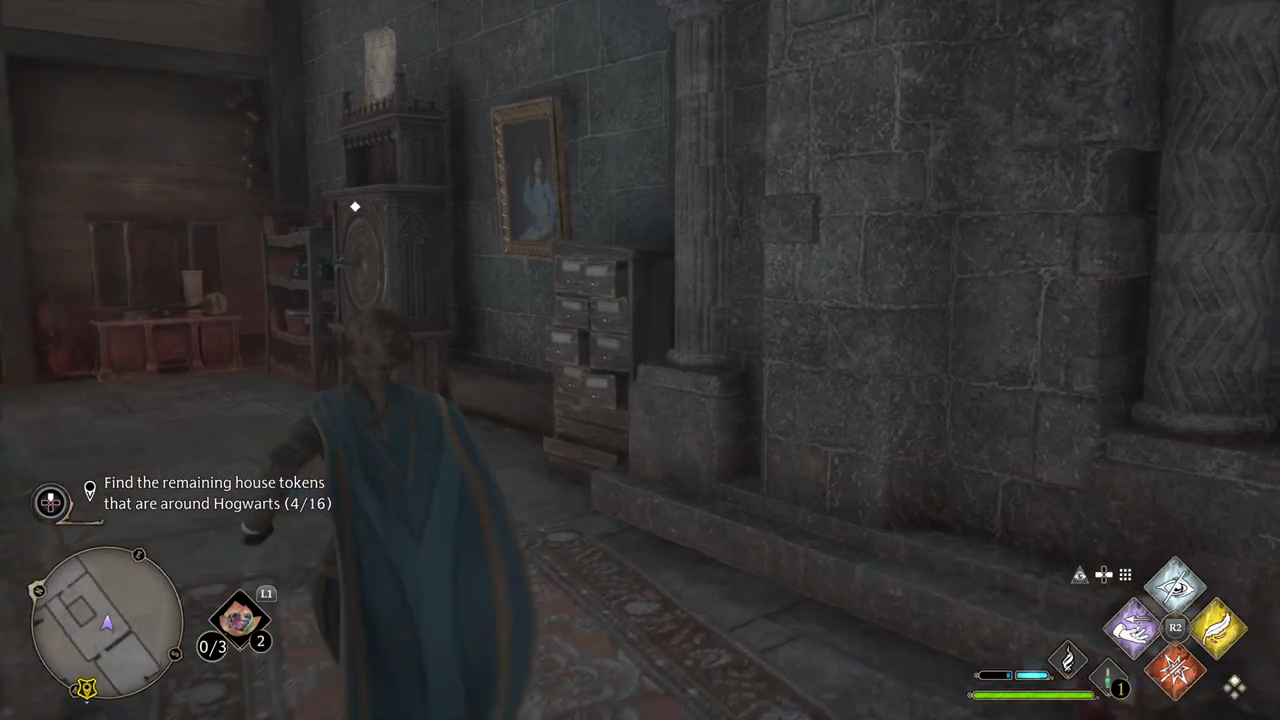
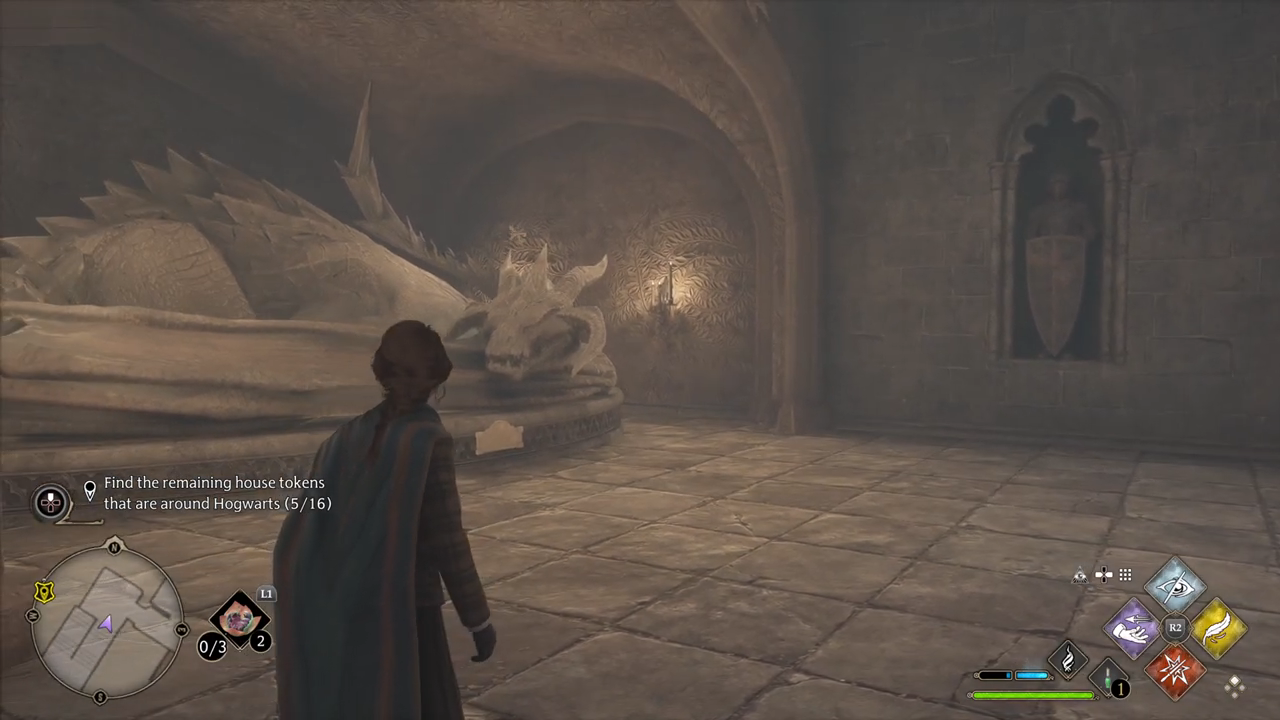
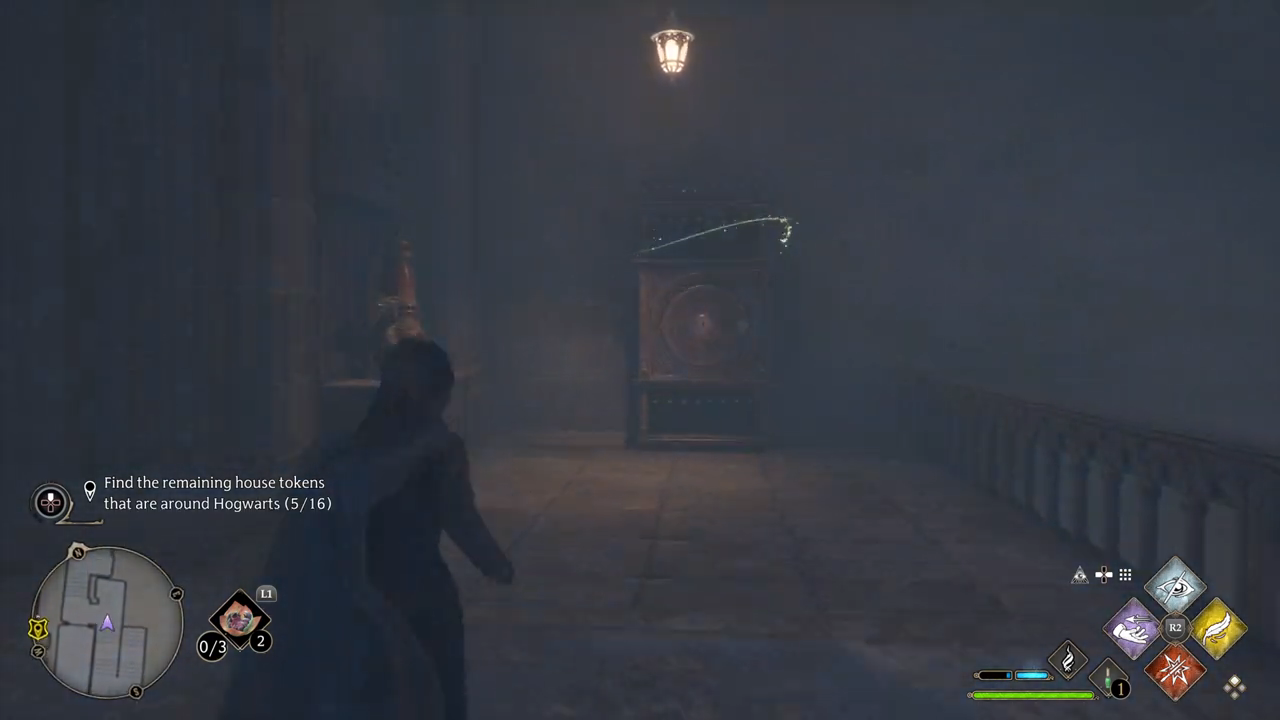
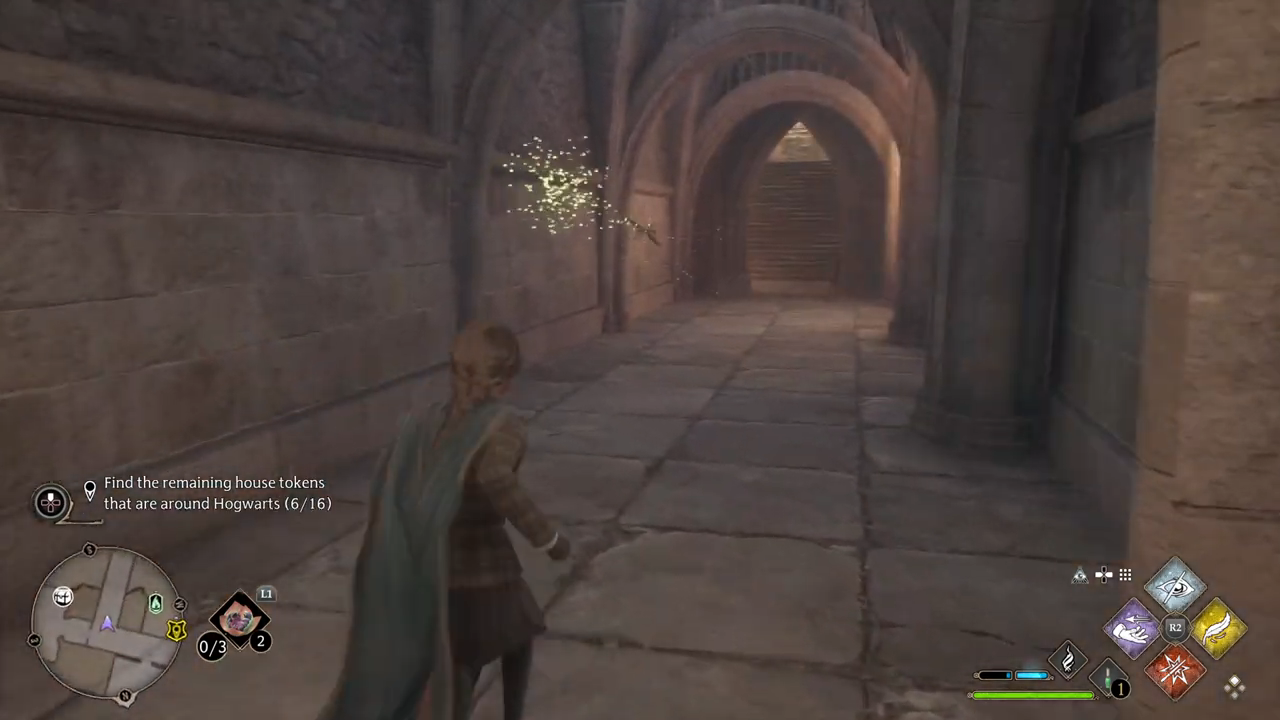
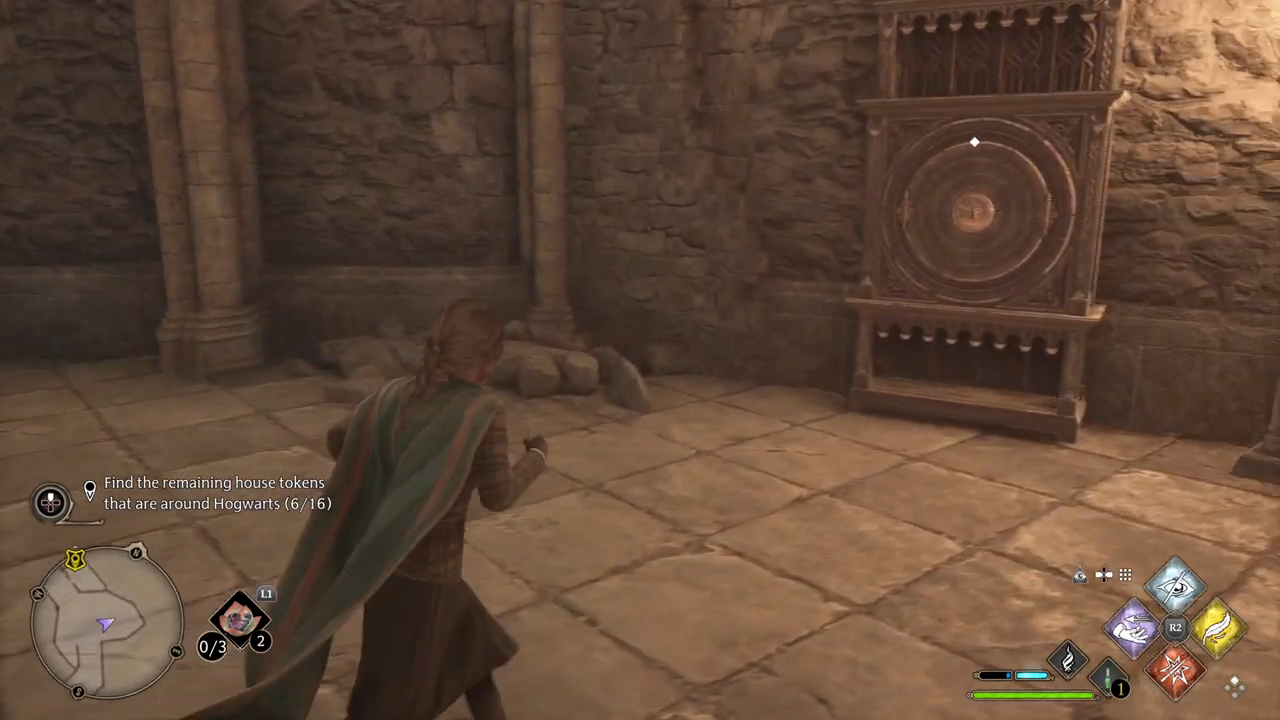
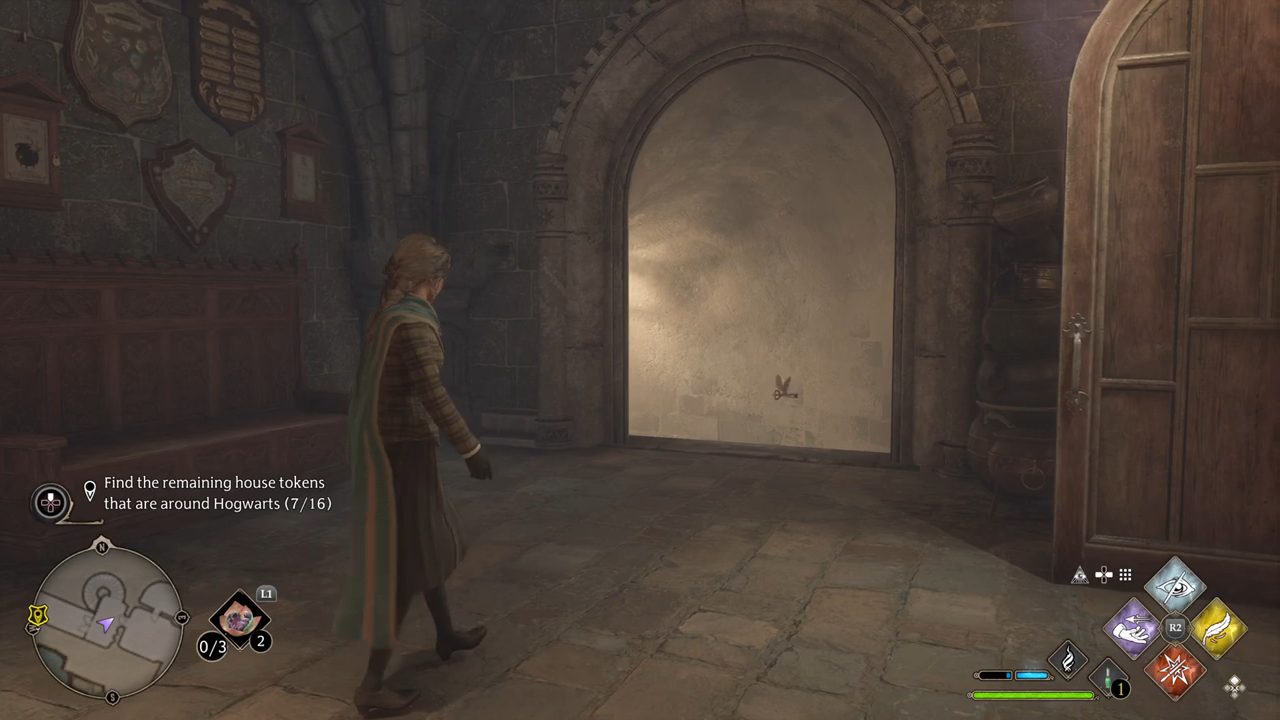
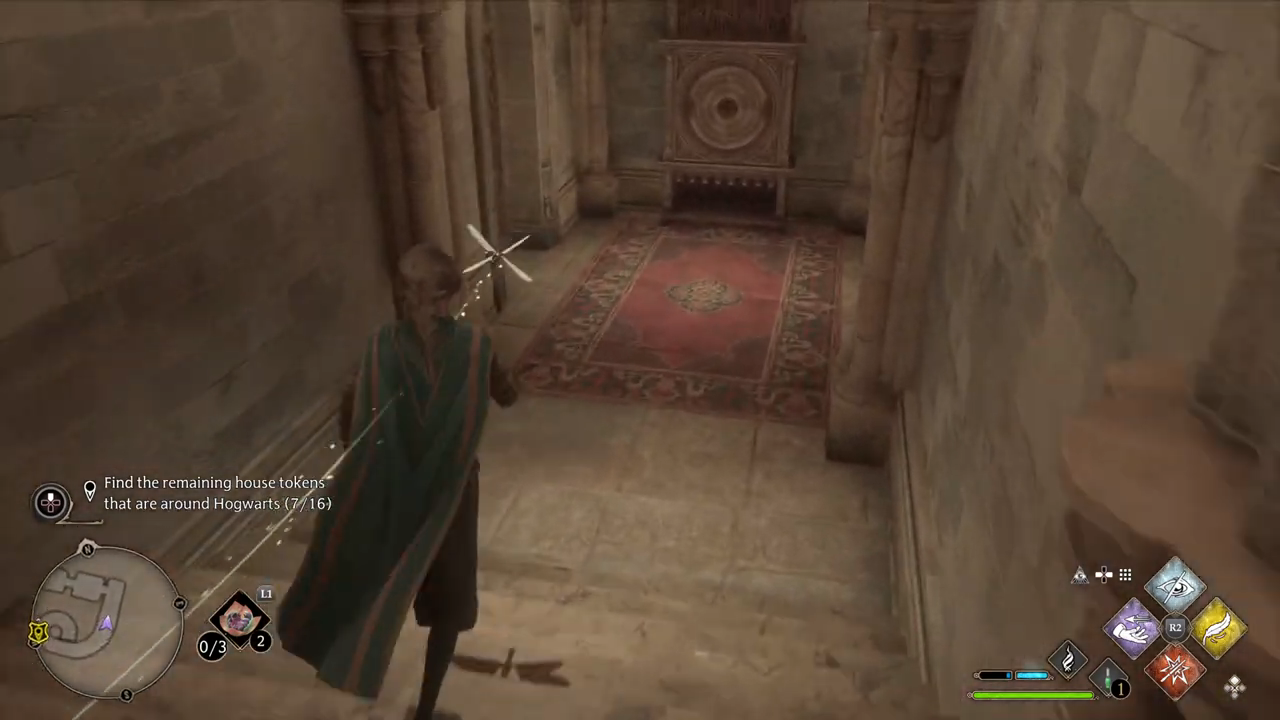
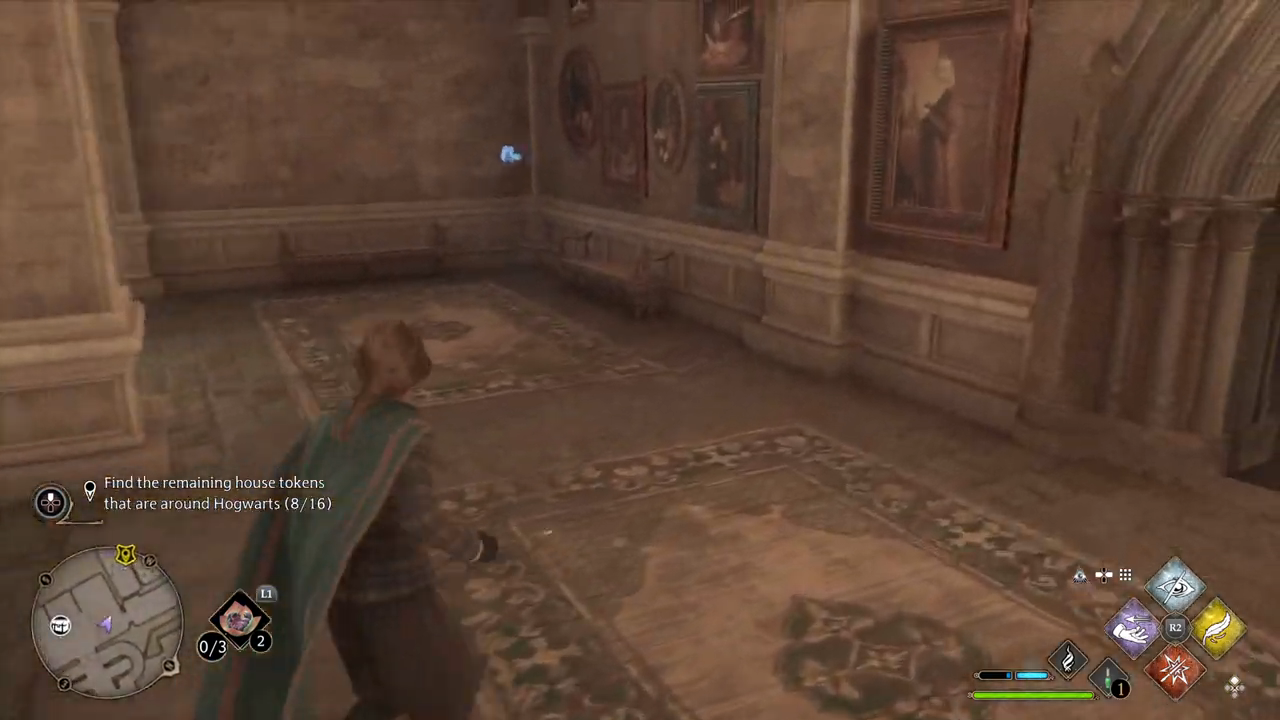
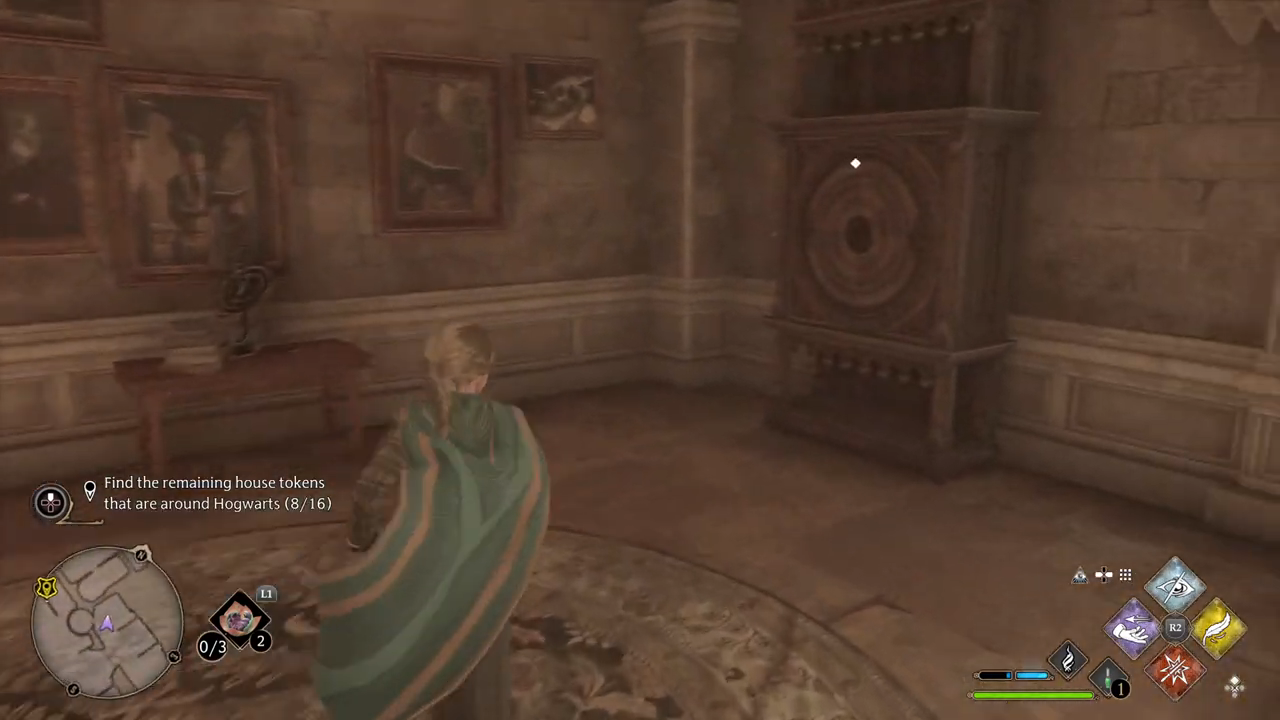
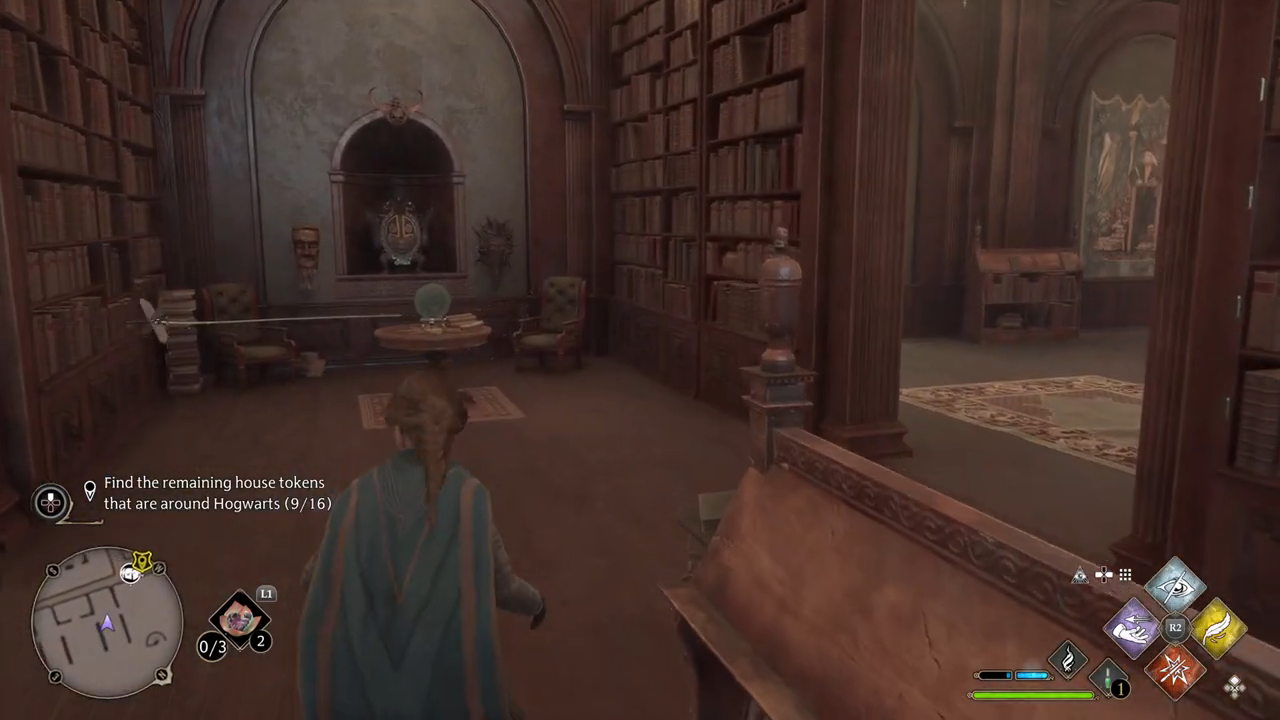
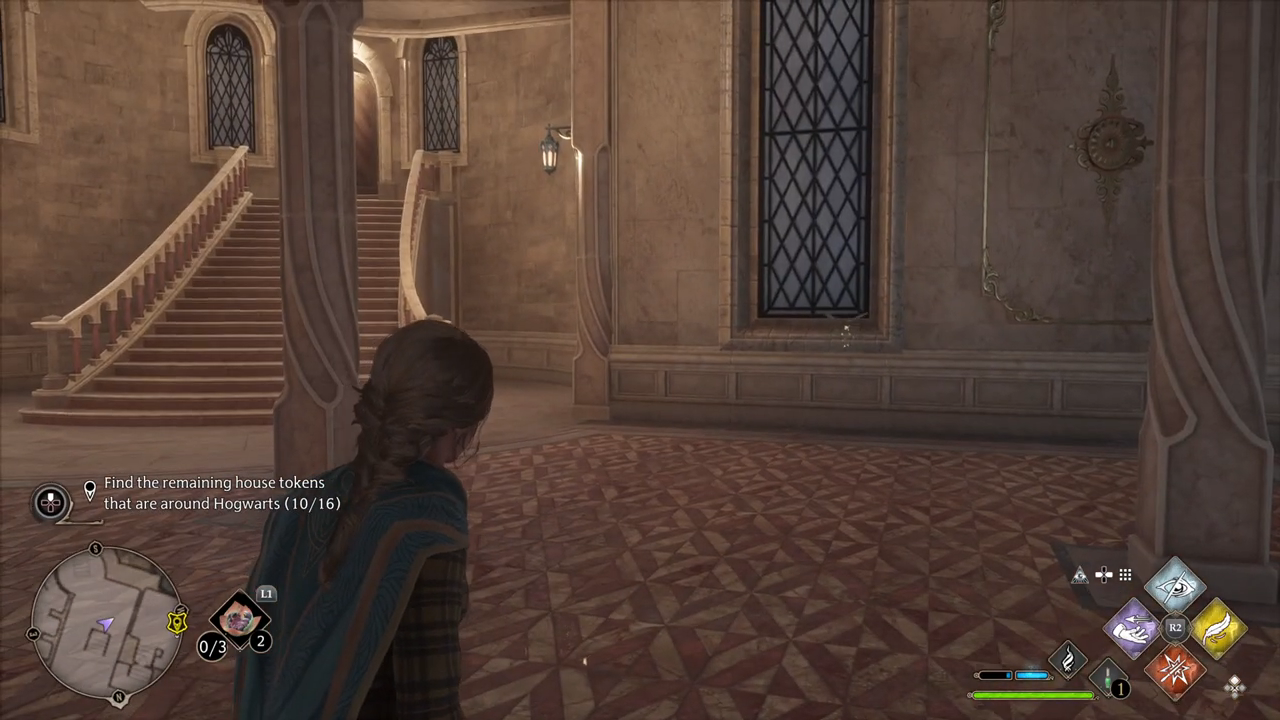
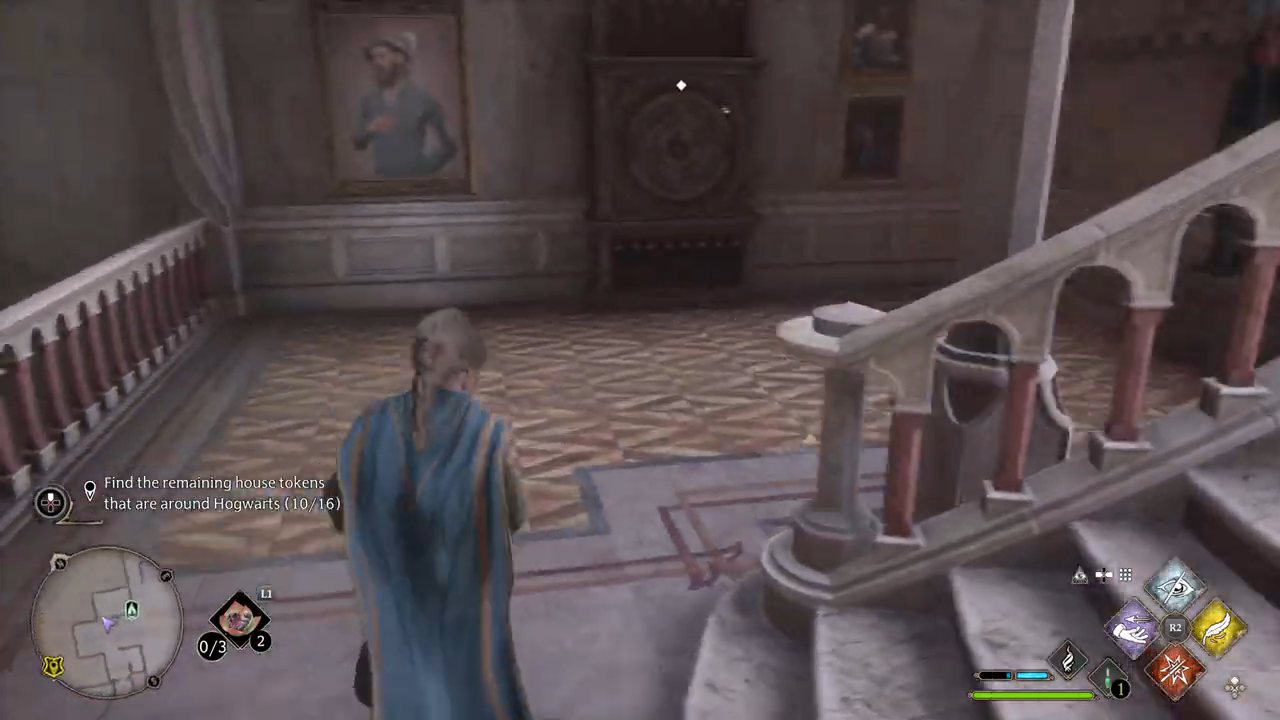
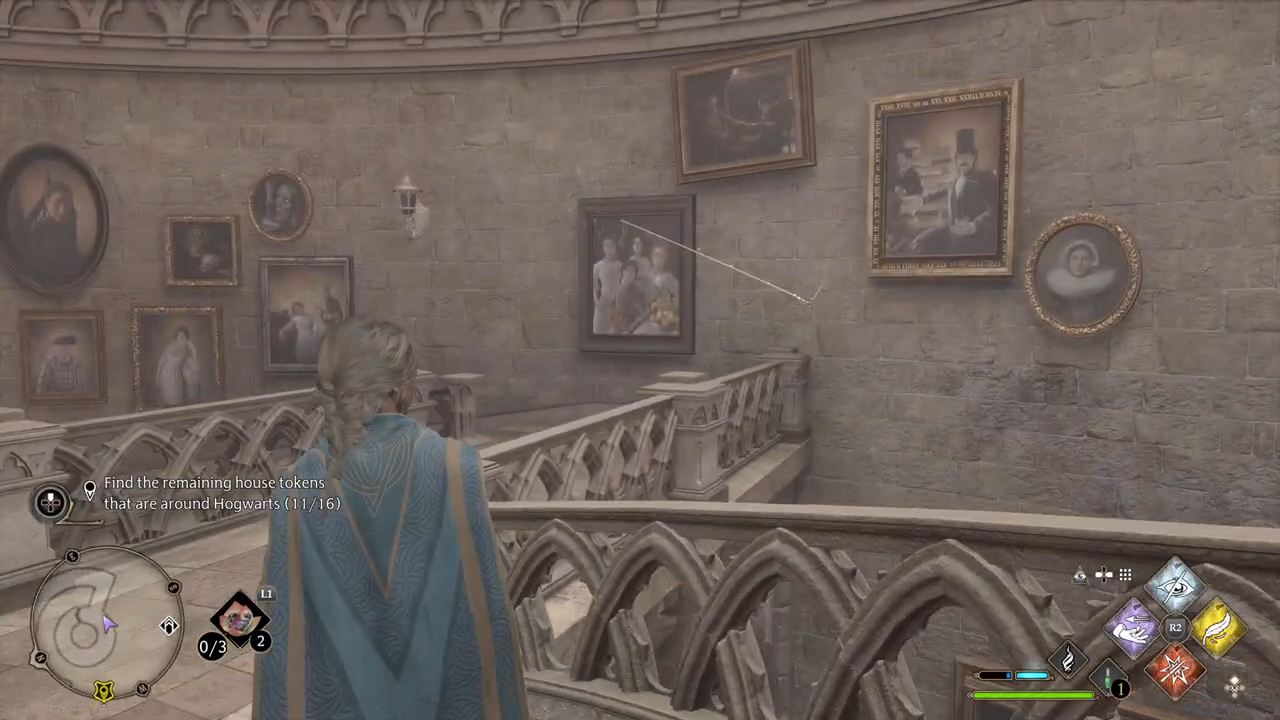
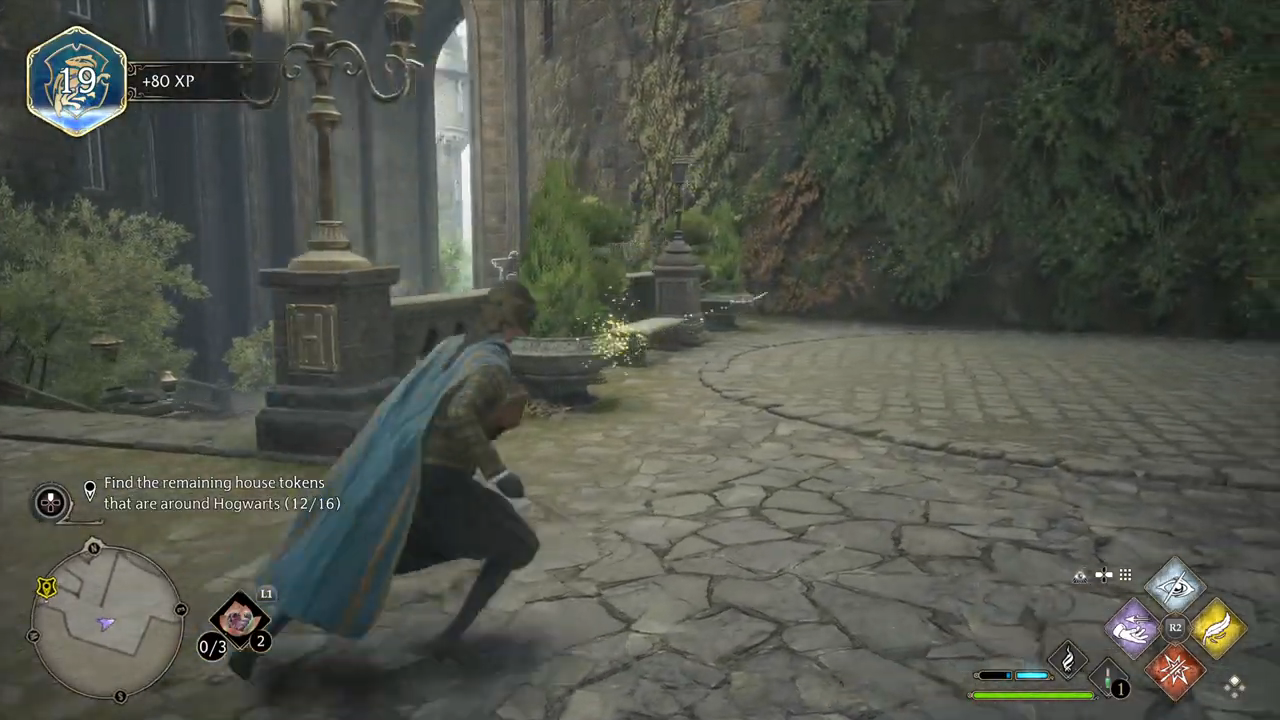
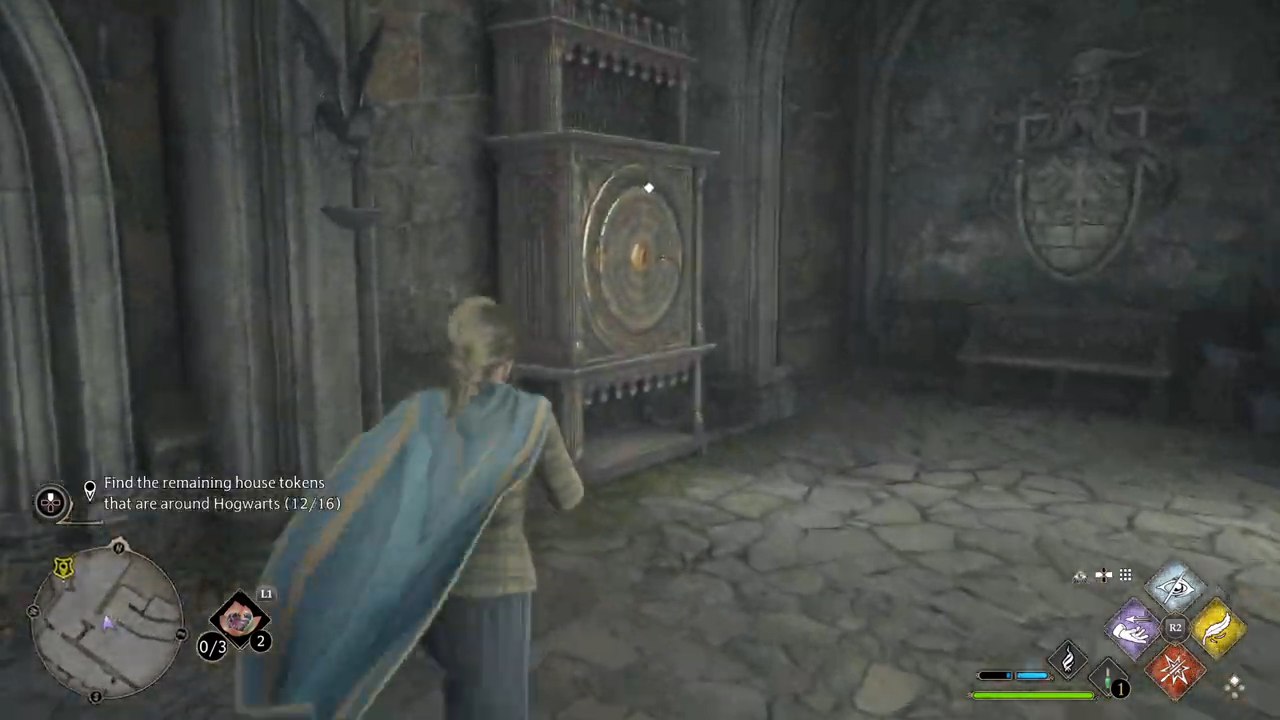
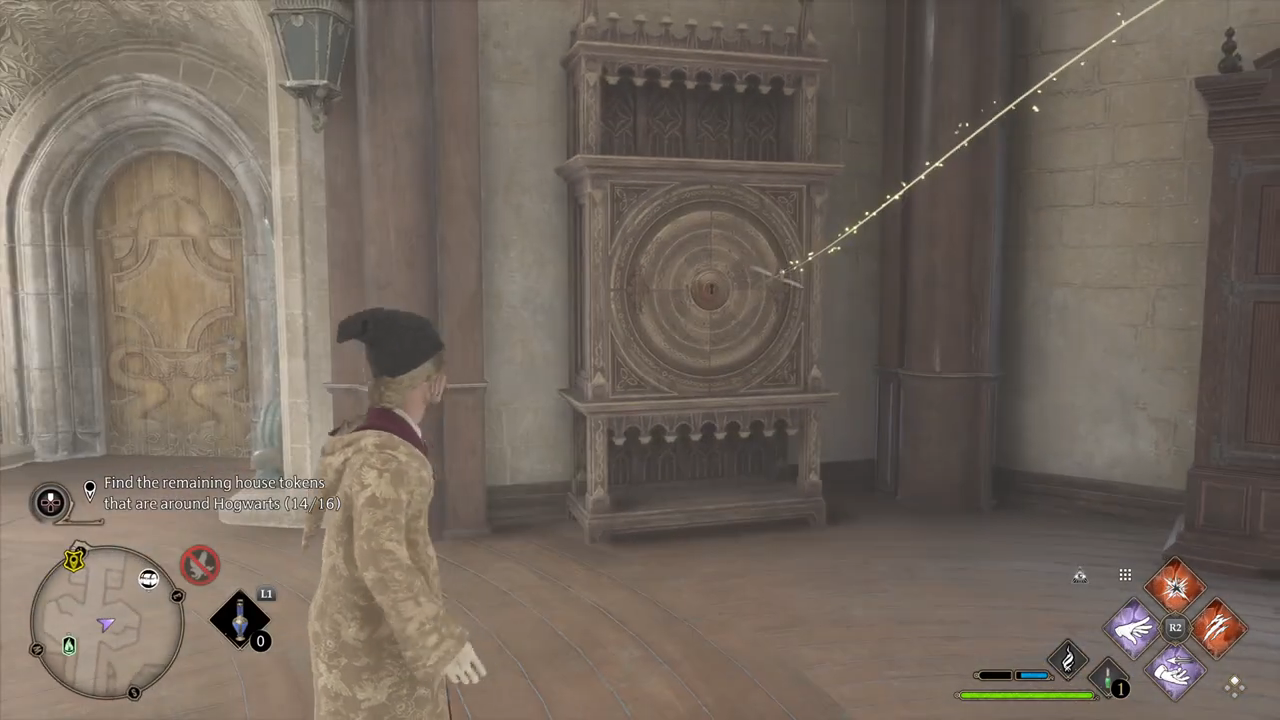
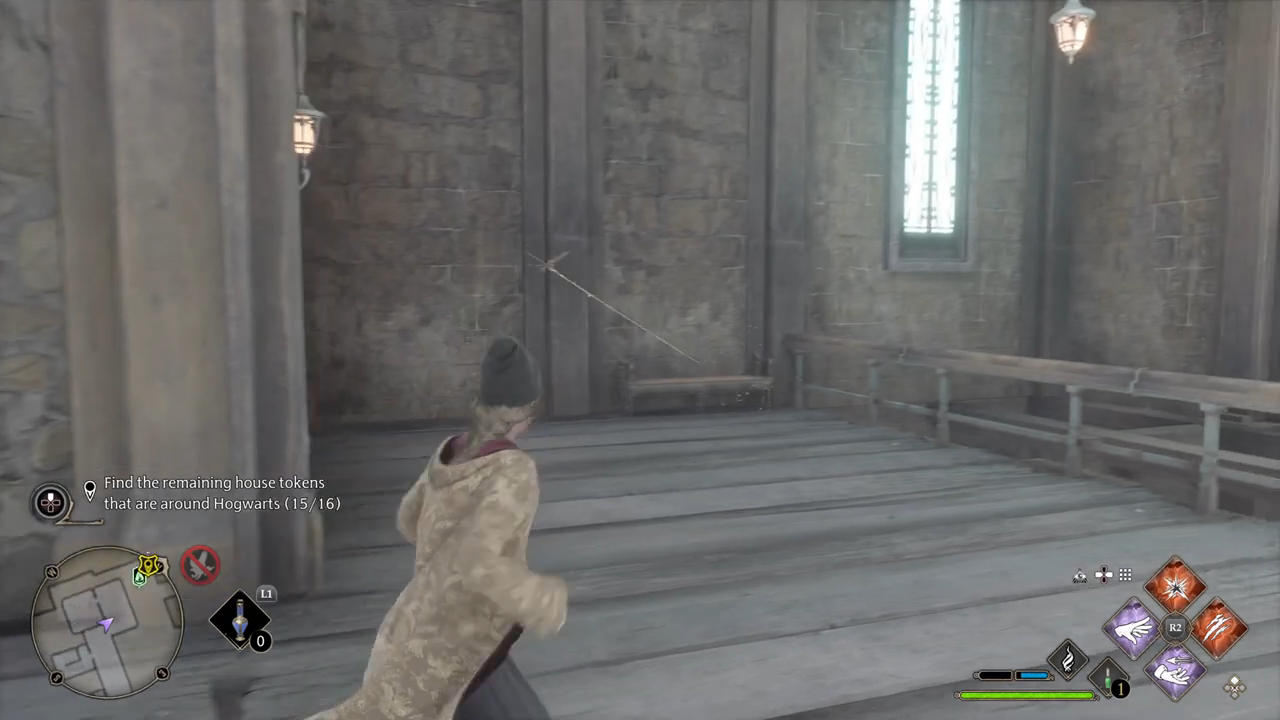
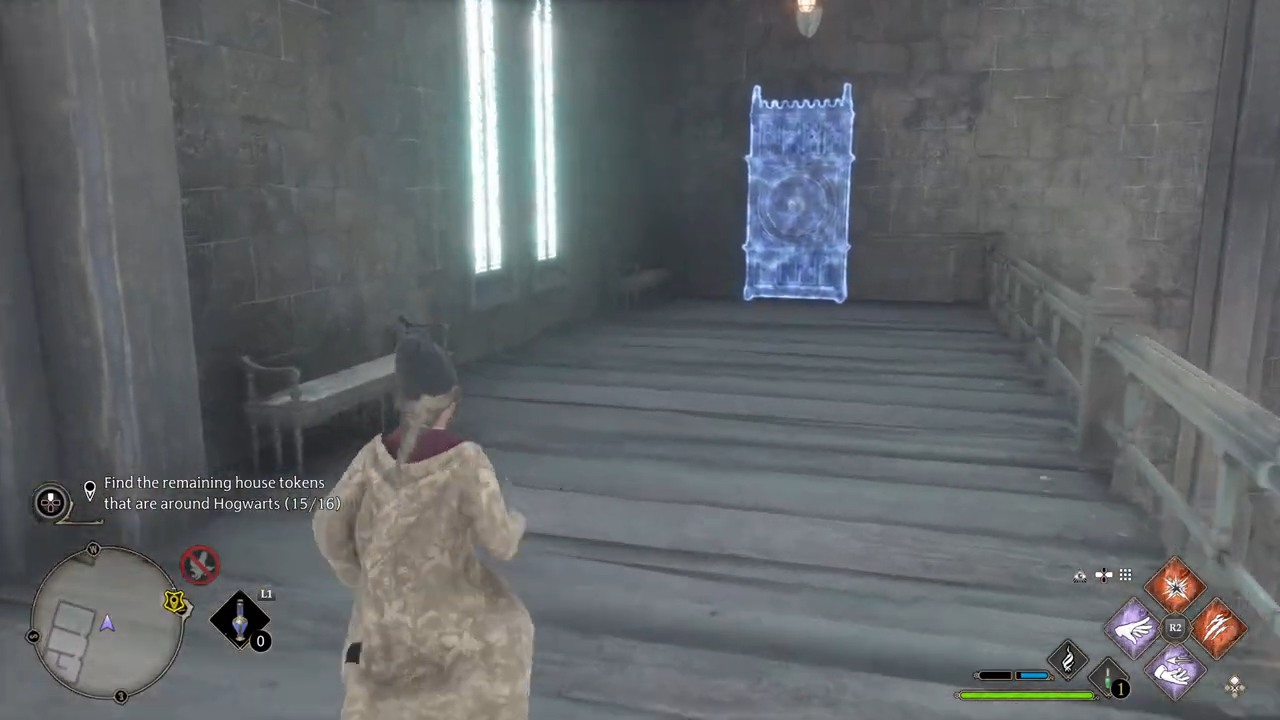
Find the remaining house tokens that are around Hogwarts: there are in total 16 tokens. You need to find the other 15 places. For some of the places, you need to learn Alohomora. You can learn it in this main quest: The Caretaker’s Lunar Lament. Here are descriptions of how to find all the keys and their cabinets.
Defense Against the Dark Arts: go downstairs from the defense against the dark arts classroom. Around a giant Skeleton you will find the key. The key will go back upstairs and then goes left at the floo flame. It will go straight until you see the cabinet.
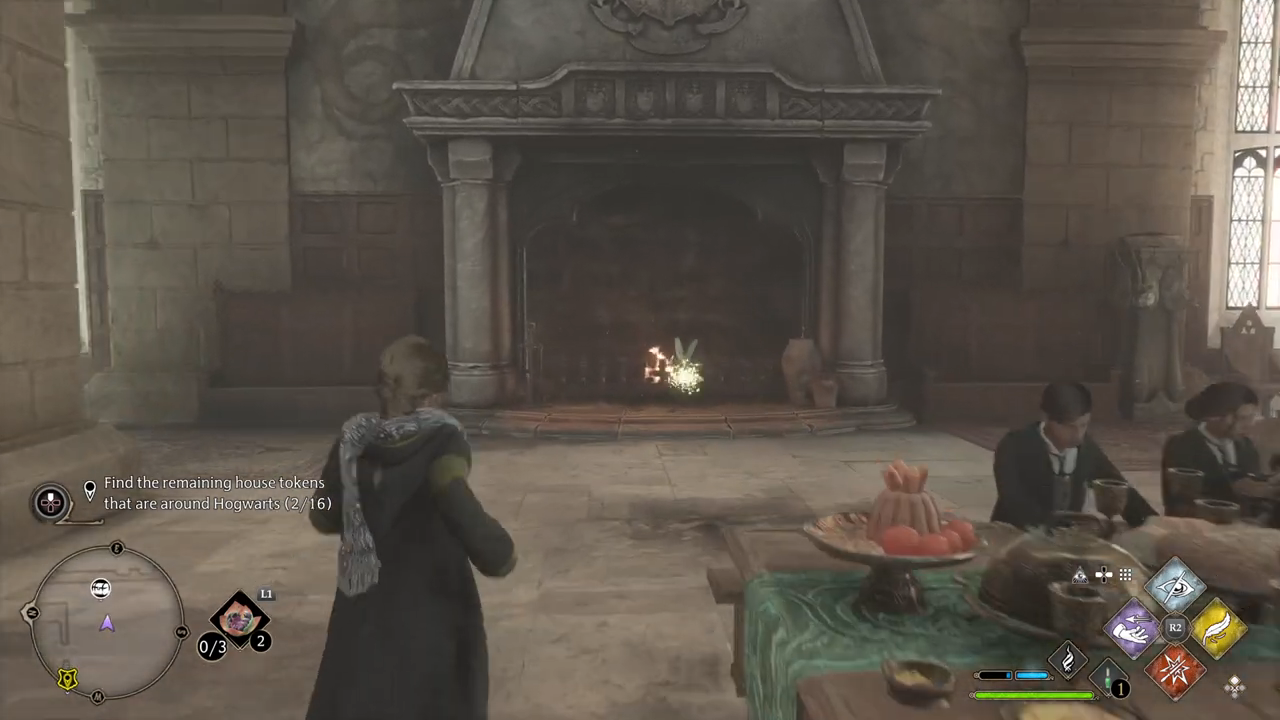
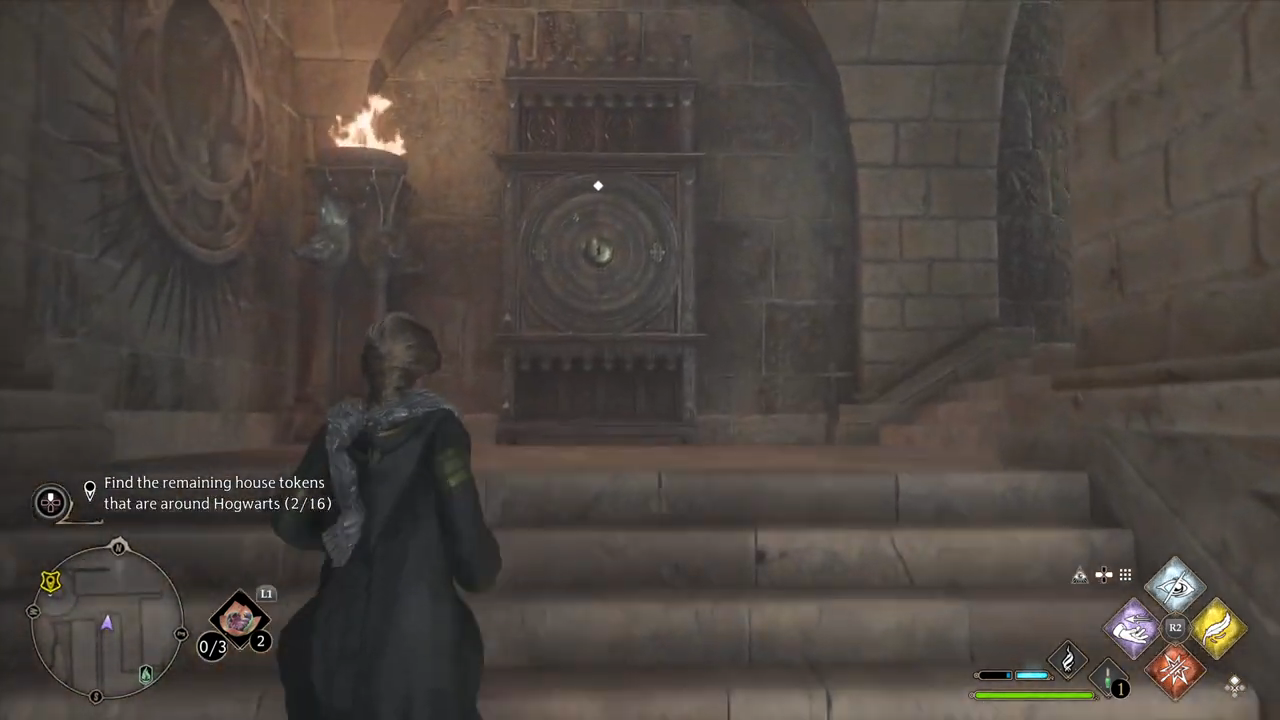
The Great Hall: go to the great hall in front of the fire place you will find a key. The Key will towards the entrance of the room and left from that entrance you find a stair. Upside the first stair, you can find the cabinet.
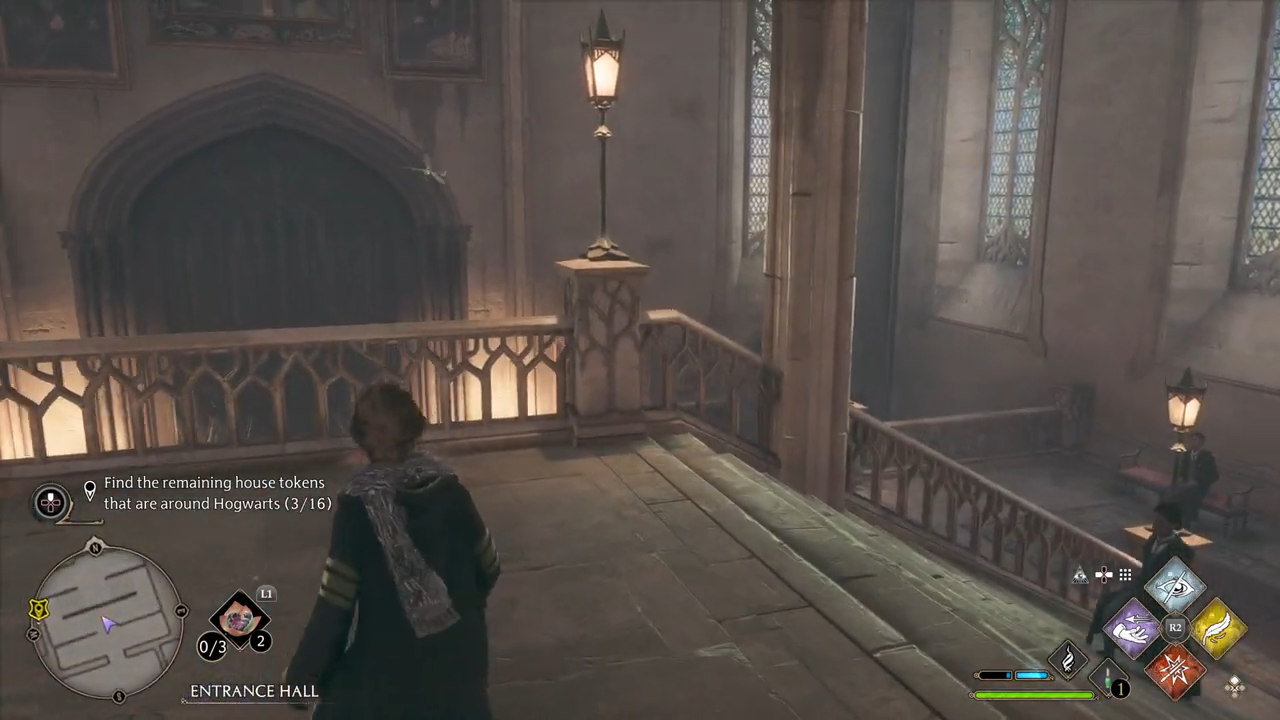
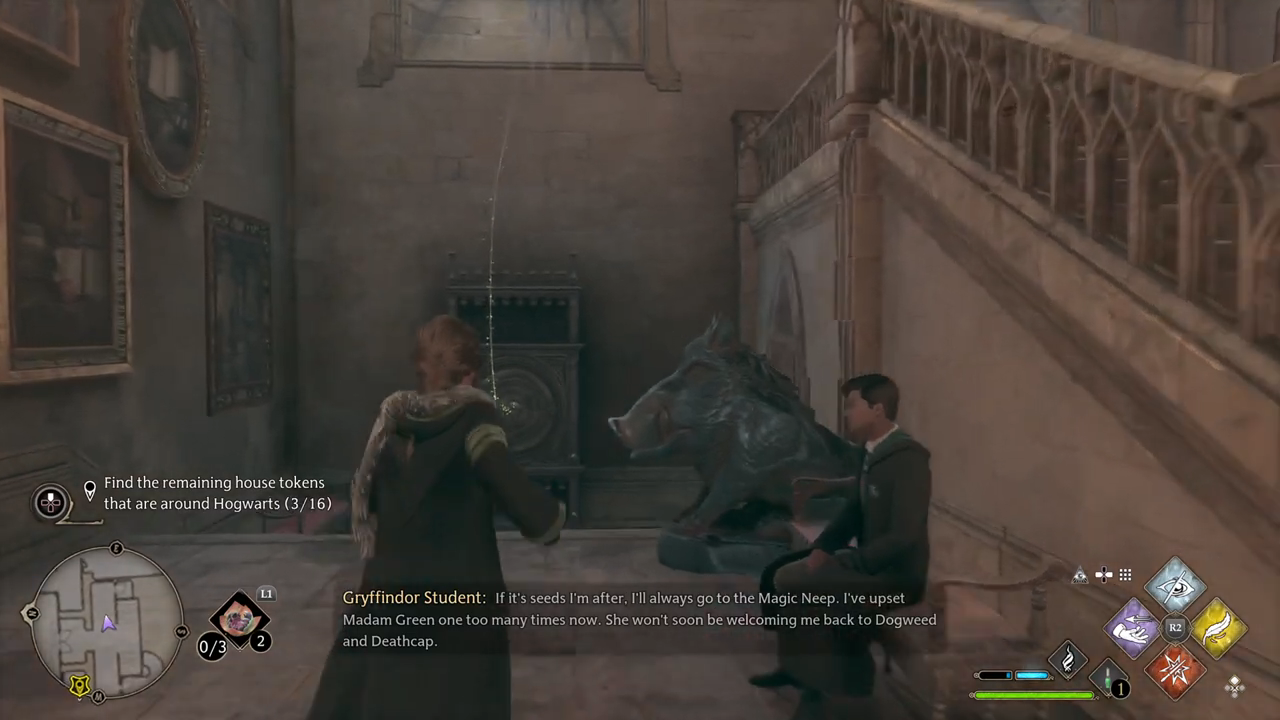
Entrance Hall: the key is at the top stair landing of the entrance hall. Follow the key downstairs to the right side of the room. There is the cabinet.
Bell Tower: go to the bell tower courtyard. Look at the floo flame and go up the stairs at your right. Go through the door and heap up the next stair. There you will see the key. The key will go further up the staircase, all the way up. Once you are at the end of the staircase, go left. There you see the cabinet.
Dungeons: you can start this one at the same place as the last one. Go through the same door and go down the stairs. Walk all the way down until you see the statue of a dragon. Then follow the key back up, four sets of stairs, and you will see the cabinet.
Second one in the dungeons: Keep following the hallway from the dragon statue. You will see the key next to the door that has a lot of couldrons around it. Follow the key further up into the hallway, then go left and you will see the cabinet.
Potions class: go to the potions classroom. In front of the room, you find the key. Follow the key down two sets of stairs. There you will see the cabinet.
Centrall Hall: walk towards the green house on the left side of the stairs you can find the key. Next to all the paintings. The key will go back upstairs to the other side of the centrall hall. Near an artimancy door, you can find the cabinet.
Library: go inside the library. The key is between a row of books downstairs in front of a shield. Follow the key to the other side of the library behind some stairs. There you can find the cabinet.
Viaduct Entrance: go back to the centrall hall. Go upstairs to the viaduct entrance. Behind some stairs on the right side, you can find the key. Follow the key one set of stairs down. And on your right side you find the cabinet.
Grand staircase: go to the grand staircase floo flame. Walk down to sets of stairs, there you can see the key. Follow the key three sets of stairs down. Walk past an artimancy door and there you can see the cabinet.
Quad Courtyard: go to the quad courtyard floo flame. Facing the flame, go left. Then up the left side of the stairs. There you see the key. Follow it back down, behind the other set of stairs, and there you can find the cabinet.
Faculty Tower: enter the tower from the locker door which you opened in The Caretaker’s Lunar Lament Quest. Go up the stairs and there the key will be. Follow the key back down and go right there you find the cabinet.
Second one in the Faculty Tower: go further up two sets of stairs. There you will see the key. Follow the key into the hallway. At then end at your right side you will find the cabinet.
Clocktower: travel to the clocktower courtyard. Go through the left lock door with alohomora. Go up 4 sets of stairs. Then at your left you can find the key. Follow the key further up the stairs and at the end of the stairs, you find on your left side the cabinet.
Return to my house chest to deposit tokens: go back to your common room and put all the tokens in your chest.
Speak with Nellie: follow the map back to Nellie. With talking to her, you complete this quest.
At 00:00 starts The Daedalian Keys quest.
Astronomy Tower Key
Astronomy Tower Cabinet
Defense Against The Dark Arts Key
Defense Against The Dark Arts Cabinet
The Great Hall Key
The Great Hall Cabinet
Entrance Hall Key
Entrance Hall Cabinet
Bell Tower Key
Bell Tower Cabinet
Dungeons Key
Dungeons Cabinet
Second one in the Dungeons Key
Second one in the Dungeons Cabinet
Potions Class Key
Potions Class Cabinet
Centrall Hall Key
Centrall Hall Cabinet
Library Key
Library Cabinet
Viaduct Entrance Key
Viaduct Entrance Cabinet
Grand Staircase Key
Grand Staircase Cabinet
Quad Courtyard Key
Quad Courtyard Cabinet
Faculty Tower Key
Faculty Tower Cabinet
Second One In The Faculty Tower Key
Second One In The Faculty Tower Cabinet
Clocktower Key
Clocktower Cabinet
Putting tokens into your house chest
Hufflepuff Relic House Uniform
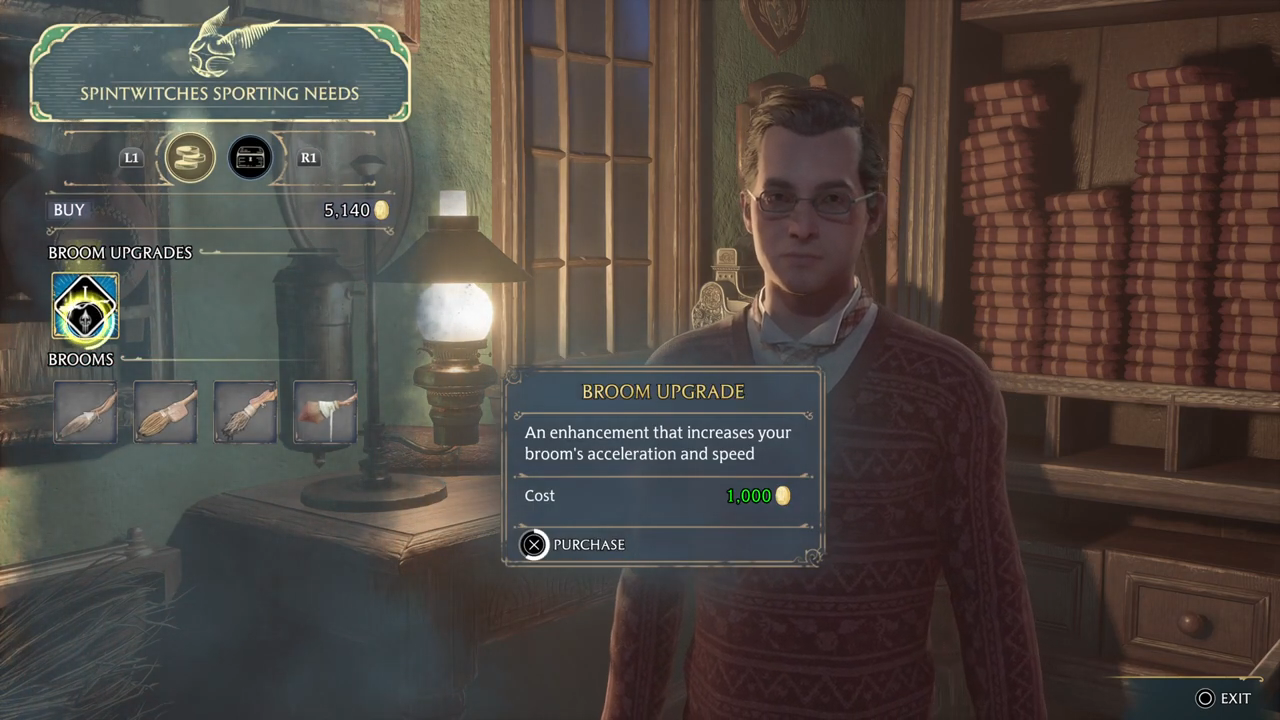
Sweeping The Competition Look into a new broom enhancement with Albie Weekes in Spintwitches Sporting Needs. Albie mentioned that Imelda can be found south of Hogwarts. To get the data he wants, I must participate in her Broom trial. Imelda is committed to joining a professional Quidditch team and creates Broom Trials to improve her flying skills. She thinks I could post a real challenge and should attempt to beat her record. I was able to beat Imelda’s record on her latest Broom Trial. The information I glean from the trial will allow Albie to develop a new broom upgrade. I should return to him as soon as possible. Here are all the subjects for the quest with explanations behind them.
Purchase a broom enhancement from Albie Weekes: Follow the map towards Spintwitches sporting needs inside Hogsmeade. Buy there a broom upgrade.
Speak with Imelda Reyes: follow the map towards Imelda Reyes and talk with her.
Place in the Hogwarts South Broom Trial: beat the best time on the broom speed race.
Speak with Imelda Reyes: this conversation starts automatically after beating her time.
Return to Albie Weekes: follow the map back to Albie and talk with him. With talking to him, you complete this quest.
At 00:00 starts Sweeping The Competition quest.
Broom upgrade
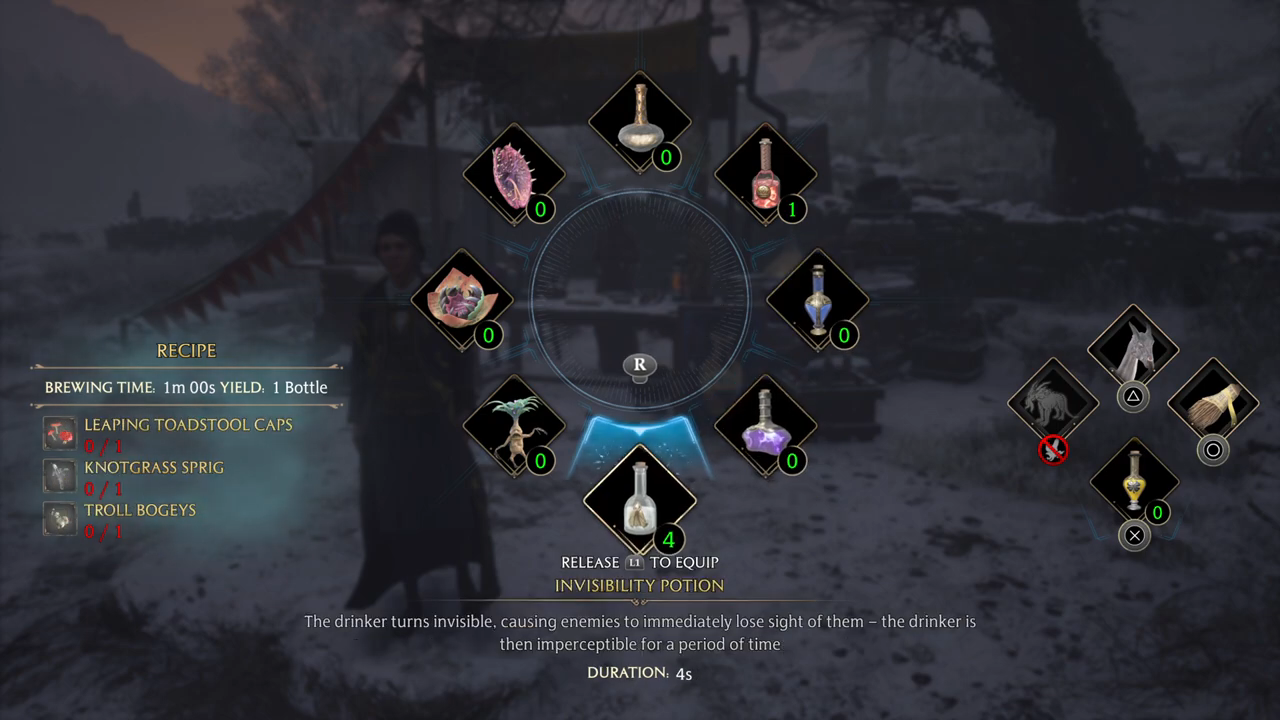
A Demanding Delivery Parry Pippin of J. Pippin’s Potions in Hogsmeade sent me an owl regarding a delivery. I should speak with him if I’m looking for some simple work. Fatimah Lawang lives in Keenbridge, to the south of Hogwarts. Hopefully it’ll be easy enough to find her there. Madam Lawang is a tad apprehensive about the brew quality of Mr. Pippin’s latest potions. She wants me to demonstrate their efficacy before finalising her purchase. The potions have been tested, and Fatimah Lawang’s fears have been assuaged. I can now deliver the potions to her in Keenbridge, to the south of Hogwarts. I have managed to deliver the potions to Fatimah Lawang and should now return to Mr. Pippin. Here are all the subjects for the quest with explanations behind them.
Speak With Parry Pippin: follow the map towards J. Pippin Potions and talk inside the shop with him.
Deliver 3 Invisibility Potions to Fatimah Lawang: follow the map towards her and talk with her.
Drink an Invisibility Potion: drink one of the potions to prove they work.
Give 3 Invisibility potions to Fatimah: talk with her to give her the potions.
Return to Parry Pippin: follow the map back to him and talk with him. By talking with him, you complete this quest.
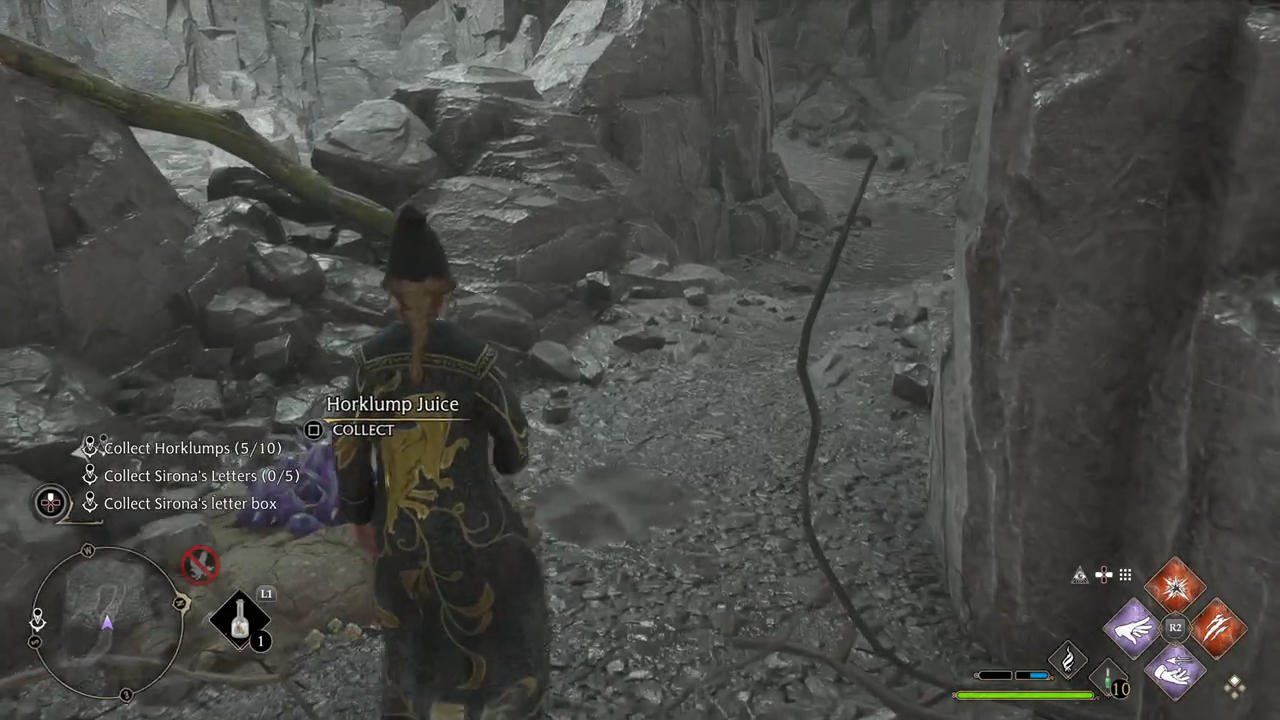
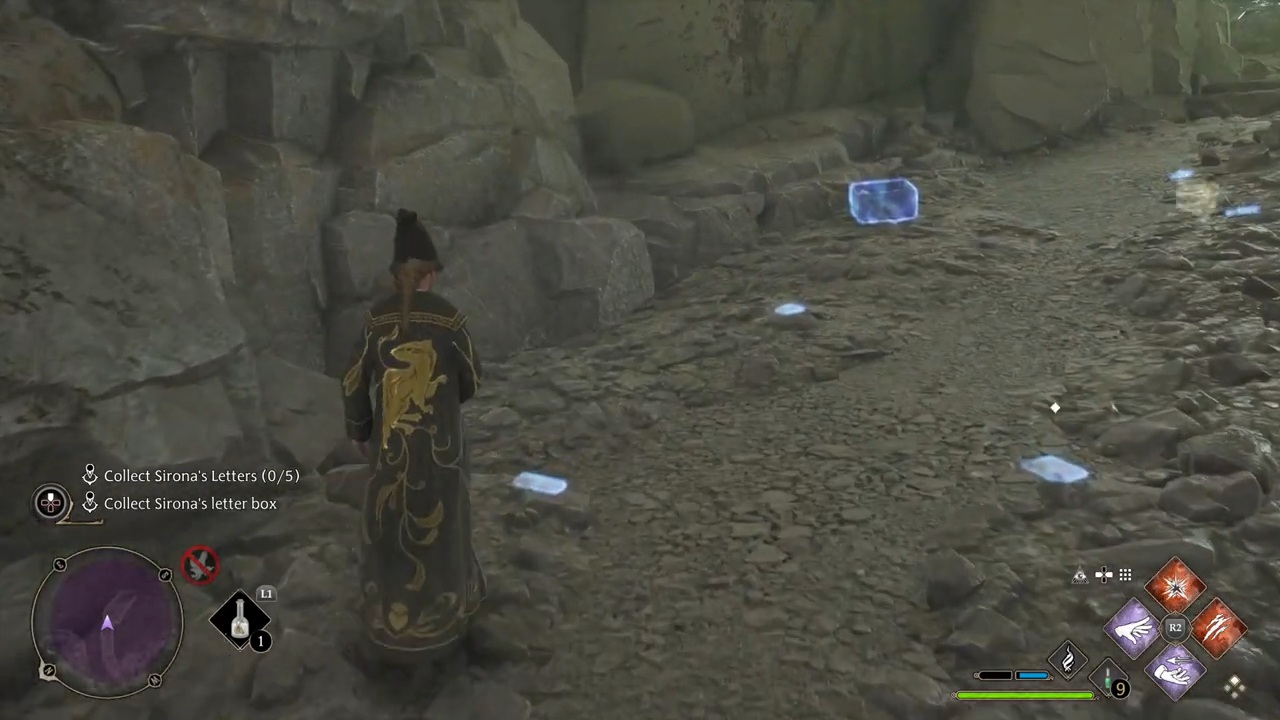
A Friend In Deed Sirona, the proprietress of the Three Broomsticks in Hogsmeade, sent me an owl requesting I meet with her at my earliest convenience. I should find out what she needs. I need to travel to Upper Hogsfield and speak with Dorothy Sprottle about her Horklump needs and ask her about Sirona’s box of letters. I believe I can find her in the hamlet north of Hogsmeade. I need to find the entrance to the cavern Mrs Sprottle mentioned. It looks like it may be in the hills southwest of Upper Hogsfield. After finding the cavern Mrs Sprottle mentioned, I now need to search for Sirona’s box of letters. Getting past that cave troll was no easy task, but I managed to get the box of letters. Now I can return them to Sirona. Here are all the subjects for the quest with explanations behind them.
Talk to Sirona Ryan in the Three Broomsticks: follow the map towards her and talk with her.
Speak to Dorothy Sprottle in Upper Hogsfield: follow the map towards her and talk with her.
Find and enter the cavern: follow the map towards the cave. You will come across some enemies before you reach the cave. Defeat them in battle and then enter the cave.
Collect Horklumps (10): pick up the horklumps you find in the cave.
Collect Sirona’s Letters (5): To reach the place where you can find the letters, you often need to use Depulso to get further into the cave. You also need to beat a Troll.
Collect Sirona’s letter box: the box lies really close towards the letters.
Return to Dorothy Sprottle in Upper Hogsfield: follow the map back towards her and give her the horklumps with talking to her.
Return the box of letters to Sirona: follow the map back towards her. With talking to her, you give her the box of letters. With giving her the box of letters, you complete this quest.
At 00:00 starts A Friend In Deed quest.
Horklumps
Letters and letter box
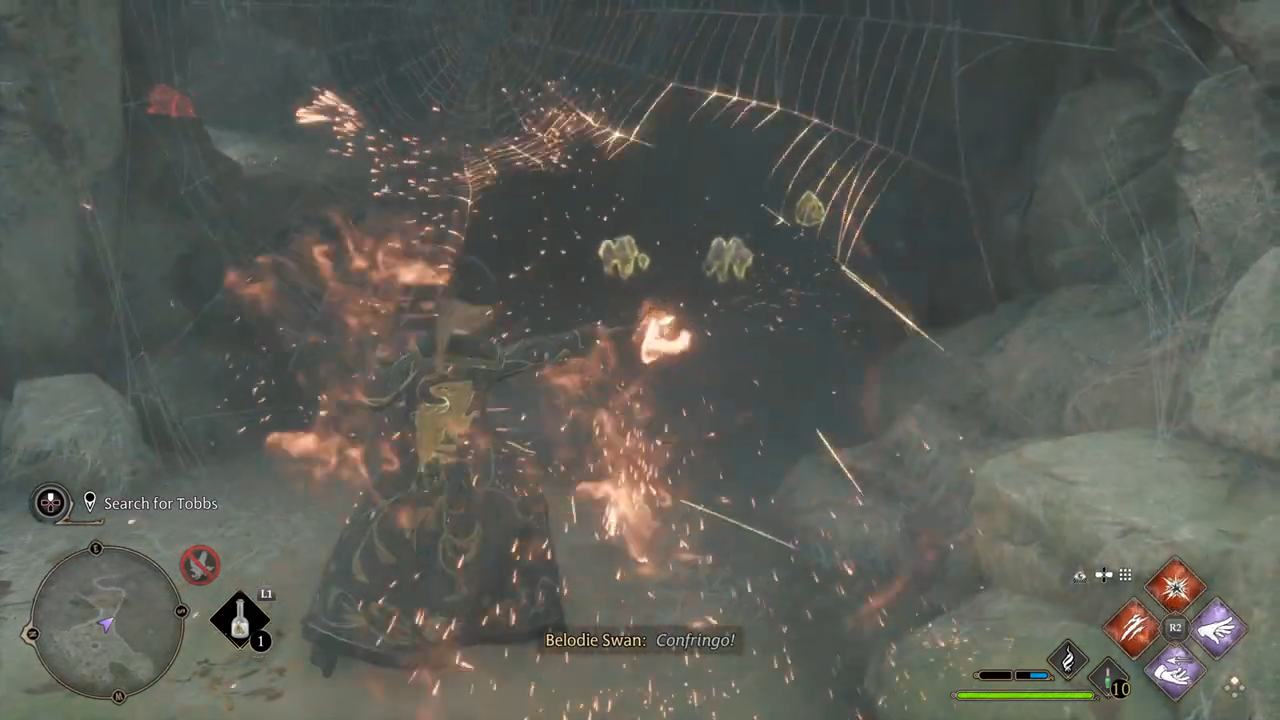
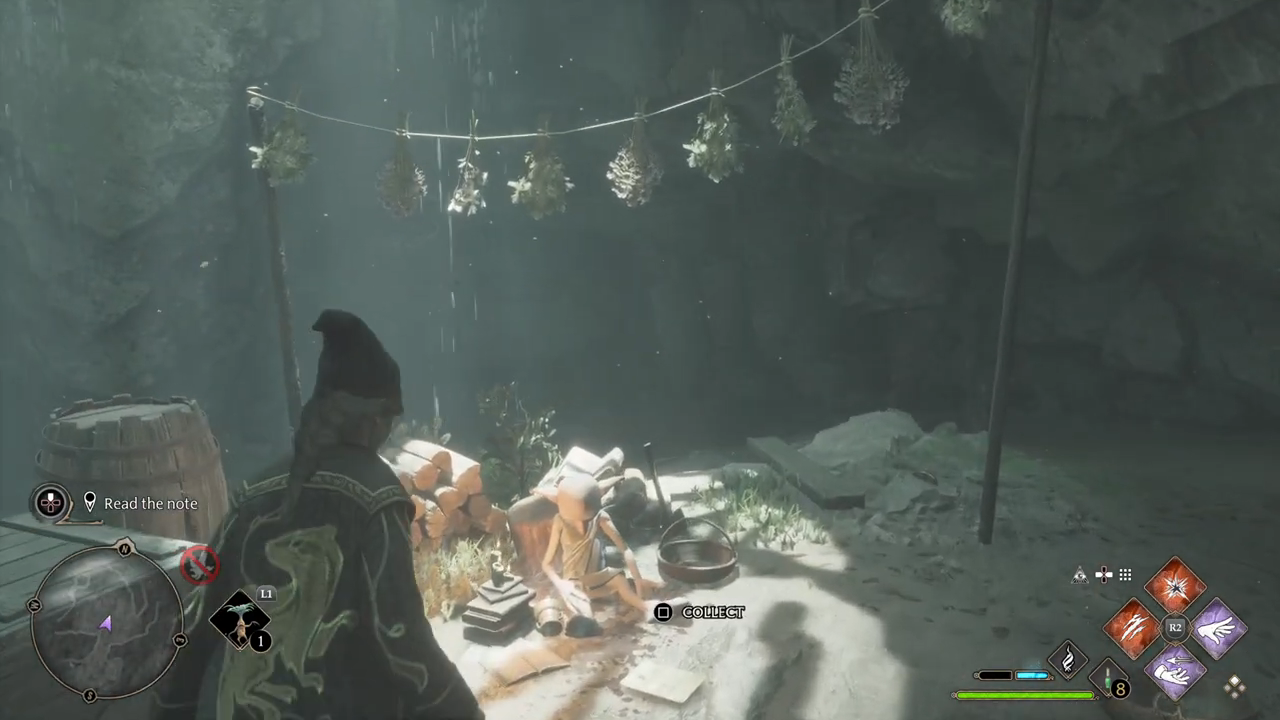
The Plight Of The House Elf Deek wants to speak to me in the Room of Requirement. Deek marked the location of the cave where Tobbs can be found on my map. I should head in that direction. What a wretched place to work. I feel sorry for Deek’s friend. I should search the cavern and find him. It looks like poor Tobbs didn’t make it. But he did leave a note behind. I should read what it says. I need to break the news to Deek and tell him of the fate of his friend Tobbs. As much as it will pain him, he needs to know the truth. Here you can find all the subjects for the quest with explanations behind them.
Talk to Deek: follow the map towards Deek.
Find the cave: follow the map towards the cave and enter it.
Search for Tobbs: walk through the cave until you find Tobbs. Collect the letters on the way. Fight against the spiders in the cave. Use Confringo on the spiderwebs.
Read the note: Read the note next to Tobbs.
Tell Deek about his friend: follow the map back towards Deek and tell him about his friend. By telling Deek about his friend, you complete the quest.
At 00:00 starts The Plight Of The House Elf quest.
Confringo on spider webs
Tobbs and the note
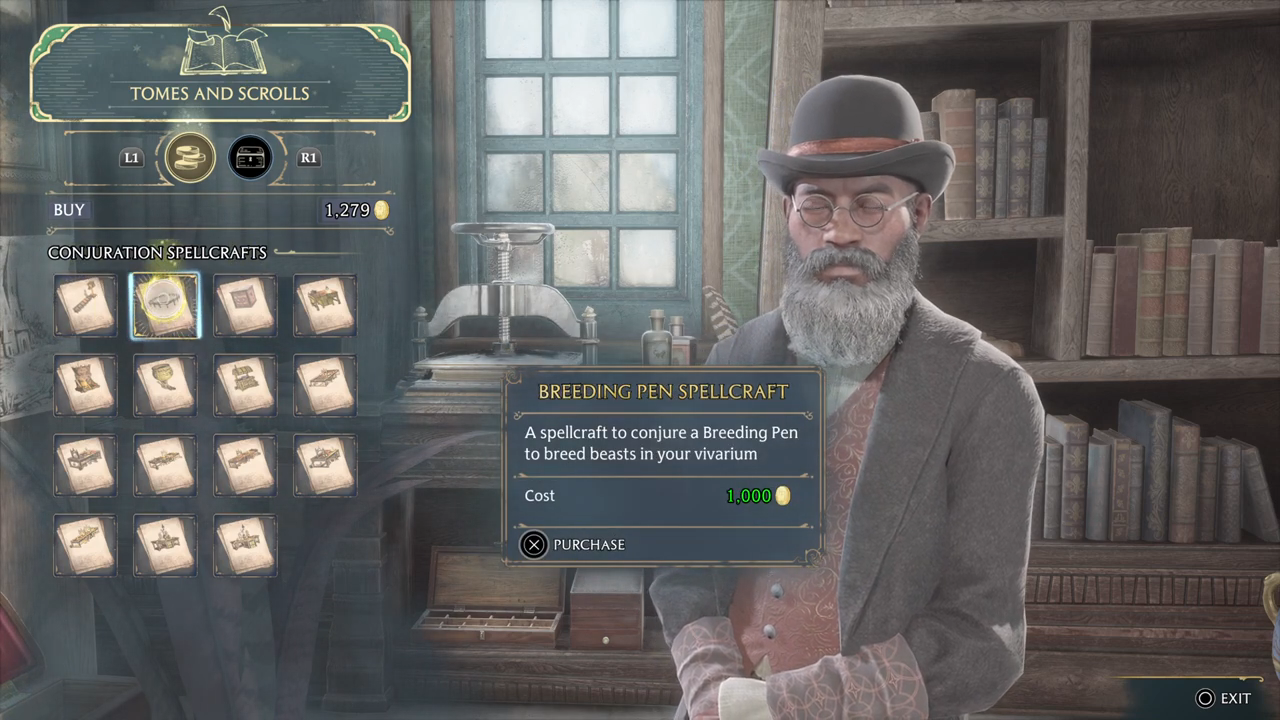
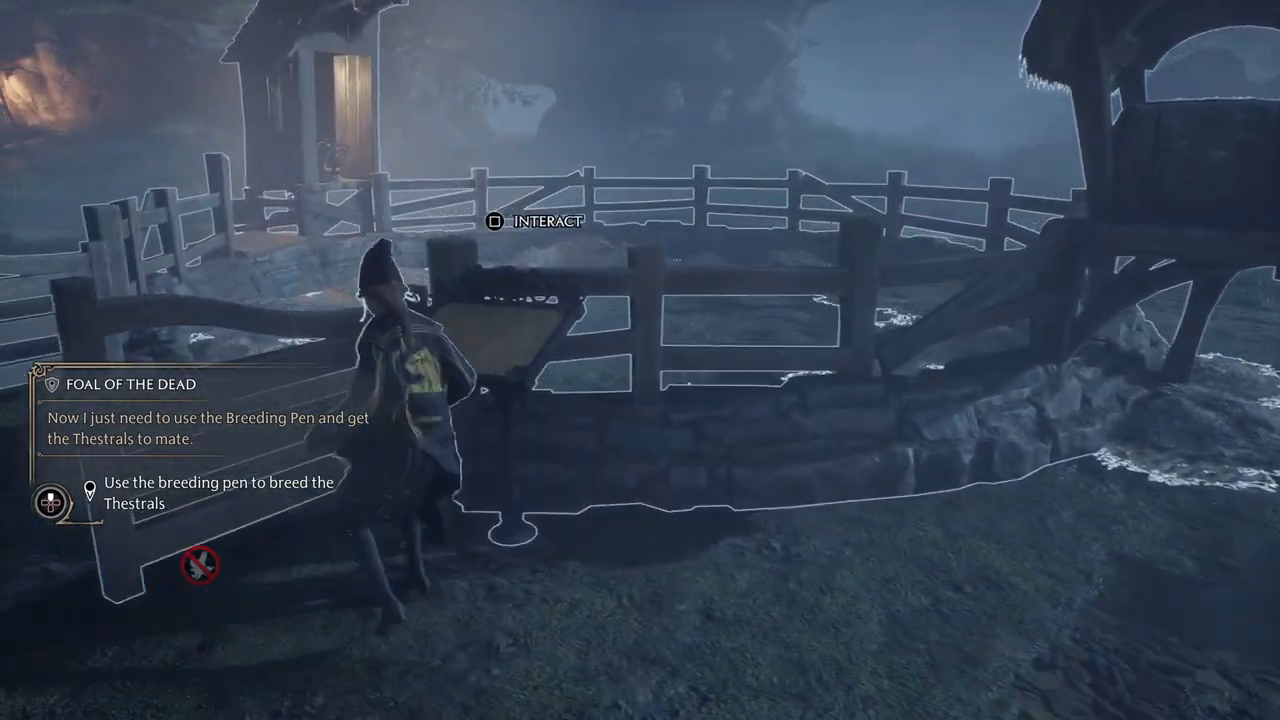
Foal Of The Dead Talk to Deek in the Room of Requirement. Deek marked the location on my map where he believes I can find Thestrals. I’ll also need to stop off in Hogsmeade and buy a spellcraft for the breeding pen. Now that I’ve rescued a pair of Thestrals and purchased the spellcraft for the breeding pen, I should return to the Room of Requirement and speak with Deek. I should conjure a breeding pen and use it to breed a pair of Thestrals. Now I just need to use the Breeding Pen and get the Thestrals to mate. The new-born Thestral could use some brushing. I should also see if it’s hungry. I should return to Deek and tell him of the arrival of the new-born Thestral. Here you can find all the subjects for the quest with explanations behind them.
Speak with Deek: follow the map towards Deek in the room of requirement.
Rescue a male Thestral: follow the map towards a group of Thestrals. Catch a male Thestral
Rescue a female Thestral: Catch a female Thestral.
Purchase a breeding pen spellcraft: follow the map towards Hogsmeade to buy a breeding pan.
Return to Deek in the Room of Requirement: follow the map back towards Deek in the Room of Requirement.
Conjure a breeding pen: put the Thestrals in the new beast’s room. Use the conjuration spell to place the breeding pen.
Use the breeding pen to breed the Thestrals: interact with the breeding pen to select the thestral.
Groom and feed the Thestral Offspring: give food and brush the new baby Thestral.
Speak with Deek: he is in the Room of Requirement. Talk with him to complete the quest.
At 00:00 starts Foal Of The Dead quest.
Buing the breeding pen spellcraft
Interacting with the breeding pen
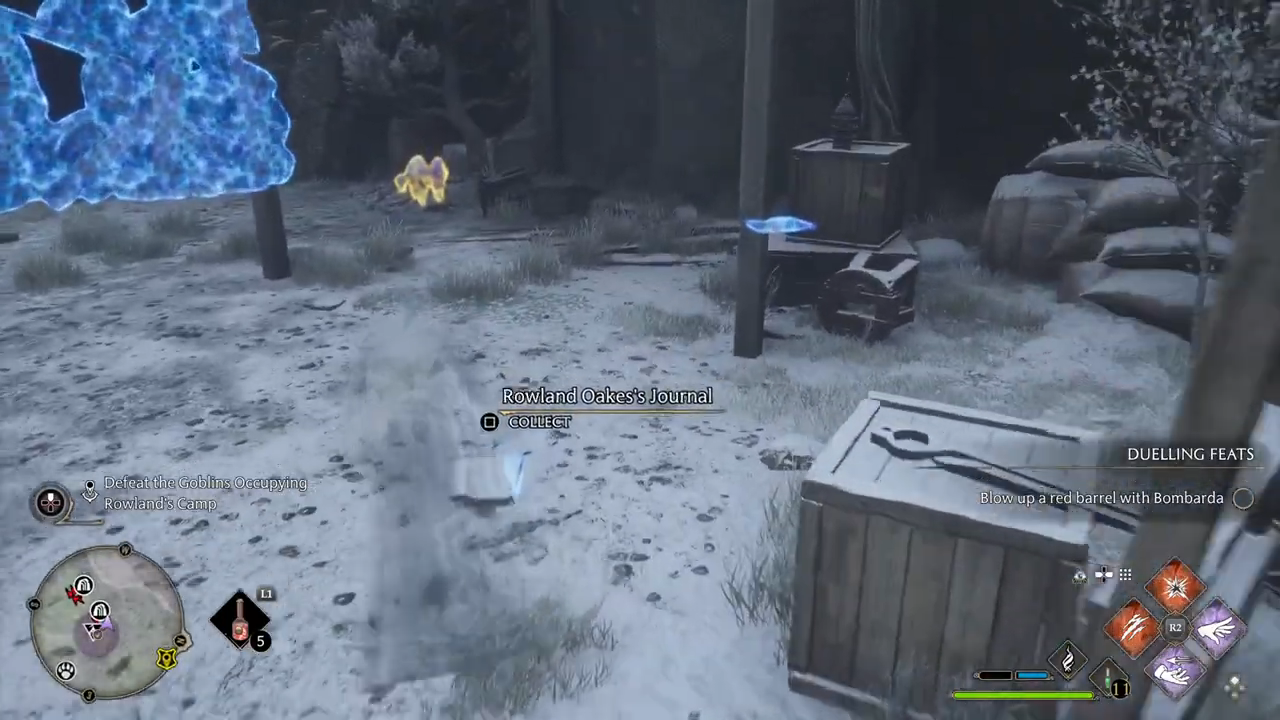
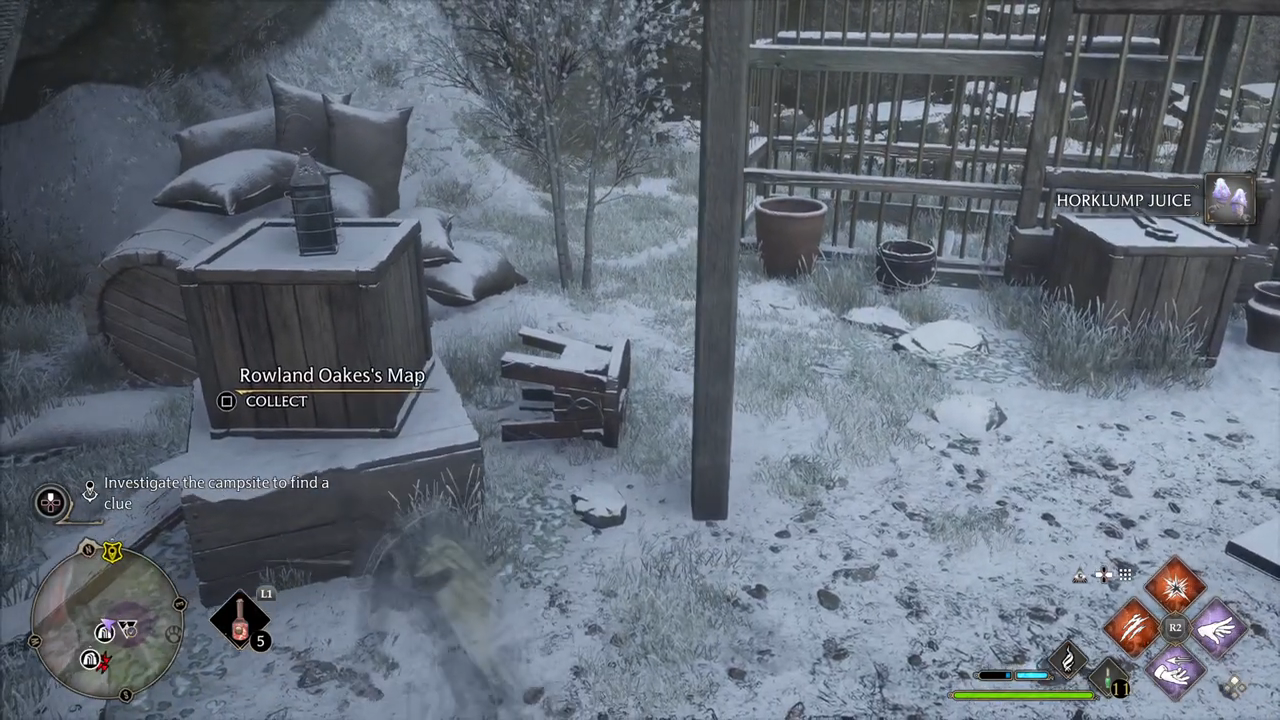
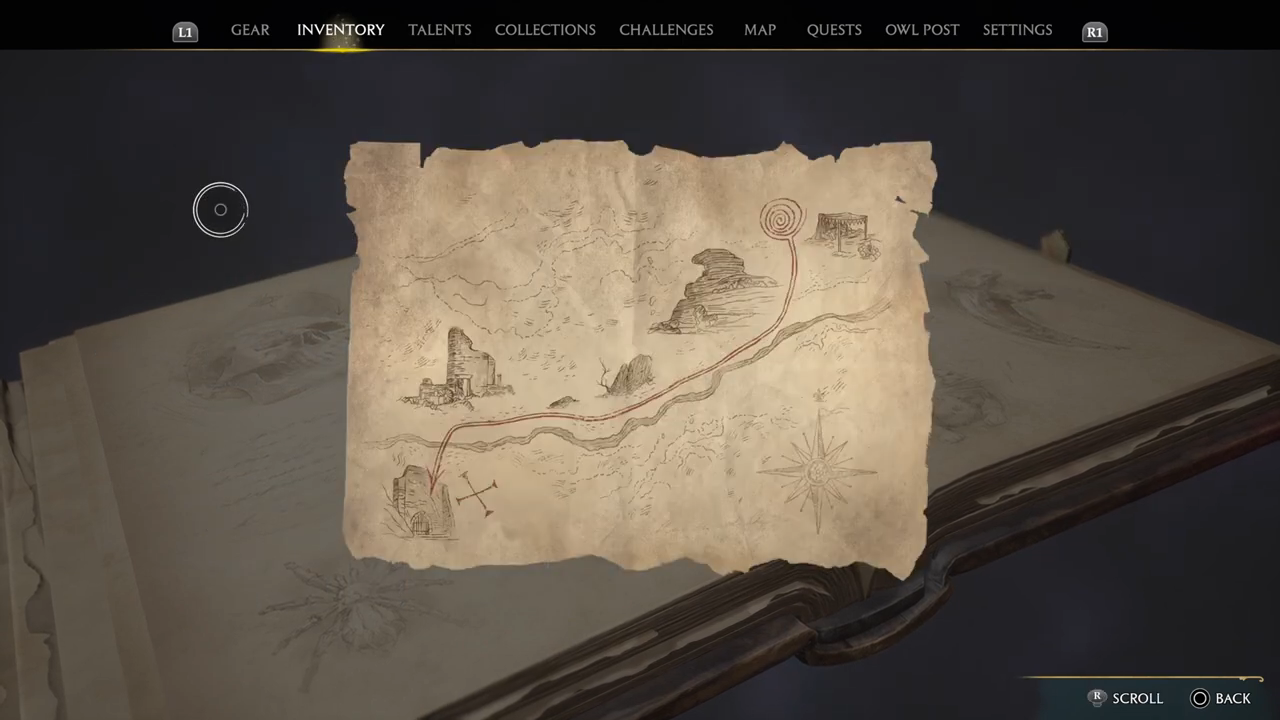
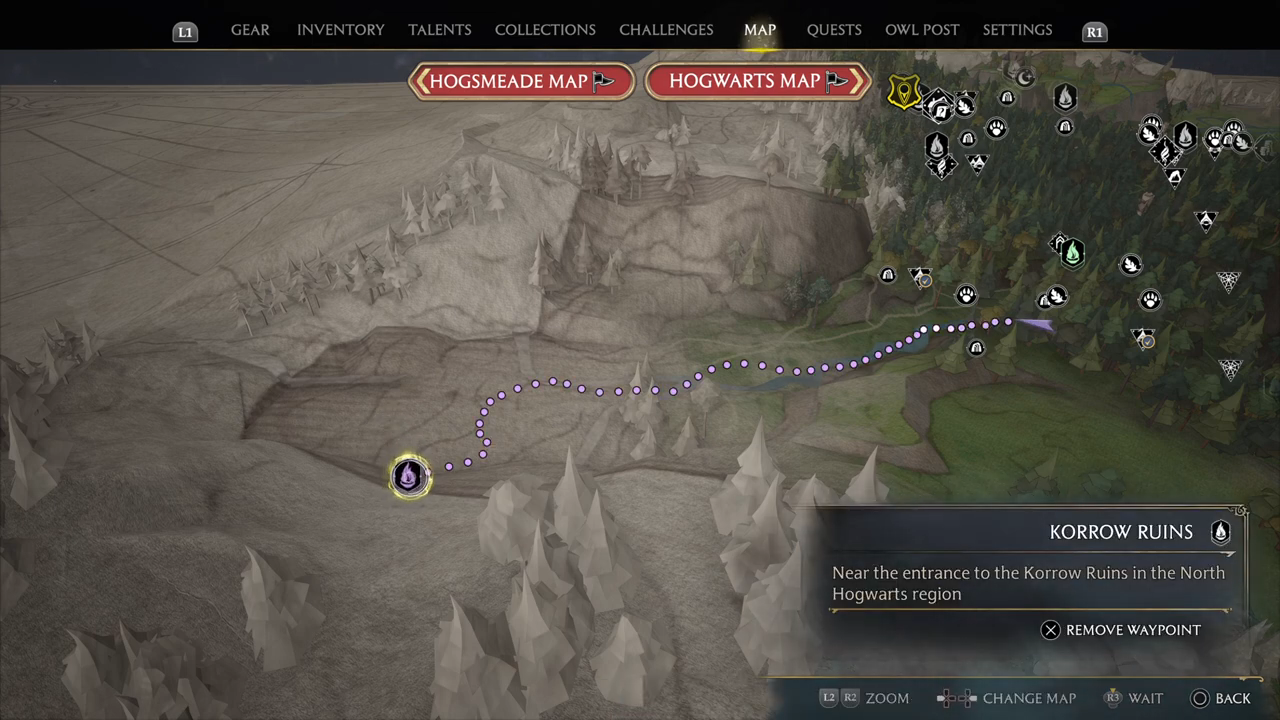
The Tale Of Rowland Oakes Adelaide Oakes seems worried about someone. I should speak with her. Adelaide mentioned that her uncle set up camp north of Hogwarts, past the river. I should start by looking for him there. It looks as if this site was overrun by Loyalists. There must be a clue as to where they’ve taken him. Rowland’s map depicts a few key landmarks. Perhaps I can use them to help me work out where the goblins have taken him. It appears the Loyalists have set up in the ruins depicted on the map. I’ve found the room of cells. Now to find which one holds Rowland. Rowland says that he heard goblins speak of a boiler door. Perhaps that’s where I can find his wand. I believe I’ve found Rowland’s wand. Now to return it to him so we can escape. By completing this quest, you will receive a handcrafted necklace. Here you can find all the subjects for the quest with explanations behind them.
Talk to Adelaide Oakes: follow the map towards Adelaide and talk with her.
Find Rowland Oakes’s campsite: follow the map to the campside.
Defeat the Goblins Occupying Rowland’s Camp: fight with the Goblins.
Investigate the campsite to find a clue: use Revelio to find Rowland Oakes’ Journal and Map.
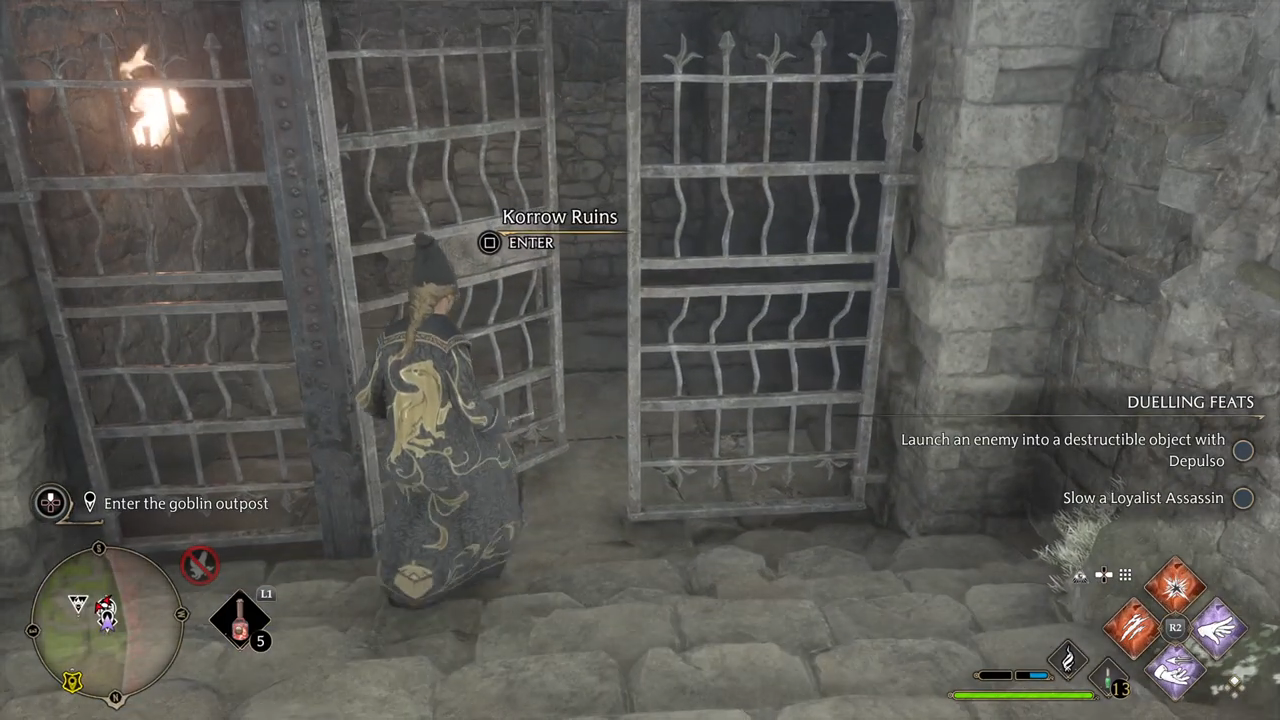
Use Rowland’s map to follow his trail: use the map you found to figure out where Roland went. He went near the Korrow Ruins.
Enter the goblin outpost: go inside the outpost.
Explore the goblin outpost and find Rowland Oakes: look around the outpost and defeat all the goblins until you find Rowland Oakes.
Talk to Rowland through his cell door: Talk through the door with Rowland
Find Rowland’s wand: use Revelio to find his wand.
Give Rowland his wand: by giving Rowland back his wand, you complete this quest.
At 00:00 starts The Tale Of Rowland Oakes quest.
Rowland Oakes's Journal
Rowland Oakes's Map
Rowland Oakes's Map
Rowland Oakes's Map on the Hogwarts World Map
Entering the outpost
Rowland's wand
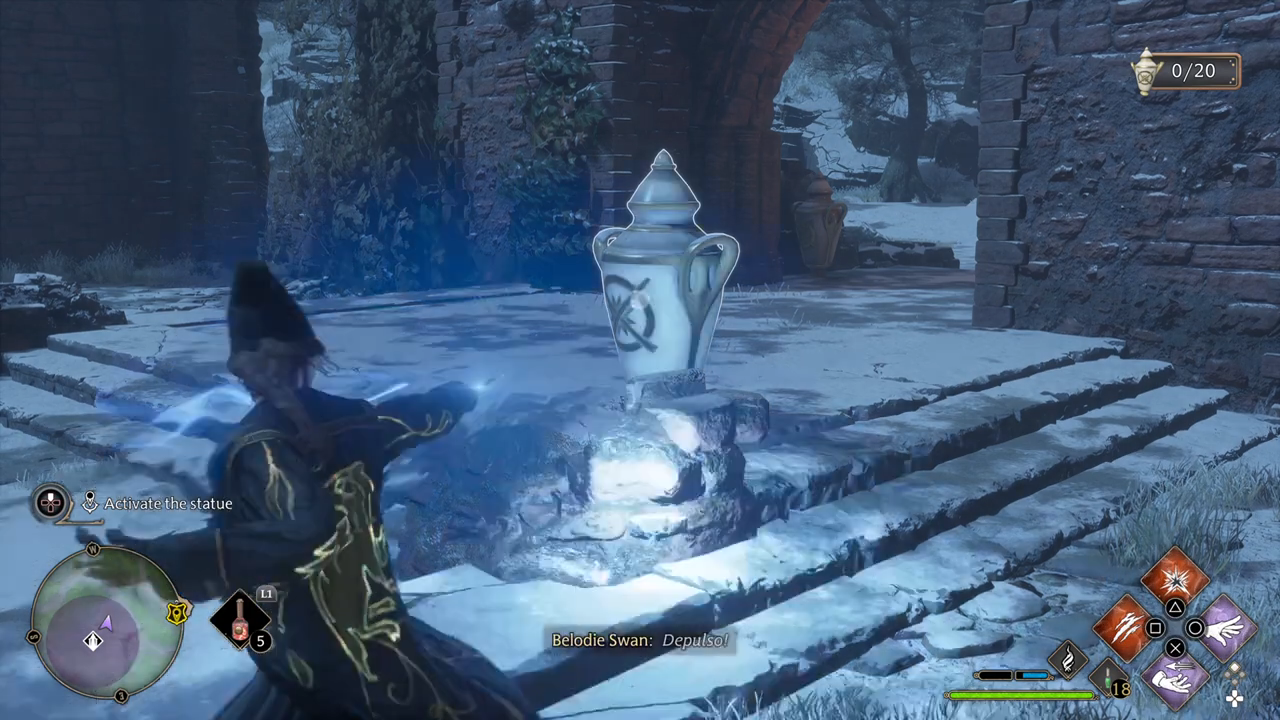
E-vase-ive Manoeuvre While visiting Irondale, I overheard a woman speaking to herself about something ‘fascinating’. I should talk with her. Madam Twiddle mentioned the statue Greville spoke of is southwest of Irondale near some ruins. I should look there. Madam Twiddle mentioned her husband believed there to be a correlation between the vases around the ruins and the statue itself. Surely they wouldn’t be missed if I were to break them. Apparently, destroying all the vases activated the statue. I should return to Madam Twiddle and confirm her husband’s suspicions. By completing this quest, you will receive Wand Handle: Column – Beige. Here you can find all the subjects for the quest with explanations behind them.
Talk to Althea Twiddle: follow the map to Althea and talk with her.
Find Madam Twiddle’s mysterious statue: follow the map towards the statue.
Activate the statue: destroy all 20 vases
Return to Althea Twiddle: follow the map back to her and talk with her. By talking to her, you have completed this quest.
At 00:00 starts E-vase-ive Manoeuvre quest.
Destroying a vase
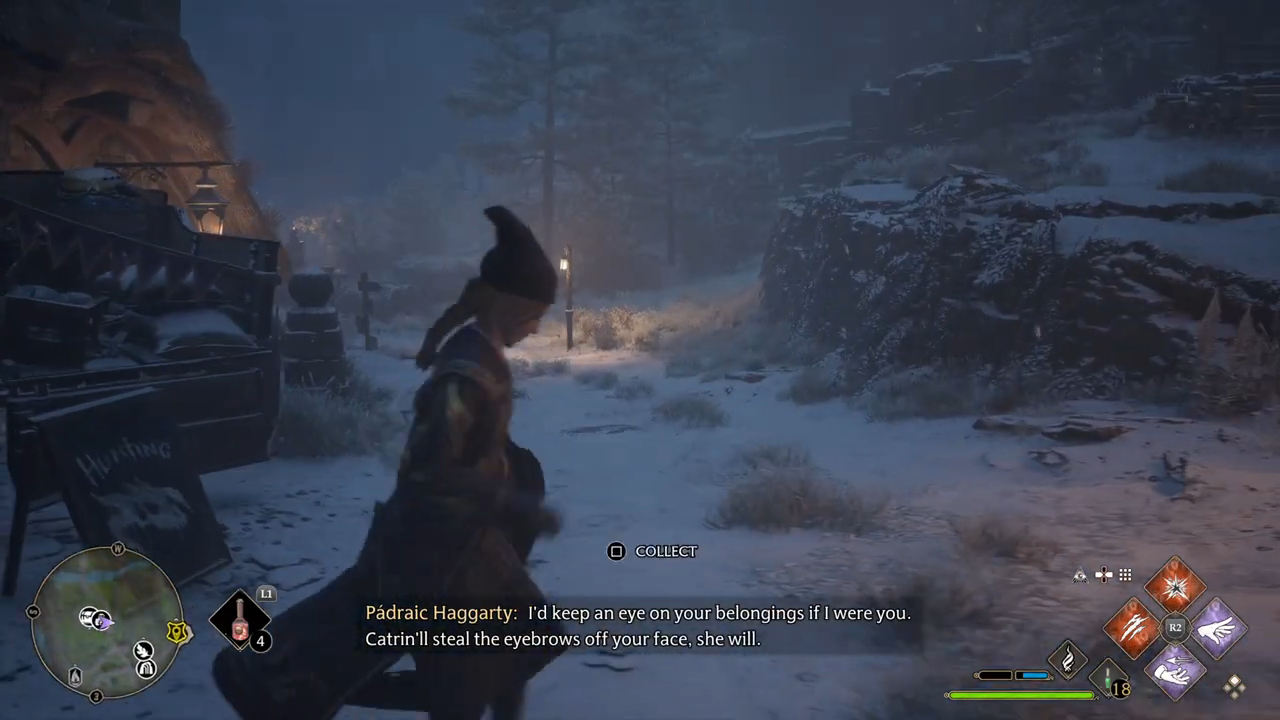
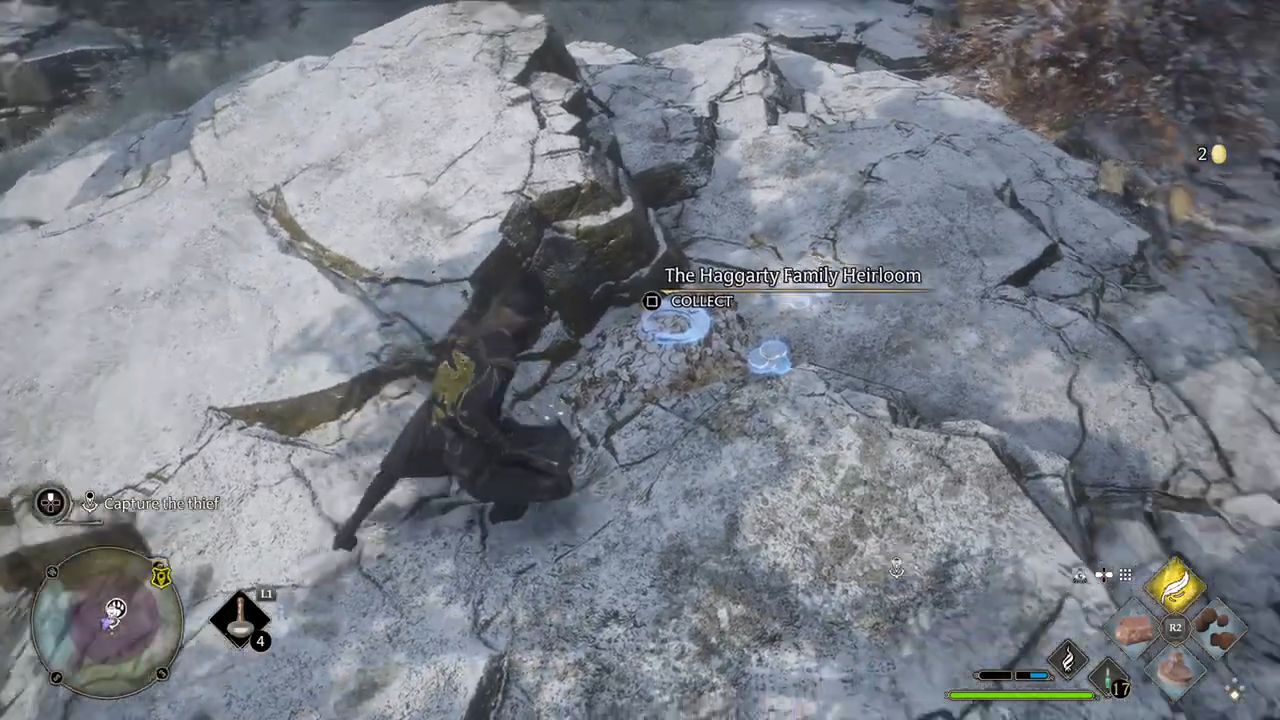
A Thief In The Night The vendor in Irondale seems to be upset about something. I should introduce myself and see what the matter is. Mr Haggarty mentioned that the thief always comes at night. I should return to Irondale then. Since the thief comes at night, I should check around Irondale for clues. I found a trail of gold coins leading just outside the hamlet. It looks like the thief took more than they could carry. I should follow the trail. The trail of coins led me to a Niffler Den. I should capture this Niffler as proof. But where is the Haggarty family heirloom? I caught the culprit, a wily Niffler with a keen sense for valuables. Now to return to Mr Haggarty to show him that it was not Catrin who was thieving after all. By completing this quest, you will receive a Niffler Mask and 500 coins if you asked to get something in return for finding the heirloom. Here you can find all the subjects for the quest with explanations behind them.
Speak with the Irondale vendor: follow the map towards him and talk with him.
Return to the scene in Irondale at night: when it is not night, return later or change to nighttime on the map.
Look for clues at the scene: find some coins.
Follow the trail of coins: you can use Revelio to see them better.
Capture the thief: capture the niffler.
Return to Pádraic Haggarty: follow the map back to him. By talking to him, you complete this quest.
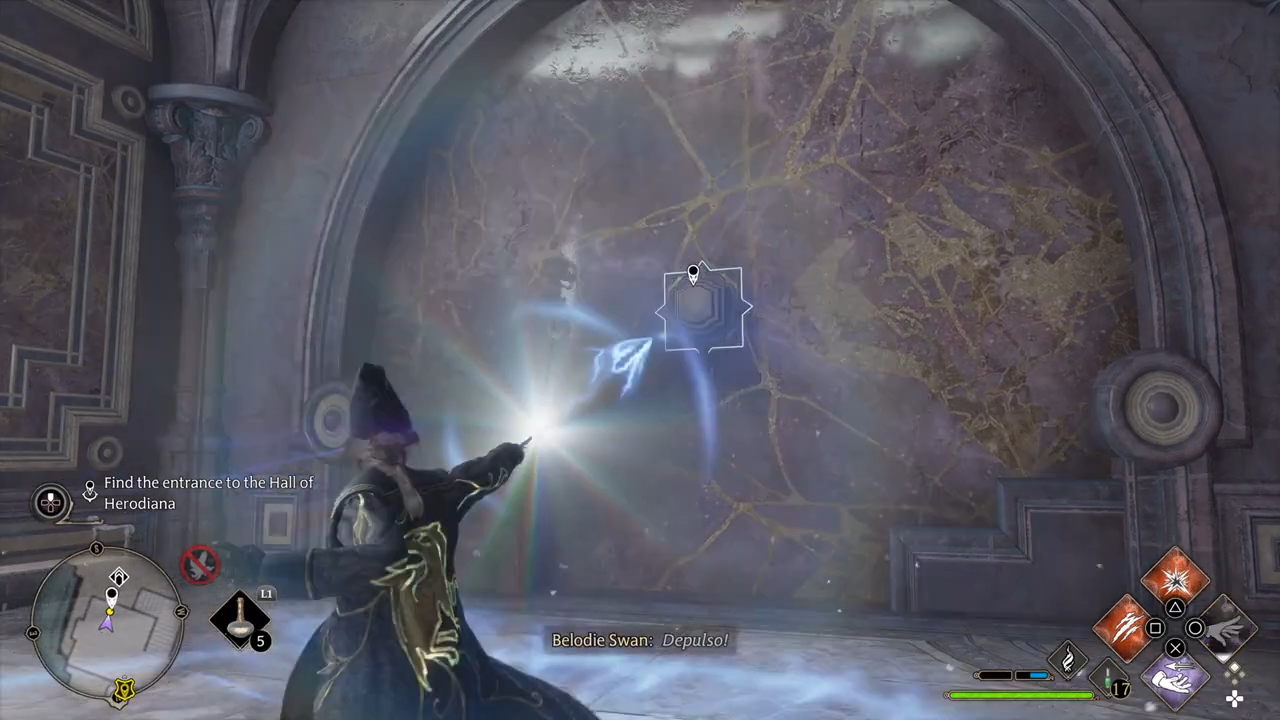
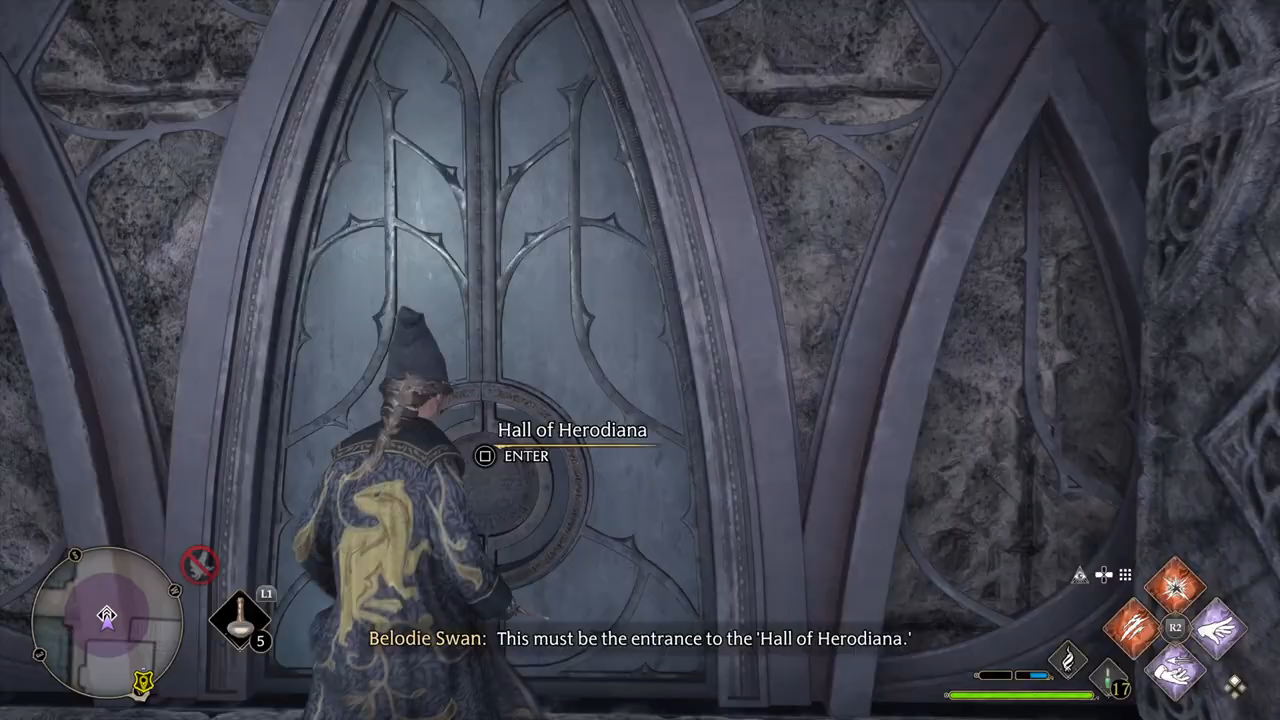
The Hall Of Herodiana Sophronia Franklin seems like she could use my help. She’s near Charms class in the lounge. Sophronia mentioned the Hall could be found at the base of the Defence Against the Dark Arts Tower. I’ve found what I believe to be the entrance to the Hall of Herodiana. It was built for practicing Depulso. Perhaps that will get me inside. I’ve made my way inside the Hall of Herodiana. Now to make my way through and find the signature outfit Sophronia mentioned. I was able to complete the Hall of Herodiana and retrieve Herodiana’s signature outfit. I should return to Sophronia to let her know. By completing this quest, you will get Herodiana’s Cape, Herodiana’s Attire, and Herodiana’s Cap. Here you can find all the subjects for the quest with explanations behind them.
Talk to Sophronia Franklin: follow the map towards her and talk with her.
Find the entrance to the Hall of Herodiana: follow the map towards a wall with a rectangle on it. Use Depulso on it, and there will appear the hall.
Enter the Hall of Herodiana: go inside the hall.
Solve Herodiana’s Puzzles (0/3): Use Depulso and Accio to move the blocks to get to the next room.
Return to Sophronia: follow the map back towards her. By talking to her, you complete the quest.
At 00:00:00 starts The Hall Of Herodiana quest.
Using Depulso to let the hall of Herodiana appear
Entering the hall of Herodiana
Using Depulso to solve the puzzles
Summoner’s Court: Match 2 Someone is looking for a new opponent at Summoner’s Court. I need to defeat Samantha Dale in a single round of Summoner’s Court.
Play Summoner’s Court: use Accio to win the game. If you fail, you can try again.
At 00:25:02 starts Summoner’s Court: Match 2 quest.
Summoner’s Court: Match 3 Someone is looking for a new opponent at Summoner’s Court. I need to defeat Grace Pinch-Smedley in a single round of Summoner’s Court.
Play Summoner’s Court: use Accio to win the game. If you fail, you can try again.
At 00:00:00 starts Summoner’s Court: Match 3 quest.
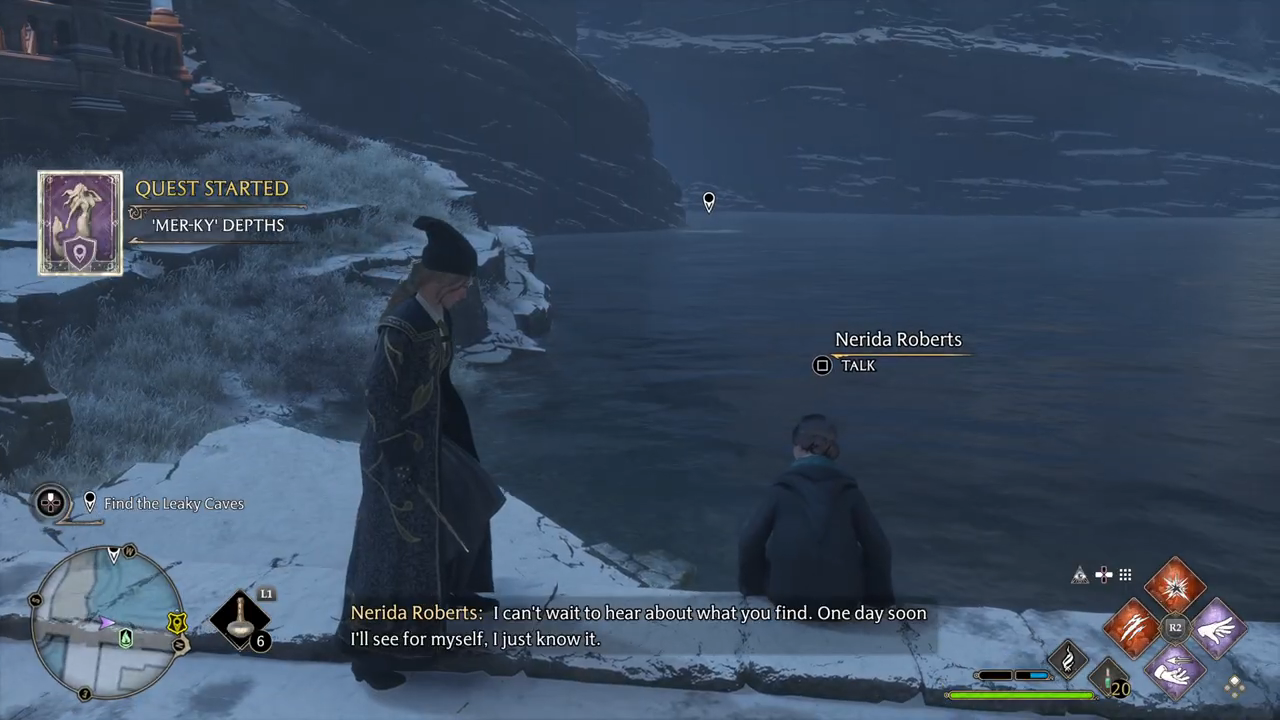
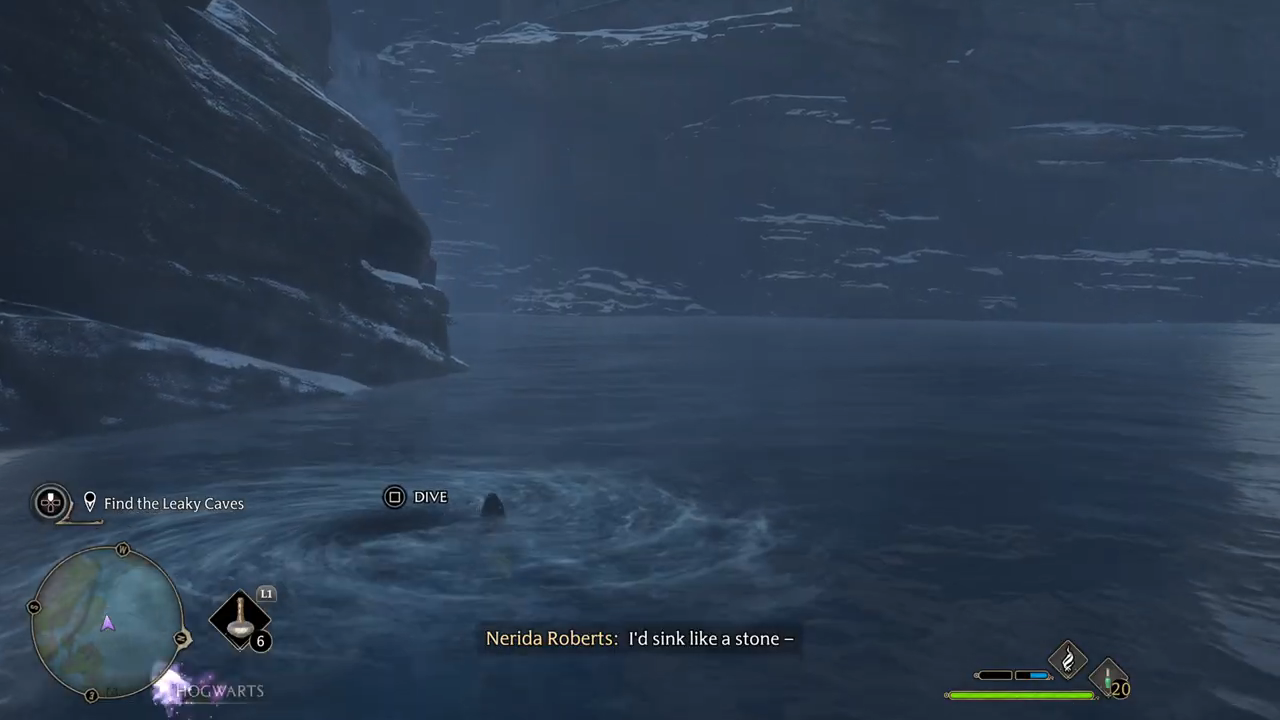
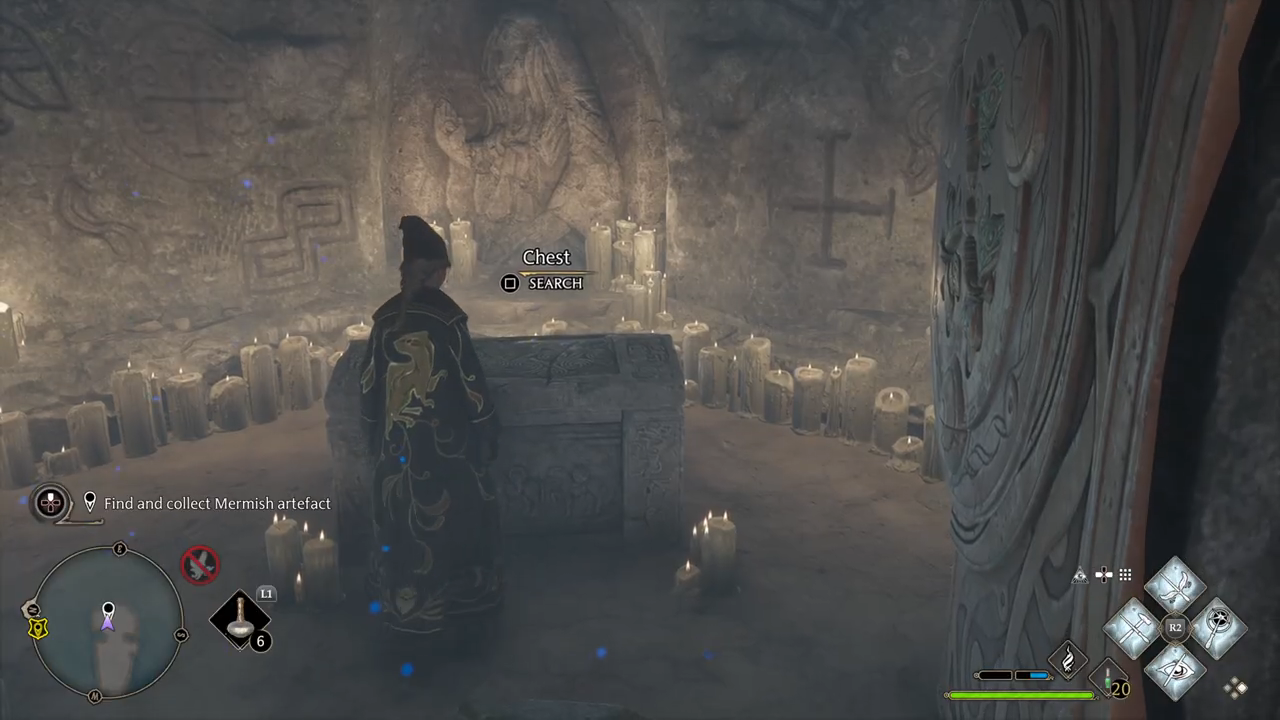
Mer-ky Depths Nerida Roberts is sitting on the docks by the Hogwarts boathouse. I should go speak with her. Nerida mentioned the caves can be found in the lake west of the Hogwarts Boathouse. It sounds like I’ll have to swim there. I made it into the Leaky Caves. Now I just need to find this Mermish artefact. I found the Mermish artefact, the gift that the merpeople left for Nerida. Now I need to return it to her. By completing this quest, you will get the Mermish Liaison Uniform. Here you can find all the subjects for the quest with explanations behind them.
Talk to Nerida Roberts: follow the map towards her and talk with her.
Find the Leaky Caves: swim to the marked place and dive.
Find and collect the Mermish artefact: solve the puzzles inside the cave with Confringo and Lumos and find the artefact.
Return to Nerida: follow the map back to her. By talking with her, you complete this quest.