The Path to Hogwarts This is the intro of the game. After being attacked by a dragon, Professor Fig and you escape by portkey to somewhere in Scotland. There you drink a wiggenweld potions and then you can control your character. Here you can find all your subjects for the quest and explanations behind it. After this quest you have learned Lumos, Protego and Revelio.
Follow Professor Fig: try to follow the professor with walking around and climbing.
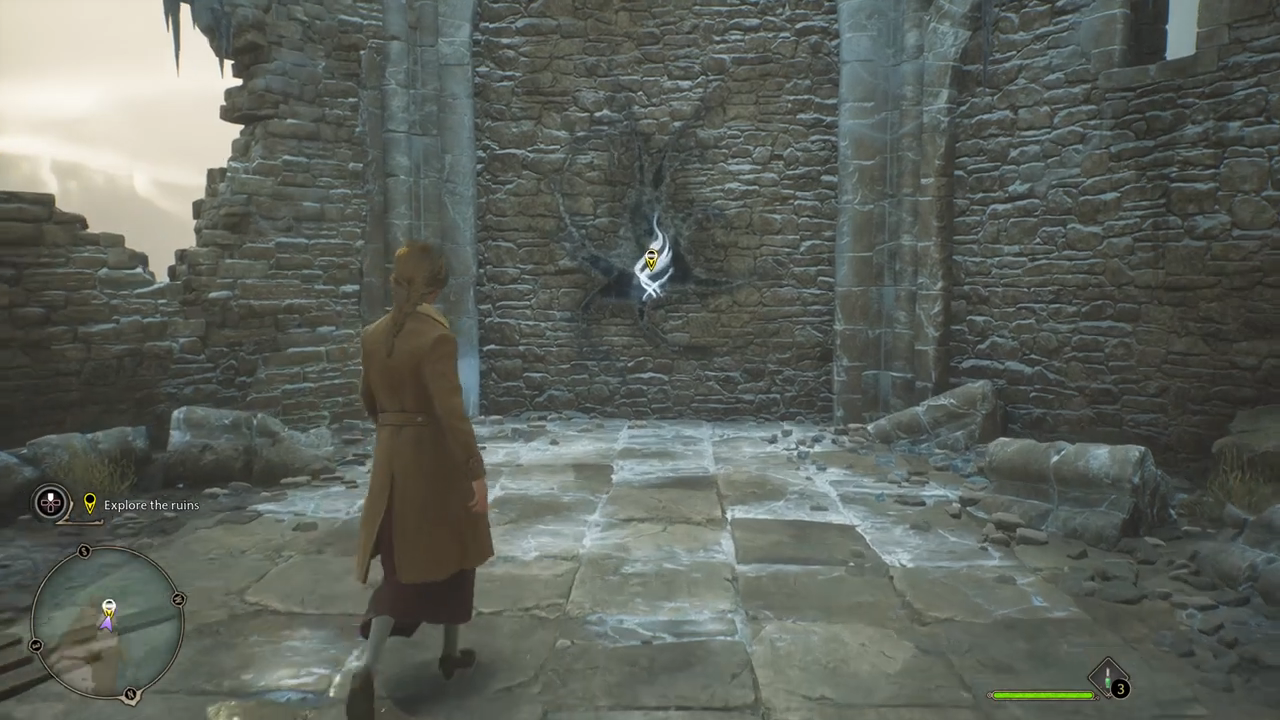
Explore the ruins: when you go right at the statue, you find a path that leads to a wall with a symbol on it.
Interact with magic: interact with the symbol on the wall.
Wake the goblin: this one you complete automatically.
Follow Professor Fig: try to follow the professor with walking around.
Cast Revelio: Professor Fig will learn you the spell.
Proceed into the vault: interact with the symbol on the door.
Stay close to Professor Fig: follow Professor Fig until you see some magic.
Interact with magic: interact with the symbol on the ground.
Determine how to proceed: cast Revelio next to the reflection of the statue.
Discover the statue’s secret: Professor Fig will learn you Lumos. Then match the reflection with the statue.
Protego incoming enemy attacks: cast Protego every time you see an orange symbol at your character.
Tap R2 to destroy statues with Basic Cast: destroy all the statues.
Stay close to Professor Fig: follow Professor Fig.
Find Professor Fig: cast Lumos and follow the magic.
Interact with magic: interact with the symbol on the ground.
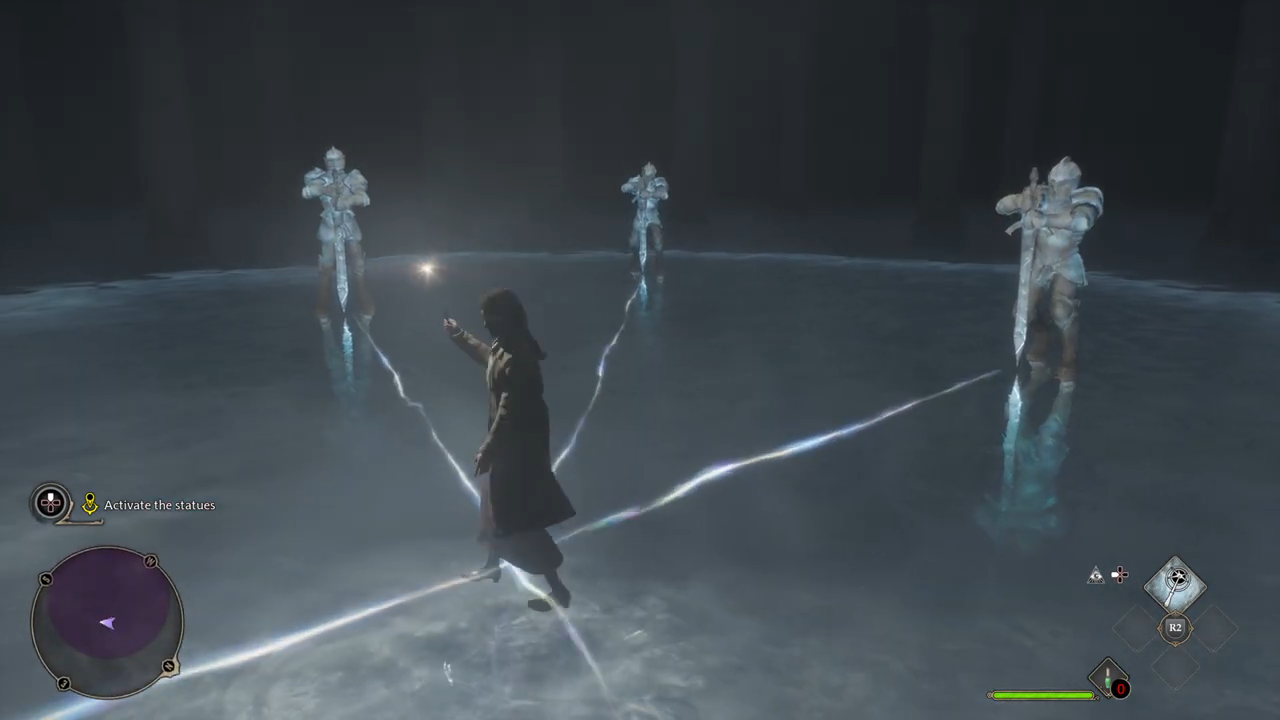
Activate the statues: cast Revelio to make the statue’s visible, and then let the line of the statue cross with Lumos.
Tap R2 to destroy statues with Basic Cast: destroy all the statues.
Hold Protego to Stupefy counter enemies: cast Protego every time you see the orange symbol around your character, you will cast automatically Stupefy.
Tap R2 to destroy statues with Basic Cast: destroy all the statues.
Find Professor Fig: cast Lumos and follow the magic.
At 08.20 starts The Path to Hogwarts quest.
Symbol on the wall.
Cast protego when you see this orange symbol around your character.
Activate the statues.
Welcome to Hogwarts After being sorted into your house, your adventure at Hogwarts start. Find your common room and meeting people of your house. Here you can find all your subjects for the quest and explanations behind it.
Find your common room: Professor Weasley takes you to your common room.
Introduce yourself to Cressida (Gryffindor), Lenora (Hufflepuff) Samantha (Ravenclaw) or Sebastian (Slytherin) : talk with the student of your house in the common room.
Introduce yourself to Garreth (Gryffindor), Arthur (Hufflepuff), Everett (Ravenclaw) or Ominis (Slytherin) : talk with the student of your house in the common room.
Introduce yourself to Nellie (Gryffindor), Adelaide (Hufflepuff), Amit (Ravenclaw) or Imelda (Slytherin) : talk with the student of your house in the common room.
Meet Professor Weasley outside the common room: walk out of your common room, there you see Professor Weasley.
Follow Professor Weasley: try to follow the professor.
Collect the Guide Page: use Revelio and then interact with the page.
Follow Professor Weasley: try to follow the professor.
Talk to Professor Fig: talk with the Professor
At 00.00 starts Welcome to Hogwarts quest.
Defence Against the Dark Arts Class Your first class is about to begin. Meet your new teacher, Professor Hecat. She will learn you Levioso. Here you can find all your subjects for the quest and explanations behind it.
Attend Defence Against the Dark Arts Class: the map will lead you to your class.
Perform a Basic Cast on the training dummy: cast a spell on the training dummy.
Cast Levioso on the training dummy, followed by a Basic Cast: cast both of the spells on the training dummy.
Duel Against Sebastian: beat Sebastian with using Levioso in a duel.
Speak with Sebastian: talk with Sebastian.
At 29.37 starts Defence Against the Dark Arts Class quest.
Charms Class Your second class is about to begin. Meet your new teacher, Professor Ronen. He will learn you Accio. Here you can find all your subjects for the quest and explanations behind it.
Go to Charms class: the map will lead you to your class.
Talk to Professor Ronen: go to the Professor to talk with him.
At 38.40 starts Charms Class quest.
Weasley After Class Your classes for today are over. Professor Weasley will tell you what to do after class. Here you can find all your subjects for the quest and explanations behind it.
Meet Professor Weasley in the Transfiguration classroom: follow the map to the transfiguration classroom.
At 55.40 starts Weasley After Class quest.
Welcome to Hogsmeade It is your first time to Hogwarts, Natty or Sebastian will go with you. It will be an interesting adventure. Here you can find all your subjects for the quest and explanations behind it.
Meet Natty near the entrance to Hogwarts: follow the map to Natty or Sebastian.
Follow Natty to Hogsmeade: stay close to Natty or Sebastian.
Visit Tomes and Scrolls: visit the shop for school supplies.
Visit Ollivanders: visit the shop for a wand.
Visit J. Pippin’s Potions: visit the shop for school supplies.
Visit The Magic Neep: visit the shop for school supplies.
Meet Natty at the town circle: follow the map to Natty or Sebastian.
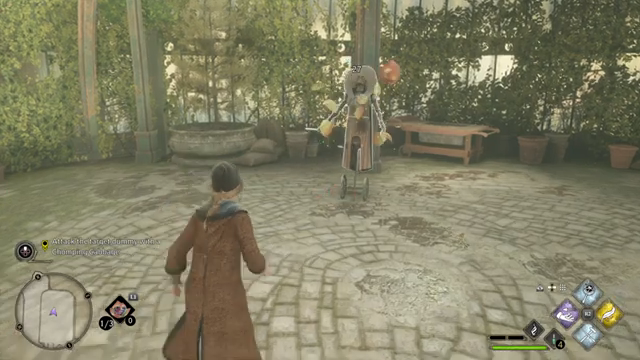
Defend Hogsmeade: defeat the troll.
Repair the damage: use Reparo on the 7 damaged things.
Speak to the shopkeeper: go to the shopkeeper.
Follow Natty to the Three Broomsticks:stay close to Natty or Sebastian.
Talk to Natty outside the Three Broomsticks: walk out of the Three Broomsticks there you see Natty or Sebastian.
At 01:17:00 starts Welcome to Hogsmeade quest.
The Locket’s Secret Professor Fig has found out the secret of the Locket. Would you be able to see more than him with your ancient magic? Here you can find all your subjects for the quest and explanations behind it.
Talk to Professor Fig: go to his classroom and talk with him.
At 00:00:00 starts The Locket’s Secret quest.
Secrets of the Restricted Section You have learned Incendio and are ready to go with Professor Fig to the restricted section of the Library. But Headmaster Black has something to do for Professor Fig. So you go with Sebastian to the Library. You will learn the Disillusionment spell from this quest. Here you can find all your subjects for the quest and explanations behind it.
Return to Professor Fig’s classroom: you can find on the map where his classroom is. There you talk with him about going to the restricted section of the library.
Talk to Sebastian: you can find where Sebastian is on your map. You ask him about a way how to get in the restricted section of the library.
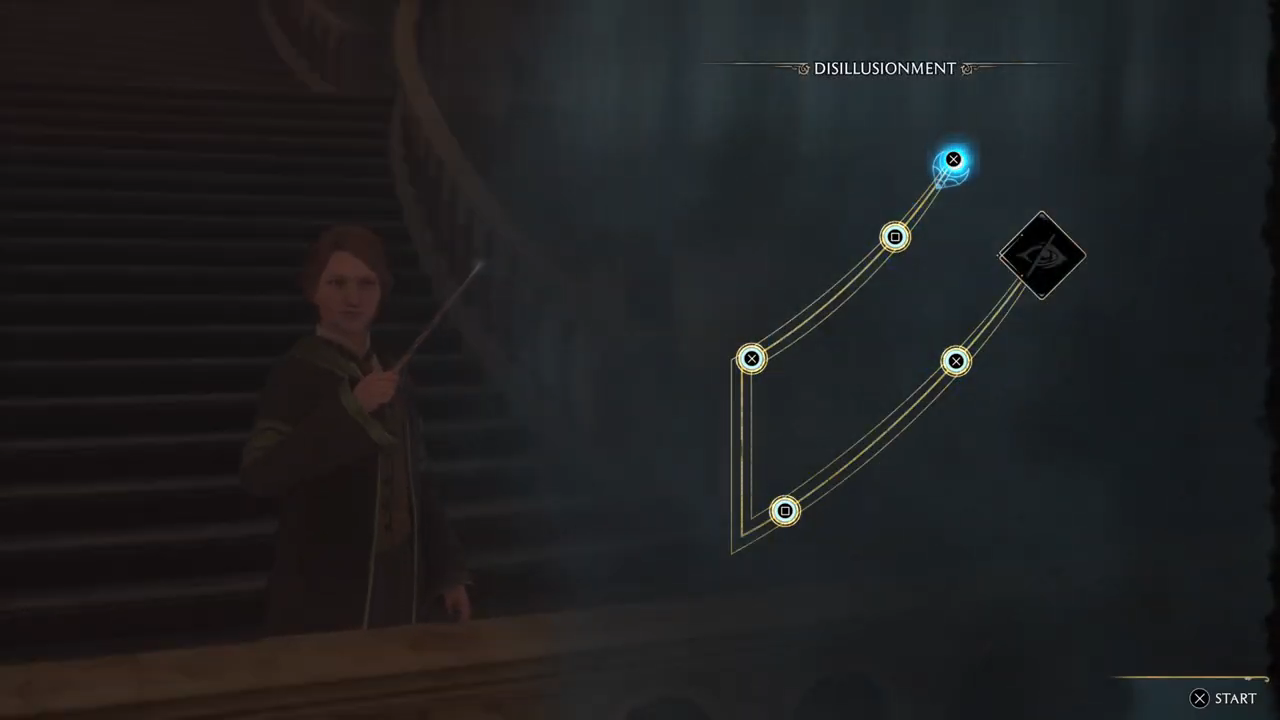
Meet Sebastian in the Central Hall at night: after your conversation with Sebastian about going to the Restricted Section, your story will go automatically to nighttime. In Central Hall, you find Sebastian. He will learn you the Disillusionment spell.
Sneak into the library: get into the library well using the Disillusionment spell.
Get the key from the librarian’s desk: go to the desk while using the Disillusionment spell. Interacting with the desk will give you the key.
Enter the Restricted Section: go into the restricted section well using the Disillusionment spell.
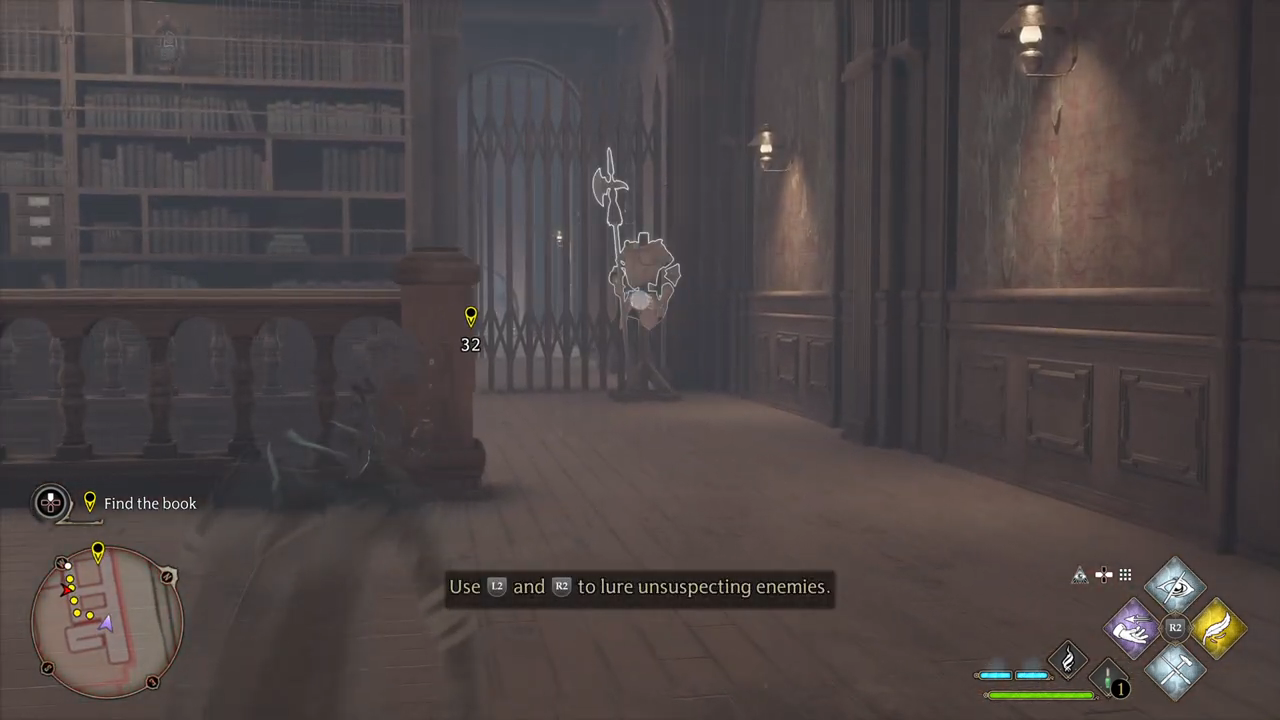
Find the book: while you are searching for the book, you have to get by some ghosts. Cast Basic spells on stuff to distract them. Once you are a floor lower, you don’t need the Disillusionment spell anymore.
Search for the secret hidden in the Restricted Section: Peeves has found you, and Sebastian is going after him. That will give you time to keep searching. Use Reparo to get further and follow the map.
Enter the Athenaeum: go through the gate, to another place.
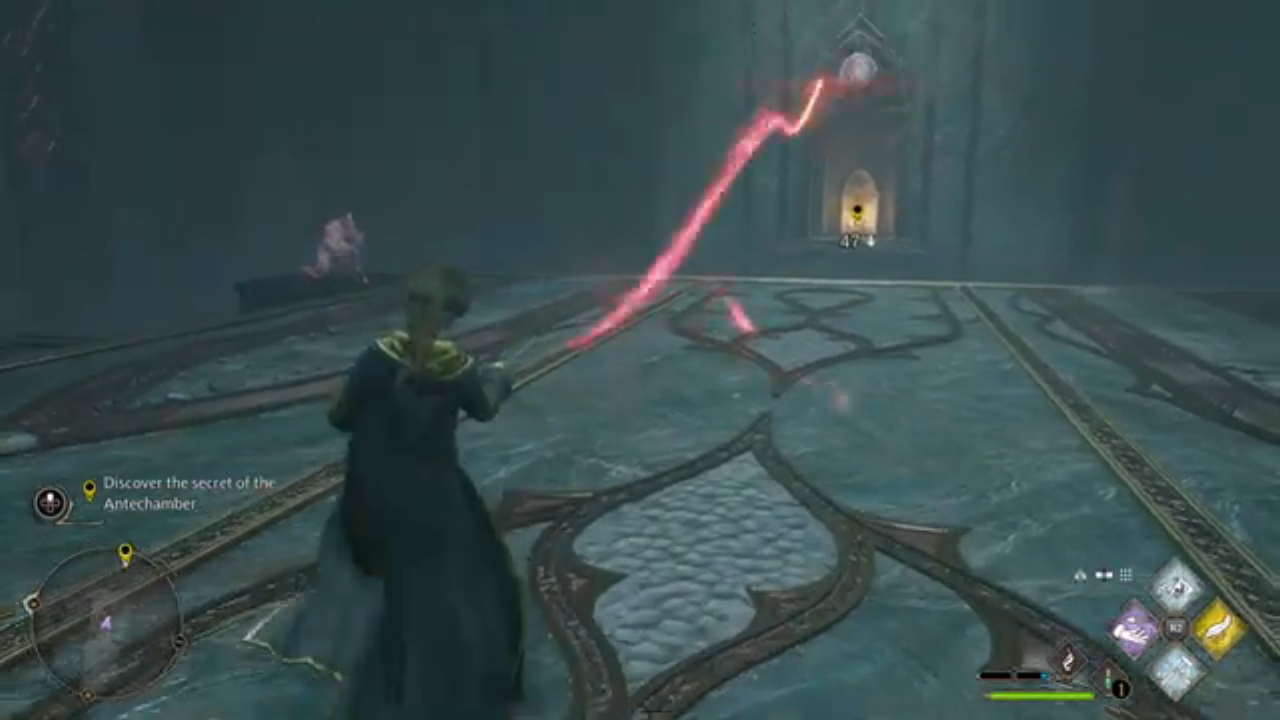
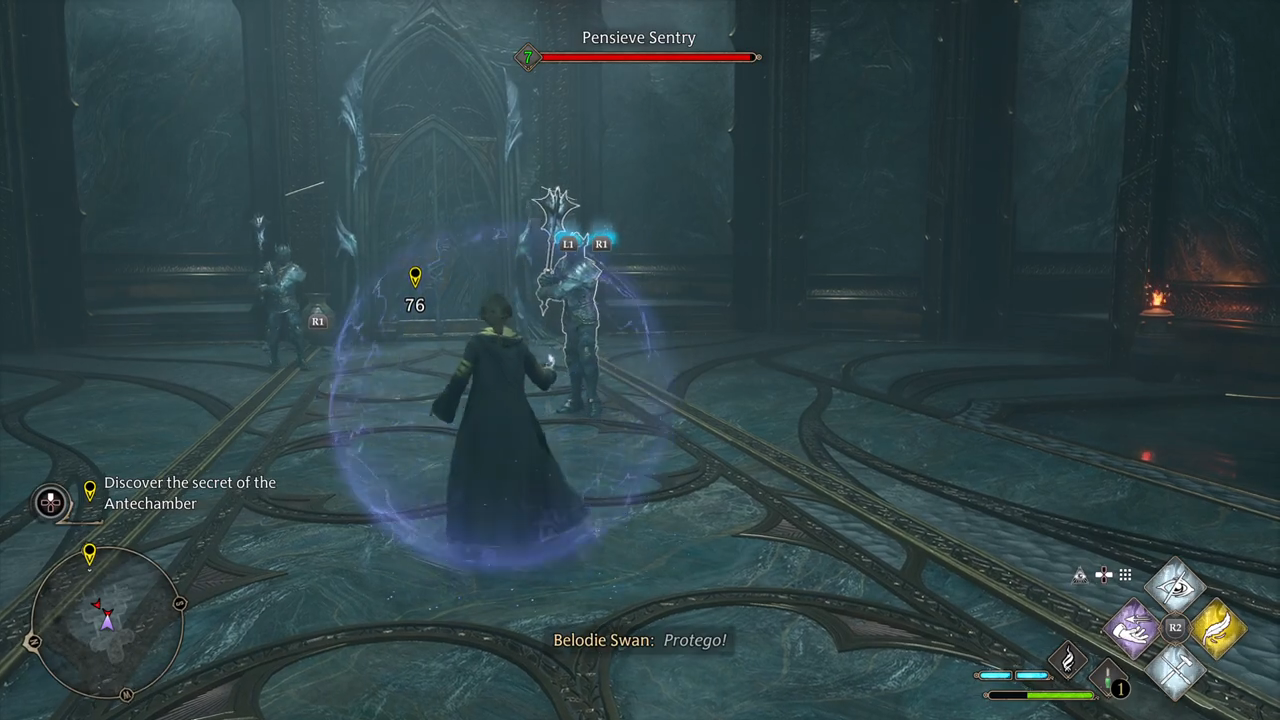
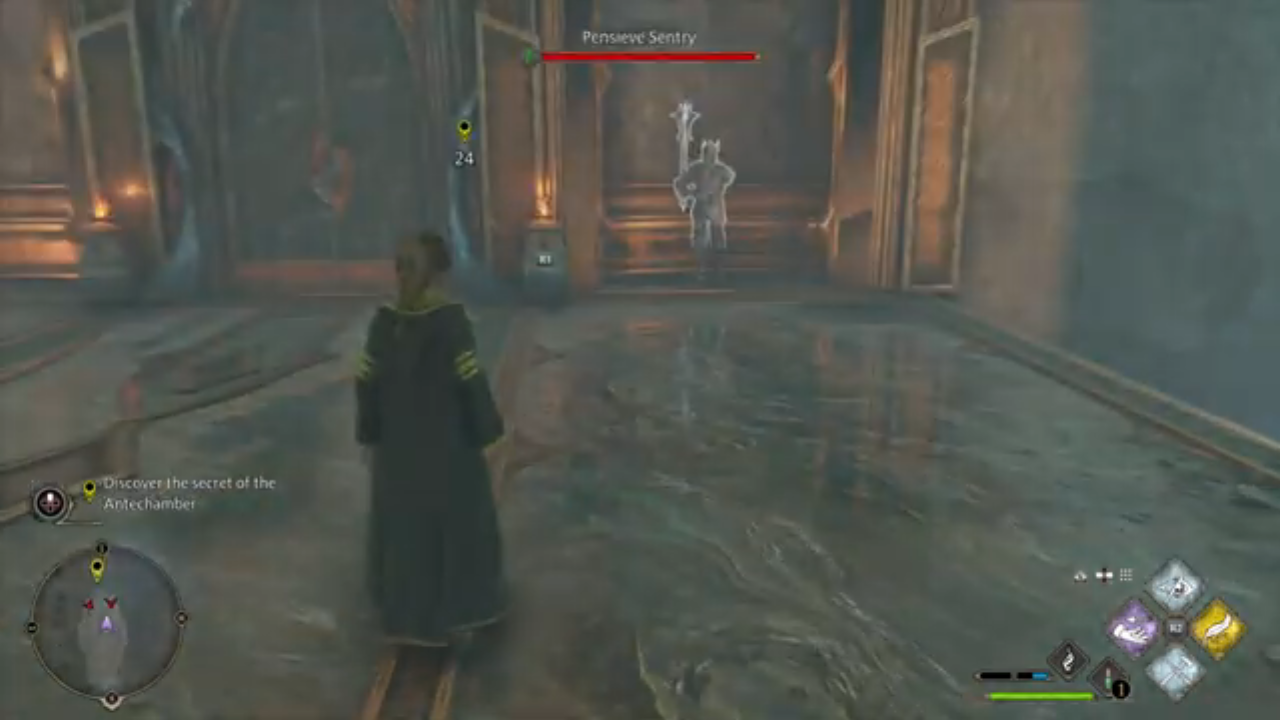
Discover the secret of the Antechamber: while following the map, you have to fight some statues using ancient magic and throwing stuff at them. The buttons for those spells will show up on the screen above the statues or stuff. You also need to solve sometimes how to get to the other side of the room. Use the Basic spell above the doorway, and sometimes you need to jump. At the end of the path you will find a book.
At 00:27:16 starts Secrets of the Restricted Section quest.
Learning Disillusionment spell
Getting past the ghosts.
Using Basic spell above the doorway.
Using ancient magic on statues
Throwing stuff at the statues
Tomes of the Tribulations You have found a book on the restricted section of the library and want to show it to Professor Fig. Here you can find all your subjects for the quest and explanations behind it.
Return to Professor Fig’s classroom: you find his classroom on the map.
Take the book to Professor Fig: talk with Professor Fig, you will give him automatically the book.
At 01:08:13 starts Tomes of the Tribulations quest.
Herbology Class Your first class of Herbology is about to begin. You learn about Mandrakes, Dittany and Chinese Chomping Cabbages. Here you can find all your subjects for the quest and explanations behind it.
Go to Herbology Class: follow the map to the Herbology Classroom.
Repot the Mandagora: follow the instructions on the screen.
Talk to professor Garlick: go over o the professor and talk with her.
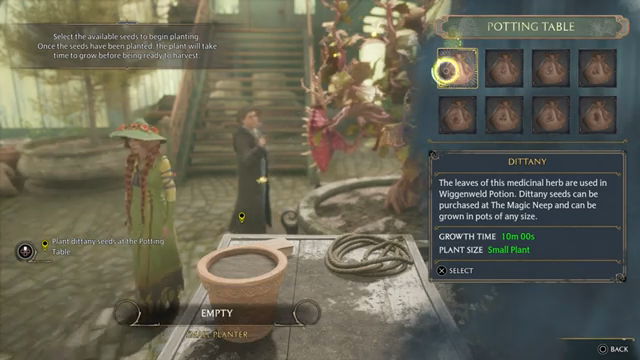
Plant Dittany seeds at the potting table: go over to the potting table and plant there your Dittany seeds.
Meet Leander Prewett: follow the map. He will show you the Chinese Chomping Cabbages.
Go to the other greenhouse: follow the map to the other greenhouse.
Harvest Chinese Chomping Cabbages: take a cabbage from the table.
Attack the dummy with a Chomping Cabbage: put the Cabbage at your throwing tab. The screen will explain to you how. Then trow them at the dummy.
Return to Professor Garlick: Follow the map back to the professor. With talking to her, you end this quest.
At 00:08:42 starts Herbology Class quest.
Potting Dittany
Atacking the dummy with Chinese Chomping Cabbage
Potions Class Your first class of Potions is about to begin. You learn about Wiggenweld Potion and Edurus Potion. Here you can find all your subjects for the quest and explanations behind it.
Attend Potions Class: follow the map to your class.
Brewing Wiggenweld potion: follow the instructions on the screen.
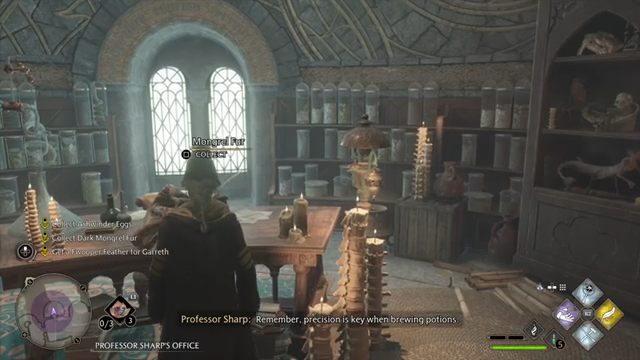
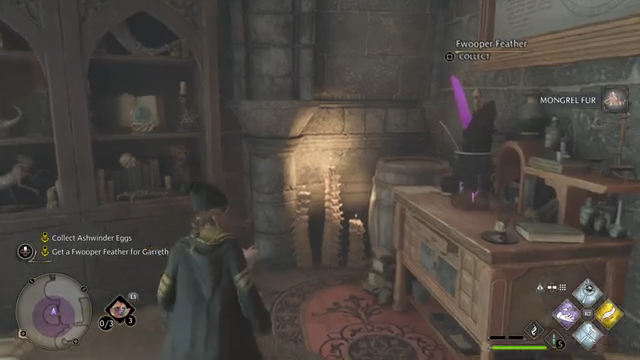
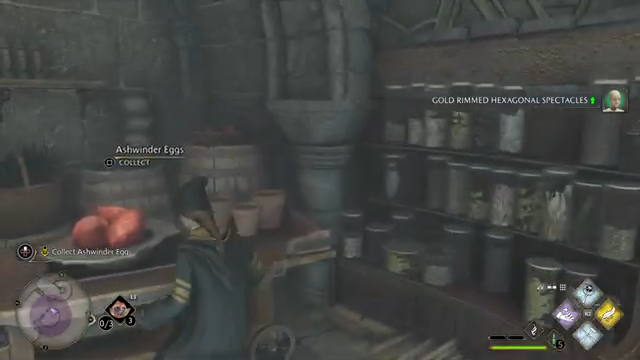
Collect Ashwinder Eggs and Dark Mongrel Fur. If you say yes to Garreth you also have to collect a Fwooper Feather. You can find all the items in the office of Professor Sharp.
Return to Garreth with Fwooper Feather: go back to Garreth and give him the feather.
Brew an Edurus Potion: go to your potion station. Choose the Edurus potion recipe. The Potion will brew itself. You only have to wait a few seconds.
Return to Professor Sharp: go talk with the Professor. With talking to the Professor, you will end this quest.
At 00:29:36 starts Potions Class quest.
Mongrel Fur
Fwooper Feather
Ashwinder Eggs
The Girl From Uagadou Natty Onai has asked you to meet her at a hamlet called Lower Hogsfield, just south of Hogwarts. I should see what she wants. Here you can find all your subjects for the quest and explanations behind it.
Meet Natty Onai in Lower Hogsfield: follow the map to Natty. The only thing you have to do for this quest is talking with her. So the quest ends directly after you talk with her.
At 00:57:26 starts The Girl From Uagadou quest.
Trials Of Merlin A woman needs help just across the water beyond the dock. After a duel with thieves, the woman will tell you about the trials of Merlin. Here you can find all your subjects for the quest and explanations behind it.
Help the stranger: follow the map towards the stranger.
Defeat the thieves: win from the thieves in a duel.
Speak with the stranger: after the duel, walk back towards the stranger and talk with her. She will tell you about the Trails of Merlin.
Get the Mallowsweet from the trunk; walk towards the trunk and interact with it. Then place the Mallowsweets on the stone swirl.
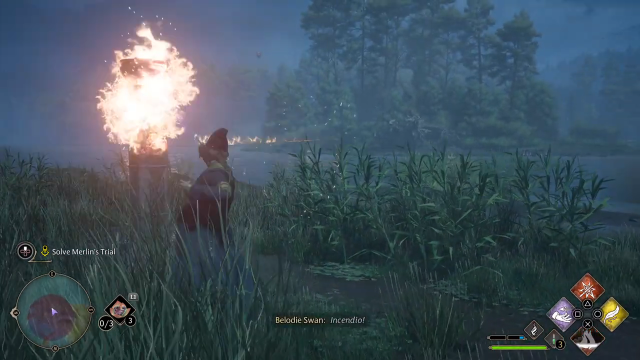
Solve Merlin Trial: cast Incendio on the three pyres.
Speak to Nora Treadwall: after solving the trial, Nora ones to speak to you. With talking to her, you end this quest.
At 01:04:04 starts Trials Of Merlin quest.
Trunk with Mallowsweets
Stone swirl
Solvin the trial
Prisoner Of Love (Hufflepuff Quest) The portrait of Eldritch Diggory, former minister for magic, may have some information for you. Eldritch Diggory wants you to travel to Upper Hogsfield and speak to Helen Thistlewood, his great-niece and a retired Auror. You only get this quest when you are in Hufflepuff House. Here you can find all your subjects for the quest and explanations behind it.
Speak to the portrait of Eldrich Diggory: the portrait is your common room. Follow the map towards it.
Speak to Helen Thistle wood: she is in Upper Hogsfield. The map will lead you towards her.
Speak to Anne in Azkaban: Helen will take you to her.
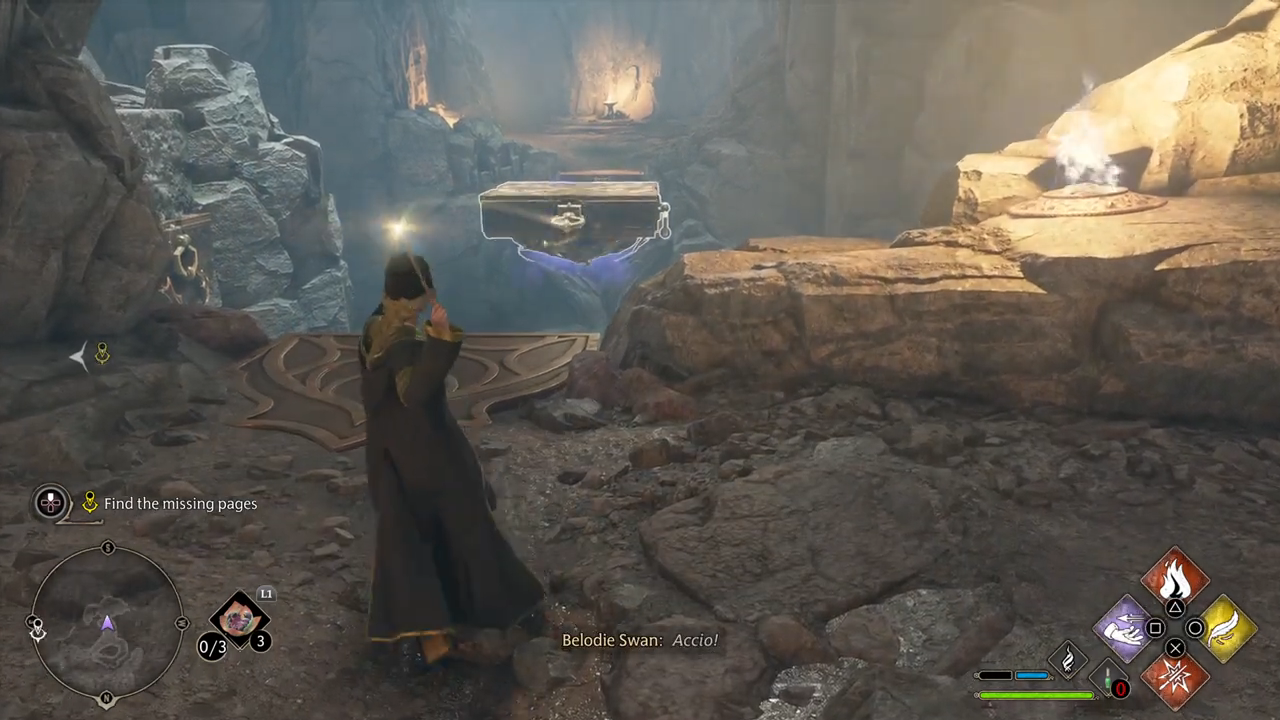
Find what Jackdaw left to Anne: follow the map to the gave. Then you have to solve a puzzle. Look at the first two images for the solution. Then you can find the pages.
Leave the Vault: go outside the gave, there you see Richard Jackdaw.
At 00:17:59 starts Prisoner Of Love quest.
Solution Puzzle Right Side
Solution Puzzle Left Side
The pages Jackdaw left for Anne
Jackdaw’s Rest The ghost of Richard Jackdaw is going to meet you at the edge of the forbidden Forest. He said he’ll show you to get the cave where he died. He’s certain the missing pages are still there with his decapitated remains. Here you can find all your subjects for the quest and explanations behind it.
Meet Richard Jackdaw at the Forbidden Forest: go to the entrée of the forbidden forest and then follow the map.
Follow Jackdaw through the Forbidden Forest: follow the ghost.
Find the cave where Richard Jackdaw died: follow the map. It will lead you to the cave.
Whisper the password: interact with the birdbath. After that there will appear some Loyalist. You have to defeat them in a battle.
Investigate the cave where Jackdaw died: go inside the cave.
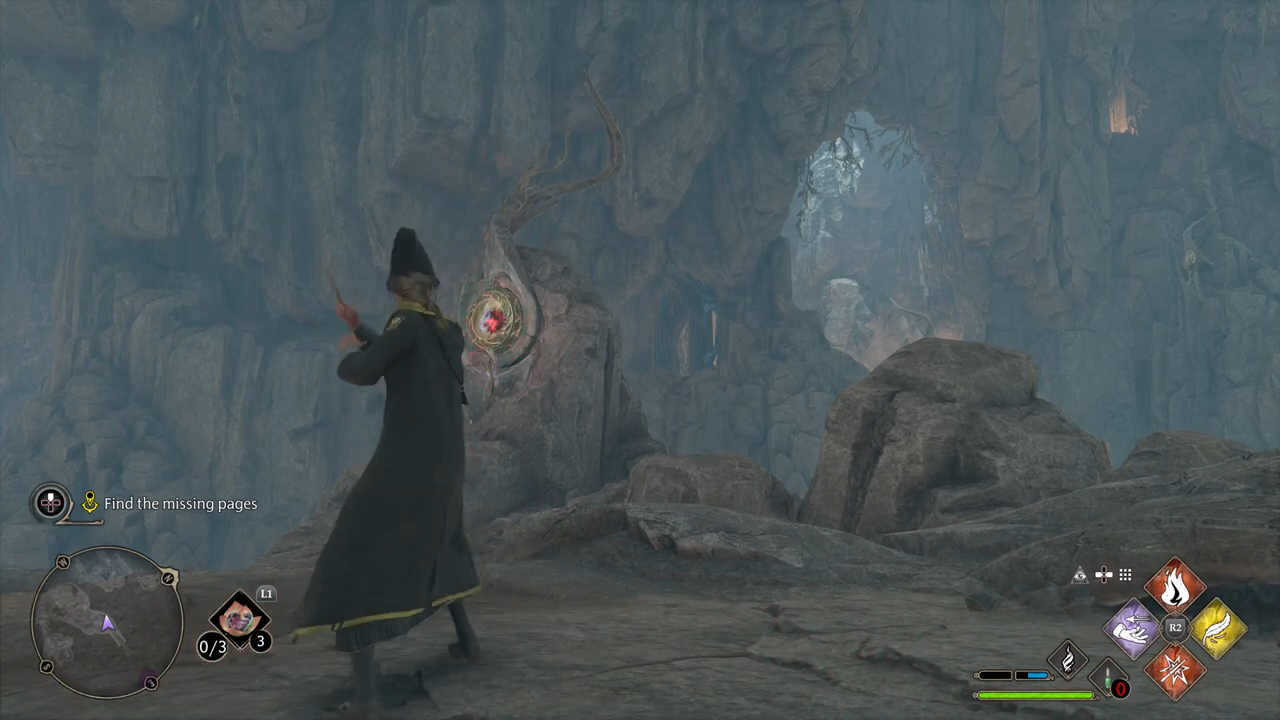
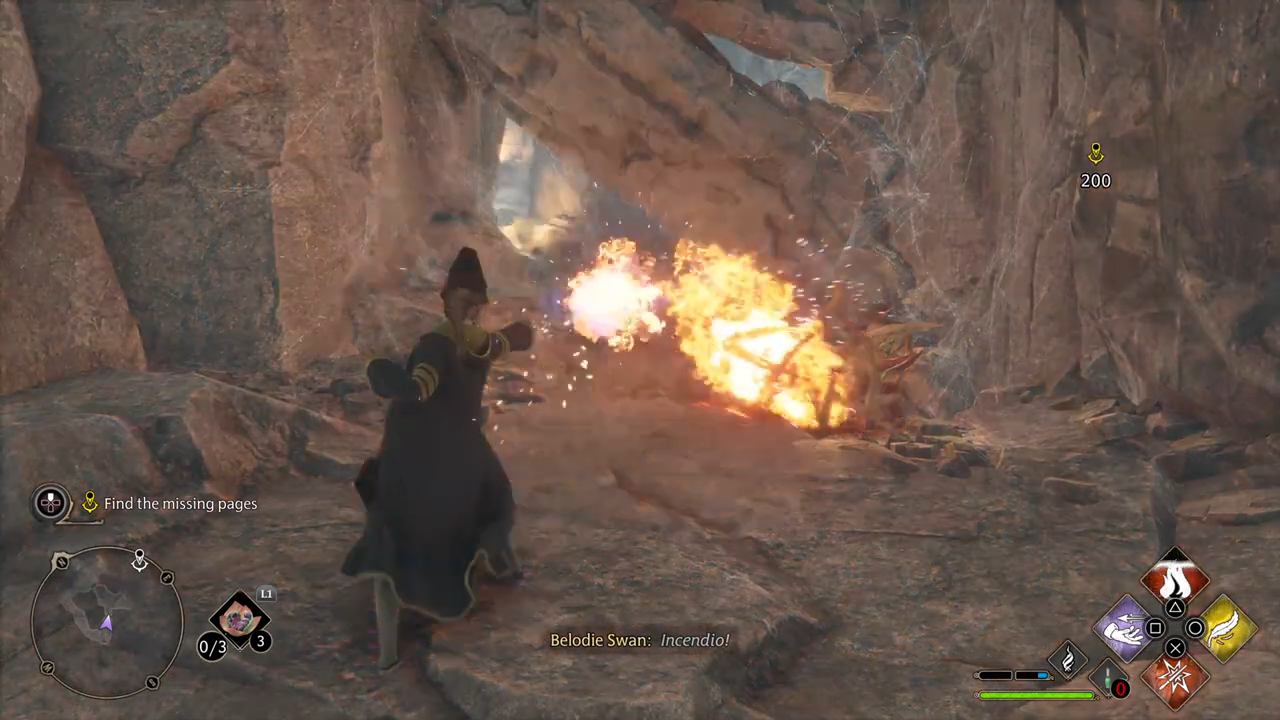
Find the missing pages: you will have to find your way to a kind of maze. You need to fight with spiders. Use basic spells to open gates, Incendio to get spider webs away and accio to get platforms towards you or bring the platforms to the next place.
Defend yourself against the Ancient Defenders: Defeat the statues.
Investigate the traces of ancient magic: interact with the ancient magic. Then you have to walk through the portal and follow the way.
Speak to the portrait: interact with the portrait.
Exit the map chamber: go outside the room through the stairs. You will enter away back to Hogwarts and their this quest will end.
At 01:22:39 starts Jackdaw’s Rest quest.
Accio on platforms
Basic spells to open gates
Incendio on a spider web
Flying Class In today’s Flying class, Madam Kogawa is reviewing basic broom flight and maneuverability. Here you can find all your subjects for the quest and explanations behind it.
Go to Flying Class: follow the map to your first flying class and begin the class.
Fly through the 3 rings: move yourself through the 3 rings, the order doesn’t matter.
Fly through the rings around the grounds: you have to fly through 11 rings.
Follow Everett Clopton: try to stay close to Everett.
Return to the courtyard: go to the yellow mark on the map.
Land and dismount: step off your broom and talk with the professor. After talking with her, you completed this quest.
At 00:00:00 starts Flying Class quest.
The Room Of Requirement Professor Weasley has requested you meet her in the seventh-floor corridor of the Astronomy tower. This is an odd location for a meeting. You wonder what she wants. Here you can find all your subjects for the quest and explanations behind it.
Meet with Professor Weasley: follow the map to the meeting place.
Follow Professor Weasley: try to stay close to the professor. When you stumble up on some chairs, the professor will teach you Evanesco.
Explore the Room of Requirement: walk around the room, pick things up and practice your new spell until you find Deek the elf.
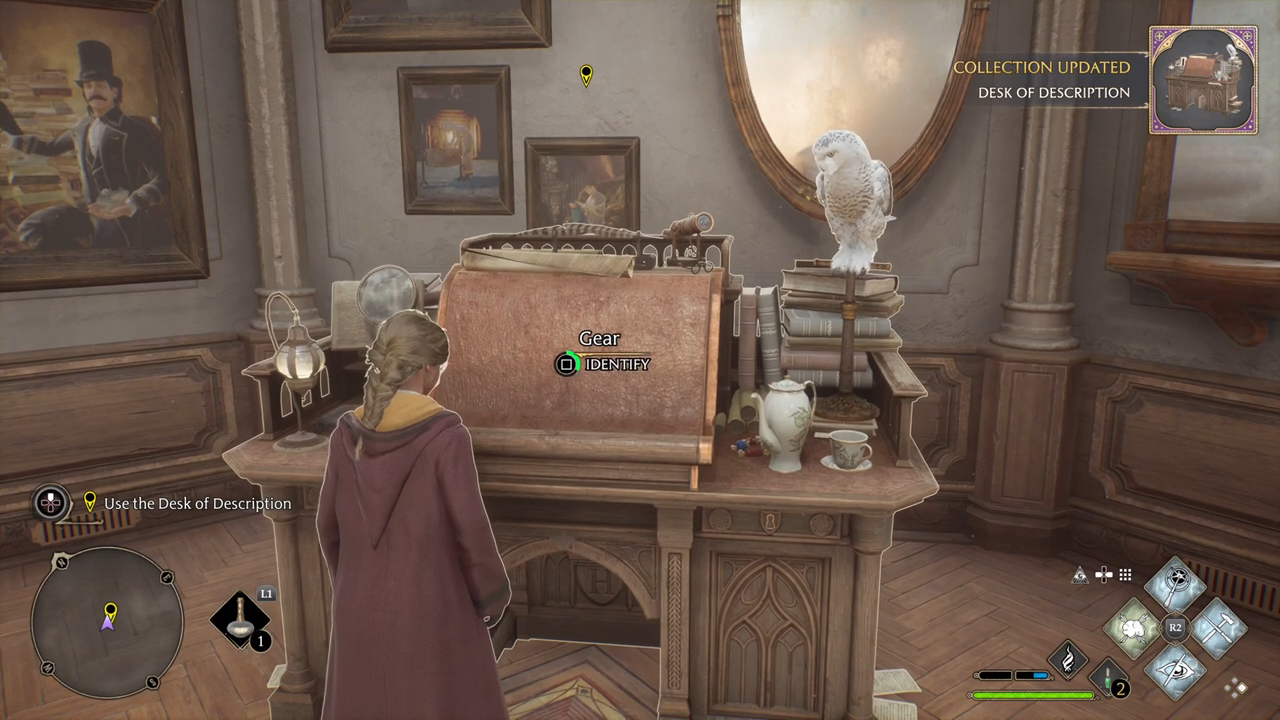
Use the Desk of Description: interact with your new desk.
Speak to Professor Weasley: walk to the professor and talk with her. She will teach you the conjuring spell.
Conjure a potting table: use your new spell to get a potting table and place it in your room.
Conjure a Potions Station: use your new spell to get a potions station and place it in your room. After putting the last object in your room, you will have a conversation with Professor Weasley, and then you have completed this quest.
At 00:14:04 starts The Room Of Requirement quest.
Interacting with the Desk of Description
In The Shadow Of The Undercroft You can probably find Sebastian at his usual spot near the Defence Against the Dark Arts classroom. Sebastion knows about a secret room where you two can discuss things privately. Here you can find all your subjects for the quest and explanations behind it.
Meet Sebastion: follow the map to Sebastian and talk with him.
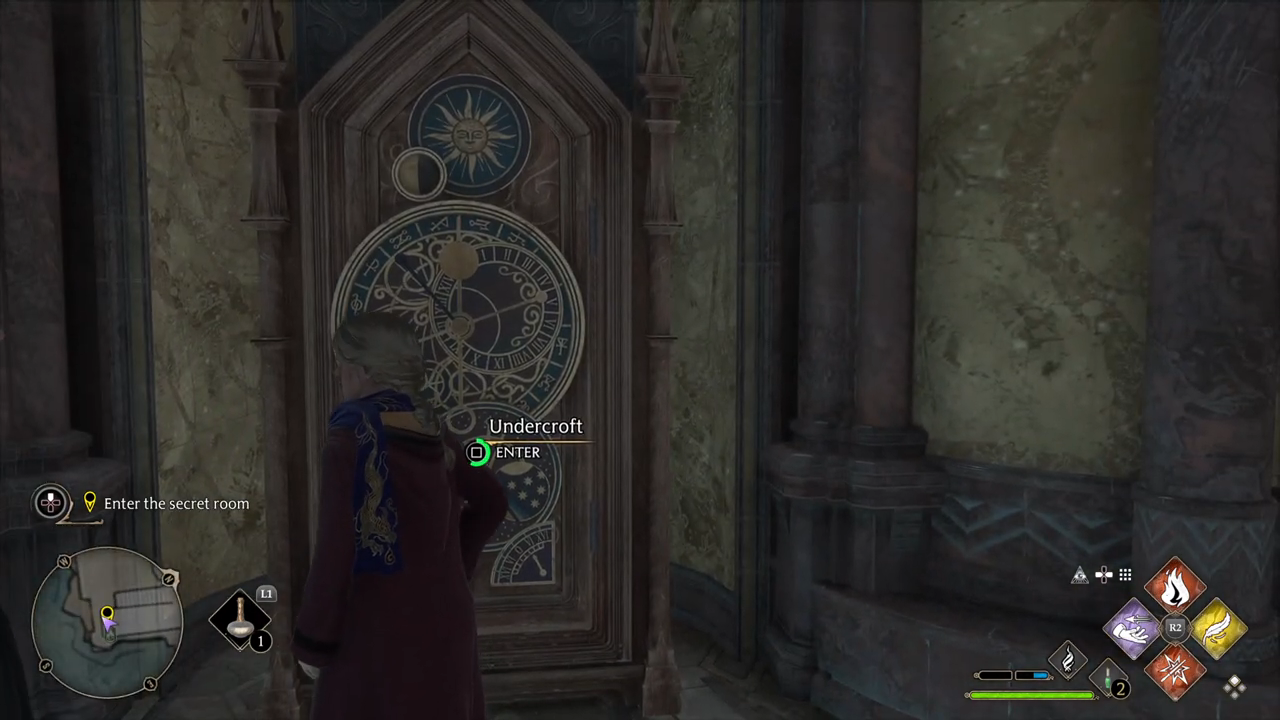
Enter the secret room: follow Sebastion into the secret room.
Explore the room: walk around the room until Sebastion is done with talking.
Talk to Sebastion: go talk with Sebastion. He will learn you Confringo.
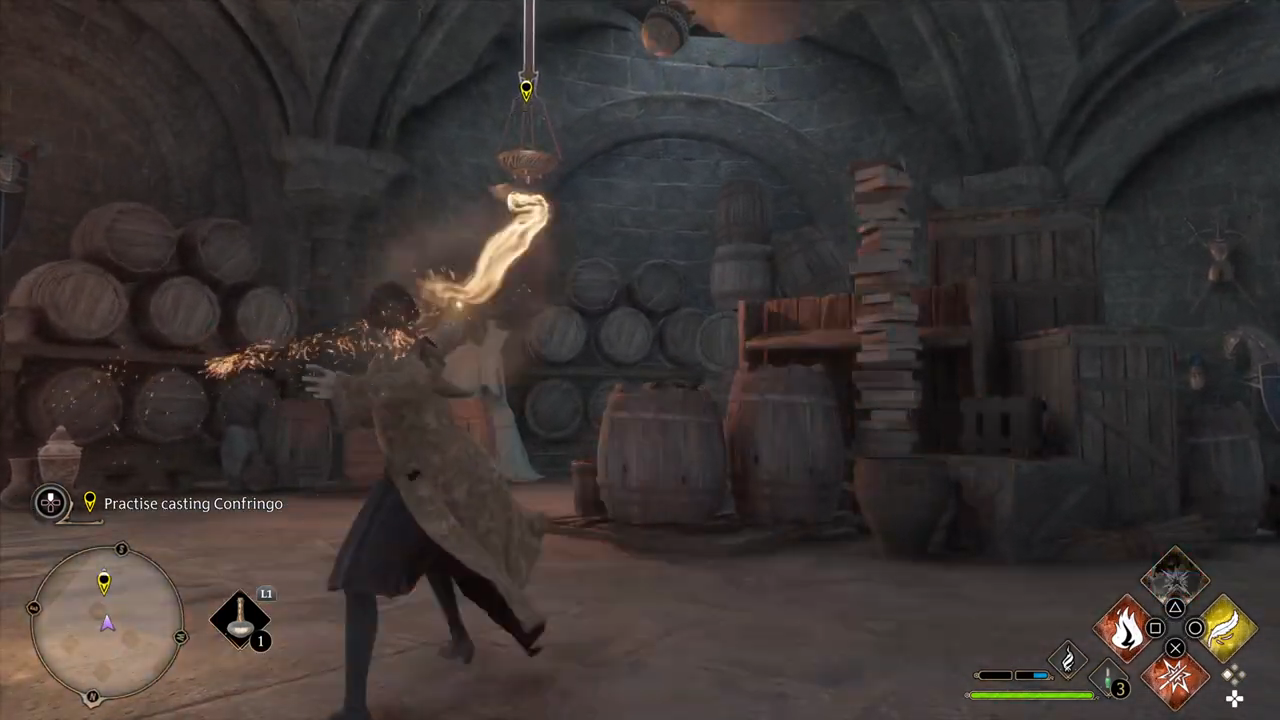
Practice casting Confringo: cast confringo on the three candelabras.
Check back with Sebastian: talk to Sebastian.
Leave the Undercroft: go outside the secret room. There you see Ominis Gaunt. After having a conversation with him, your quest is completed.
At 00:53:11 starts In The Shadow Of The Undercroft quest.
Entering the Undercroft
Casting confringo on the candelabras
The Map Chamber Now that Professor Fig has returned. You’re excited to show him the missing pages and the secret map chamber you found below the school. Here you can find all your subjects for the quest and explanations behind it.
Report to Professor Fig: follow the map to professor Fig’s chamber.
Enter the map chamber: follow the map to the entrance of the map chamber.
Speak to the portrait of Professor Rackham: go talk with the portrait. After the conversation, you have completed the quest.
At 00:00 starts The Map Chamber quest.
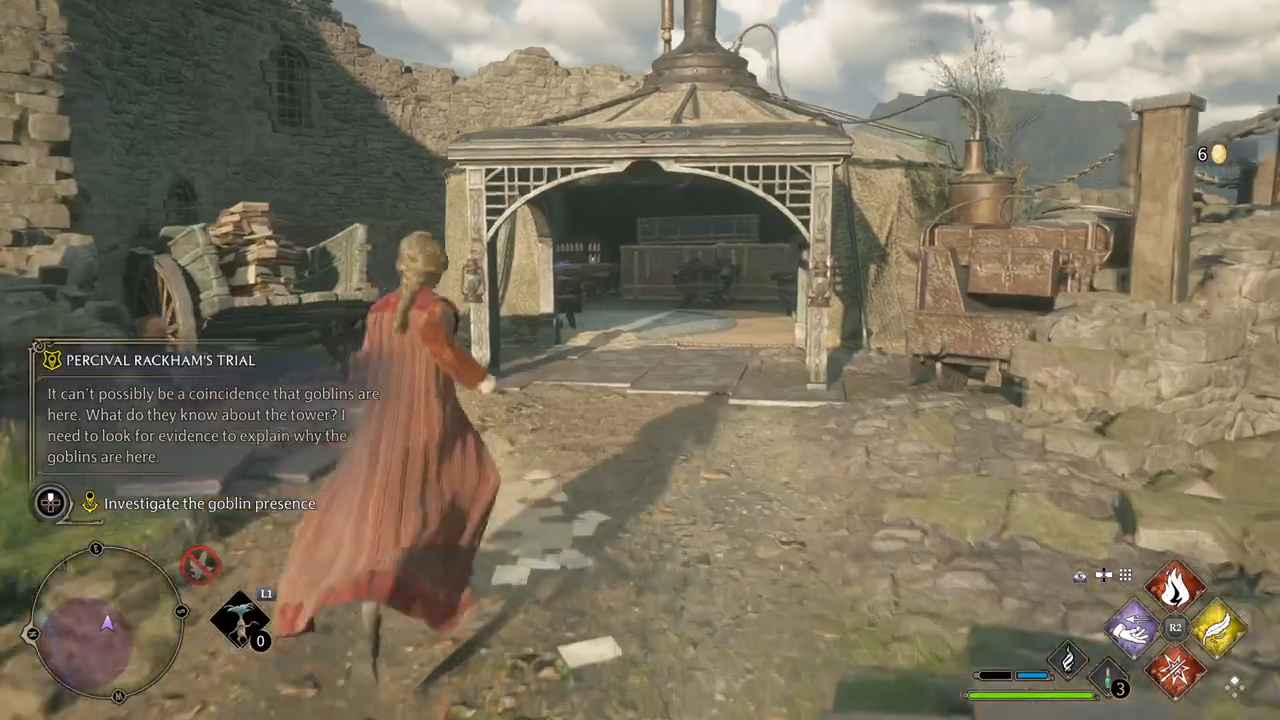
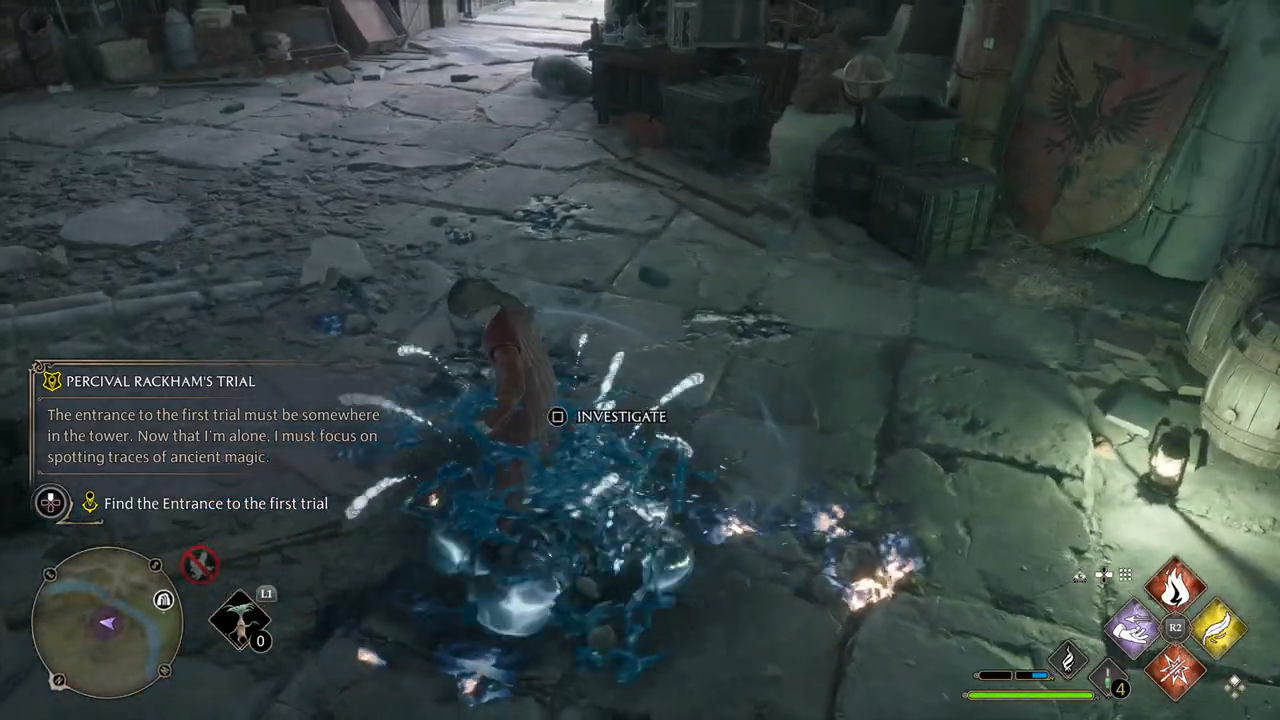
Explore the Tower You need to meet Professor Fig outside the Tower. It can’t be a coincidence that goblins are here. What do they know about the tower? You need to look for evidence to explain why the goblins are here. Here you can find all your subjects for the quest and explanations behind it.
Meet Professor Fig at the tower: follow the map towards the tower.
Investigate the goblin presence: try to get pass the goblins to a tent on the left side. There you find a note from Ranrok.
Get past the goblins: defeat all the goblins in a duel.
Search the tower: follow the professor inside the tower and look for the painting of Percival Rackham. His painting is at the end of the stairs.
Find the Entrance to the first trail: go back downstairs, there you will find traces of old magic.
Enter Percival Rackham’s trail: go inside the gate and go through the door at the end of the hallway.
Complete Percival Rackham’s trial: try to solve all the puzzles on your way and defeat the protectors.
Defeat the Guards: try to defeat the guards in a duel.
Learn the trial’s secret: use the pensive to see the memory.
Return to the Map Chamber: walk through the gate back to the map chamber.
Speak to Fig and Professor Rackham: walk towards professor Fig, the conversations start automatically.
Speak with Charles Rookwood: talk with the painting of Charles Rookwood. After this conversation, you have completed the quest.
At 00:00 starts Explore the Tower quest.
Tent on the left side
Entrance to the trail
The Helm Of Urtkot You need to travel to Hogsmeade. You should be able to find Sirona inside the Three Broomsticks. Sirona said that the goblin you are looking for is named Lodgok – he’s known to frequent the Hog’s Head Inn. Sirona personally vouched for him and told you to tell Lodgok that she sent you. Lodgok asked you to meet him on the outskirts of Hogsmeade. From there, he will show you the way to the witch’s tomb. Lodgok knows the way to the witch’s tomb – You need to follow him to the entrance. According to rumor, the Helmet of Urtkot should be in the sarcophagus of the deceased witch. Hopefully it’s not guarded by something horrible – seems like every time you walk into a cave, there is something ghastly waiting inside. Unfortunately, it looks like Ashwinders got to the tomb before you did and made off with the relic. You need to get back to Lodgok and let him know the helmet is gone. From evidence in the tomb, the relic was stolen by Ashwinders. They are known to have an encampment nearby in the Forbidden Forest. You need to find it and get the helmet from them. You managed to retrieve the Helmet of Urtkot from the Ashwinders. Now you need to bring it to Lodgok at the entrance of the witch’s tomb. Here you can find all your subjects for the quest and explanations behind it.
Speak to Sirona in the Three Broomsticks: follow the map to the three Broomsticks and speak there with Sirona.
Look for Lodgok at the Hog Head’s Inn: follow the map towards the Hog Head’s Inn and talk to Lodgok.
Meet Lodgok near the witch’s tomb: follow the map towards the witch’s tomb.
Follow Lodgok to the tomb’s entrance: try to stay close to Lodgok.
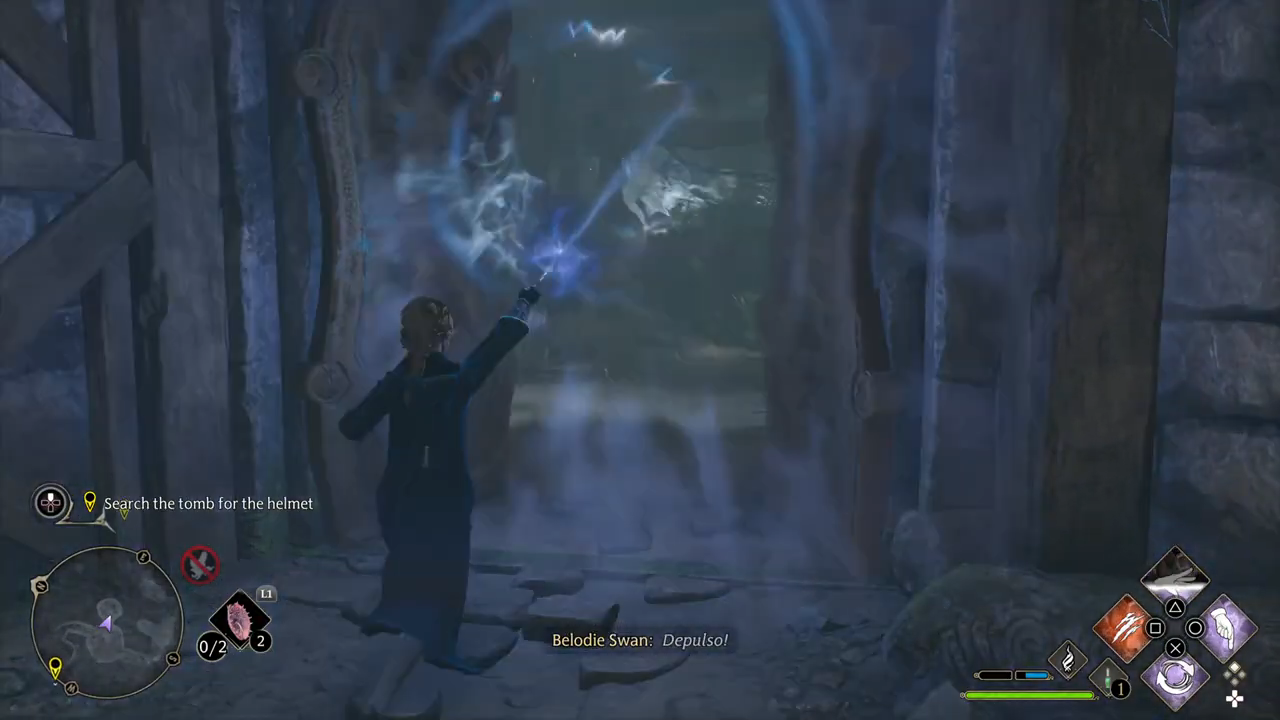
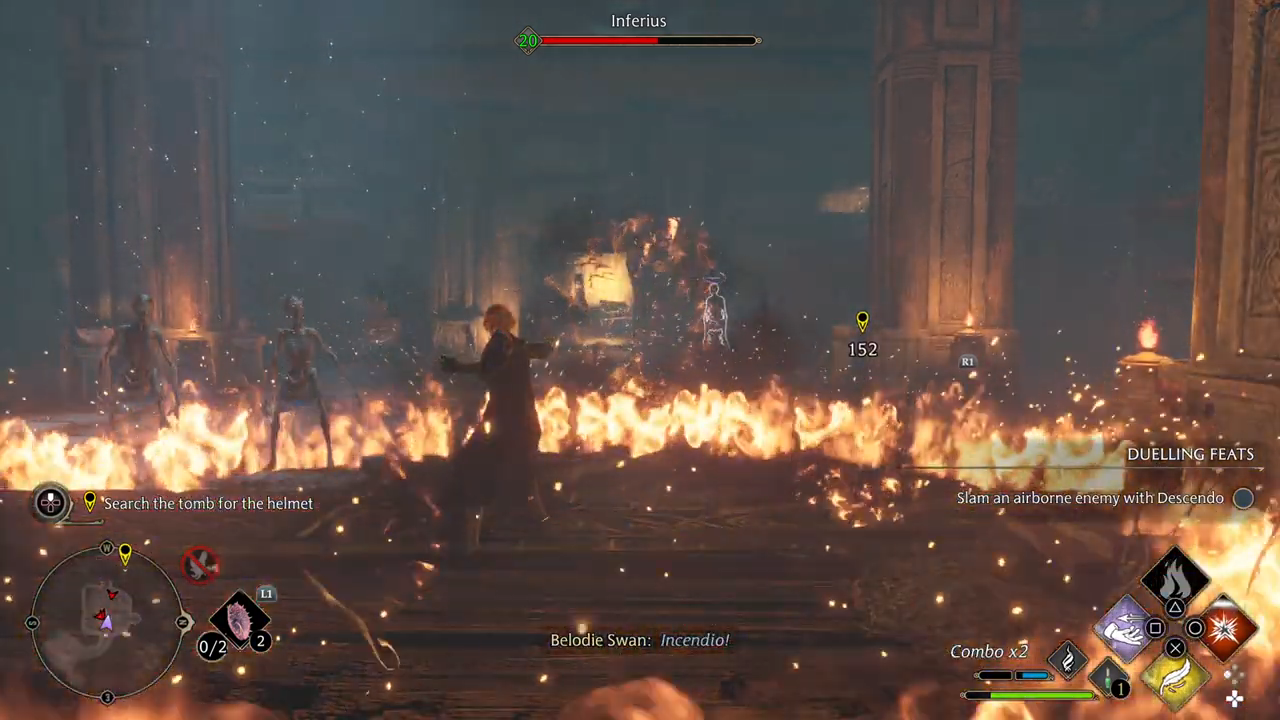
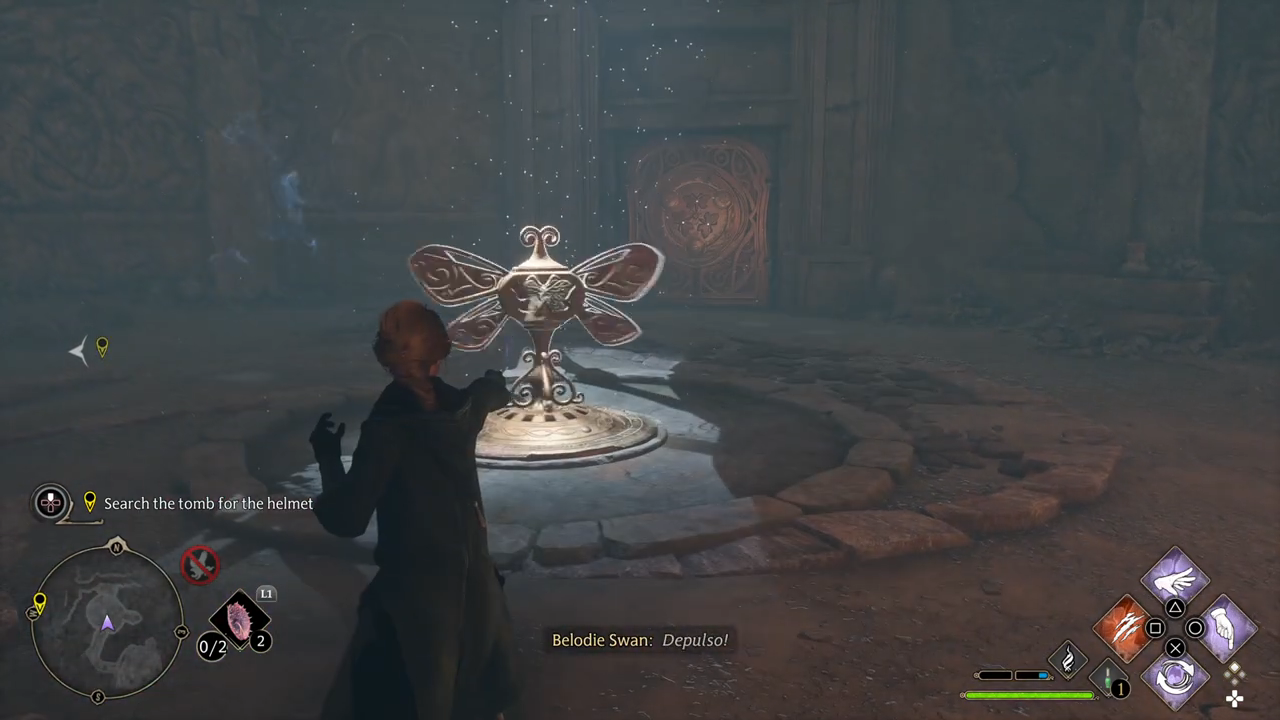
Search the tomb for the helmet: go inside the tomb. There you have to solve some puzzles and defeat enemies. You have to bring moths to doors with Lumos and use depulso to spin the moths. Open doors with Depulso. Fight with Inferius, use incendio and confringo on them. They don’t like fire.
Return to Lodgok: go back outside the tomb.
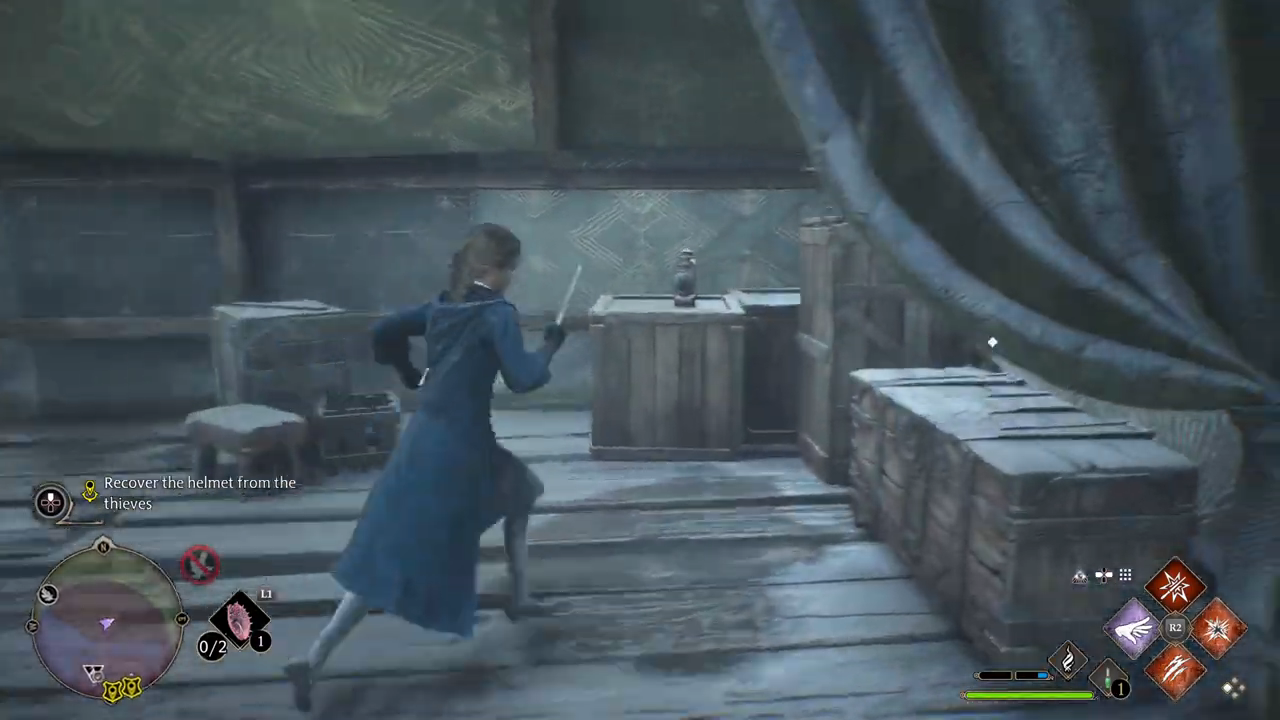
Recover the helmet from thieves: follow the map to the thieves and defeat them. And find the helm in the chest in the green tent.
Return the helmet to Lodgok: follow the map back to Lodgok and talk with him. After talking with him, you complete this quest.
At 00:00:00 starts The Helm Of Urtkot quest.
Bringing Moths to doors
Depulso on doors
Figthing Inferius
Depulso to make Moths spin
Finding the Helmet
Beasts Class You need to attend Beasts class, taught by Professor Howin. Professor Howin has asked me to brush Gerald the Puffskein. I should use the Beast Petting Brush that Poppy gave me. Now I need to give Gerald the Puffskein some food. Poppy has given me some Beast Feed for him. Now that you have finished with Gerald, it’s time to move on to the Kneazles. You need to use the Beast Feed and Beast Petting Brush to feed and groom the Kneazles. Now that class has ended, Professor Howin would like a word with me. Poppy is calling me over. You should see what she wants. Poppy wants to show you something she says she hasn’t shown anyone else. You wonder what it could be – You should follow her. Poppy introduced me to a Hippogriff called Highwing. Now that you have bowed to her to show her respect, you should feed and brush her to show her you are a friend. You better be careful of that beak, though. Here you can find all your subjects for the quest and explanations behind it.
Go to Beasts class: follow the map to your class.
Brush the Puffskein: put the brush on your spell set and use it on puffskein.
Feed the Puffskein: put feeding on your spell set and use it on the puffskein.
Brush a Kneazle: use your brush spell on the kneazle.
Feed a Kneazle: use your feeding spell on the kneazle.
Speak with Professor Howin: go talk with the professor.
Talk to Poppy: talk with Poppy.
Go with Poppy: try to stay close to Poppy.
Brush Highwing: use your brushing spell on Highwing.
Feed Highwing: use your feeding spell on Highwing. After feeding Highwing you have completed this quest.
At 01:22:13 starts Beast Class quest.
The Caretaker’s Lunar Lament Gladwin Moon, the Hogwarts caretaker, wishes to speak with you about something. You should find him near the Reception Hall. Gladwin wants you to remove the moon from the Demiguise statue. Gladwin Moon has more details he wishes to share. I should follow him and listen as we walk. Gladwin taught you Alohomora, which he now wants you to use to unlock the door to the Faculty Tower. According to the Caretaker, there is a Demiguise statue in the Prefects’ Bathroom and another one in the hospital wing. He wants you to use Disillusionment to sneak into the Faculty Tower and retrieve them. You need to be careful not to get caught. Now that you have collected the moons from the Demiguise statues, you need to return to Gladwin Moon, back at the entrance to the Faculty Tower. Here you can find all your subjects for the quest and explanations behind it.
Talk to Gladwin Moon: follow the map to Gladwin Moon and talk with him.
Remove the moon from the statue: walk to the statue and collect it.
Follow Gladwin: try to stay close to Gladwin. At the end of the walk, he will learn you Alohomora.
Use Alohomora to open the Faculty Tower door: use your new spell on the door. You have to move the red dot until the middle things start to spin. And the green dot so that the right things will spin.
Retrieve the Demiguise moon in the Prefects’ Bathroom: use the Disillusionment charm and follow the map to the bathroom. Collect there the statue.
Retrieve the Demiguise moon in the Hospital Wing: use the Disillusionment charm and follow the map to the Hospital Wing. Collect there the statue.
Return the Demiguise moons to Gladwin: follow the map back to Gladwin. After talking with him, you have completed this quest.
At 0135:45 starts The Caretaker’s Lunar Lament quest.
Collecting the first Statue
Using Alohomora first time
Demiguise moon at the Prefect Bathroom
Demiguise moon at the Hospital
The Elf, the Nab-Sack, and The Loom Deek wants to teach you how to use the nab-sack to rescue magical beasts. You need to talk to Deek about heading out to search for magical beasts to rescue with the nab-sack. You need to follow Deek to where he wants you to use the nab-sack. You are looking forward to seeing how it works. Deek wants you to use the nab-sack to rescue a Puffskein. You just need to get close enough to use it before the beast runs off. Now that you have rescued a Puffskein, you should talk to Deek and see what he wants me to do next. Deek is scouting ahead for the location of a Jobberknoll habitat. He wants you to meet him at a large tree near the edge of a cliff to the West. Deek wants you to use the nab-sack to rescue a Jobberknoll. You may need to cast Levioso on it to keep it from flying away before you can collect it. You have rescued a Jobberknoll, as Deek asked. You should return to him and see what’s next. Deek told me of a large tree with a spiral pattern in front of it where you can rescue a Mooncalf. You need to rescue a Mooncalf with the nab-sack, but these beasts will only come out at night. Perhaps you should wait until then. You should speak to Deek and let him know that you have successfully rescued a Mooncalf with the nab-sack. Deek wants you to bring the nab-sack and the rescued beasts back to the Room of Requirement. You should investigate the new area created by the Room of Requirement. You are excited to see what the room has provided. The Room of Requirement has provided a vivarium where you can care for my rescued beasts and keep them safe from poachers. According to Deek, if you brush and feed the beasts you have rescued, they will provide magical materials that have a variety of uses. You need to collect a Jobberknoll feather, hair from a Puffskein, and some Mooncalf fur. You have collected the magical materials. You should talk to Deek and learn how to use them. Deek provided you with a spell craft to conjure an Enchanted Loom. He says you can use the Loom to weave the magical materials into my clothing. You should return to the Room of Requirement and conjure one. You should try using the Enchanted Loom to add magical properties to my clothing. Upgrading your clothes with the Enchanted Loom went smoothly. You should let Deek know of your success. Here you can find all your subjects for the quest and explanations behind it.
Check in with Deek: follow the map to the requirement room and talk with Deek.
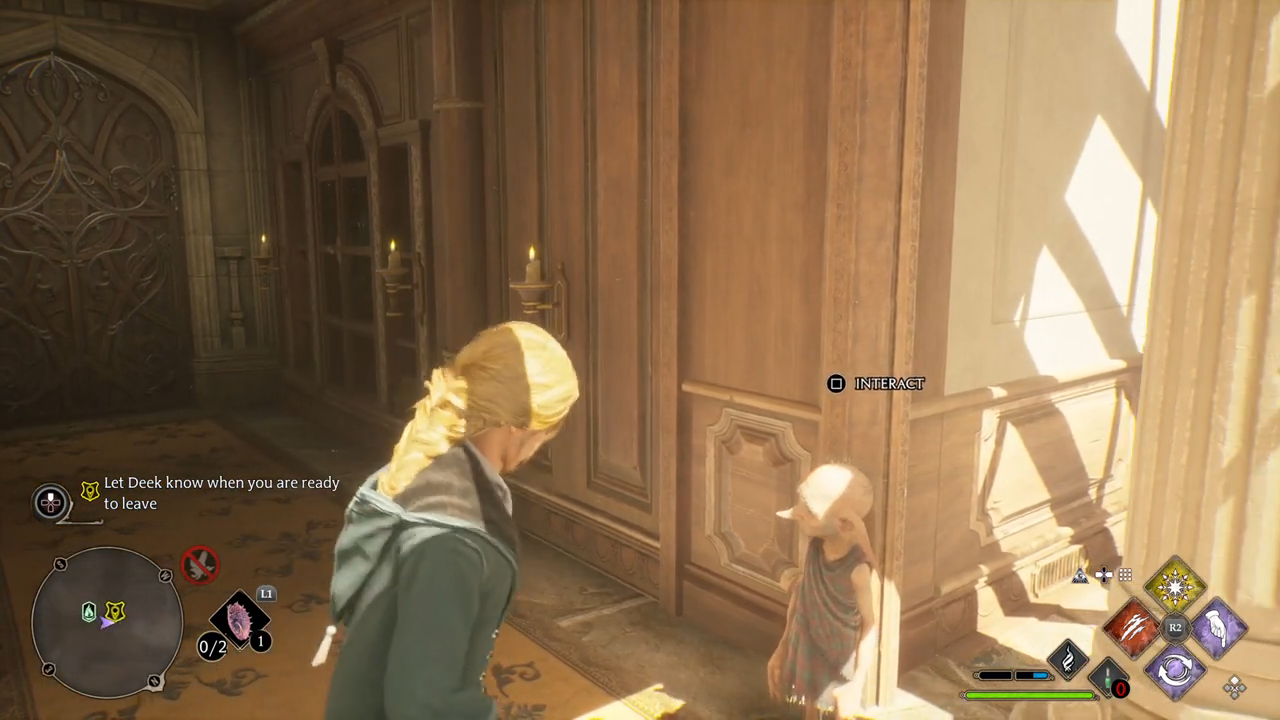
Let Deek know when you are ready to leave: interact with Deek to leave.
Follow Deek: try to stay close to Deek
Rescue a Puffskein: put the nab-sack on your spell set and use it to catch a Puffskein.
Talk to Deek: walk back to Deek and talk with him.
Meet Deek near the Jobberknoll habitat: follow the map to the Jobberknoll habitat and talk there with Deek.
Rescue a Jobberknoll: use the nab-sack to rescue a Jobberknoll.
Talk to Deek: walk back to Deek and talk with him.
Meet Deek near the Mooncalf habitat: follow the map to the Mooncalf habitat and talk there with Deek.
Rescue a Mooncalf: use your nab-sack to rescue a mooncalf at nighttime.
Talk to Deek: walk back to Deek and talk with him.
Return to the Room of Requirement: go back to the room of requirement.
Meet Deek inside the new creation: go inside and talk with Deek.
Release rescued beasts into the vivarium: release the beast to their new home.
Collect a Jobberknoll feather: give the Jobberknoll food and brush it to collect feathers.
Collect Puffskein fur: give the Puffskein food and brush it to collect fur.
Collect Mooncalf fur: give the Mooncalf food and brush it to collect fur.
Speak with Deek: walk back to Deek and talk with him.
Exit the vivarium: go outside the vivarium.
Conjure an Enchanted Loom: put the enchanted loom in the room of requirement.
Add a trait, an item of clothing: add a trait to your clothe with using the Loom.
Upgrade an item of clothing: upgrade your clothes using the Loom.
Tell Deek you have used the Enchanted Loom: walk to Deek and talk with him. By talking with, you have completed this quest.
At 02:06:34 starts The Elf, the Nab-sack, and The Loom quest.
Interacting with Deek to leave
In The Shadow Of The Estate You promised Sebastian you would meet him [in] Feldcroft. He hopes meeting a new student will bring some cheer to his sister Anne. But there’s something ominous happening in Feldcroft. Sebastian thinks that meeting me will cheer his sister up. You hope he’s right. You should follow him to their home in Feldcroft. You suppose you should step inside. You hope that you are not arriving unannounced. Sebastian needs time alone after arguing with his uncle over his sister’s condition. Anne suffered a bout of pain from her curse, and it is distressing for the entire family. You should talk to Solomon and Anne. Perhaps there’s something you can do to help. You should check on Sebastian. The situation with his sister and uncle has put a great strain on him. Sebastian wants you to follow him to the site where his sister was attacked. A troop of Ranrok’s Loyalists have set up an excavation at the site where Sebastian’s sister was cursed. Their presence here cannot be a coincidence. We must defend Feldcroft. That was a fight – You better talk to Sebastian and make sure he’s unharmed. Sebastian told me the story of how Anne was cursed by Ranrok’s Loyalists at this location. This estate seems to be important to them – they are clearly searching for something. You should see what you can find. You seem to have discovered a hidden cellar. Perhaps it holds what the goblins have been searching for. You should look. You found more crystallized stone and another passageway in the cellar. You should tell Sebastian that it’s here. The goblins couldn’t see it, which is why it eluded them. You wonder if this passage works like the others you have seen. You should lead the way, since Sebastian cannot see what you can. The triptych contained a scrap of parchment with runes and symbols scrawled on it. They are like ones you have seen during the Keepers’ trials. This piece of parchment may be connected to the Keepers. You should show it to Sebastian and tell him more of what I know. Here you can find all your subjects for the quest and explanations behind it.
Meet Sebastian in Feldcroft: follow the map to Feldcroft and talk with Sebastian.
Follow Sebastian: try to stay close to Sebastian.
Enter the Sallow home: go inside the house.
Speak with Anne and Solomon: go talk with Anne and Solomon. Anne is inside the house and Solomon is outside, next to a carriage.
Talk to Sebastian: the map will show you where he is.
Follow Sebastian: try to stay close to Sebastian.
Defend Feldcroft: fight against Ranrok’s Loyalists.
Speak to Sebastian: the map shows you where he is. Go talk with him.
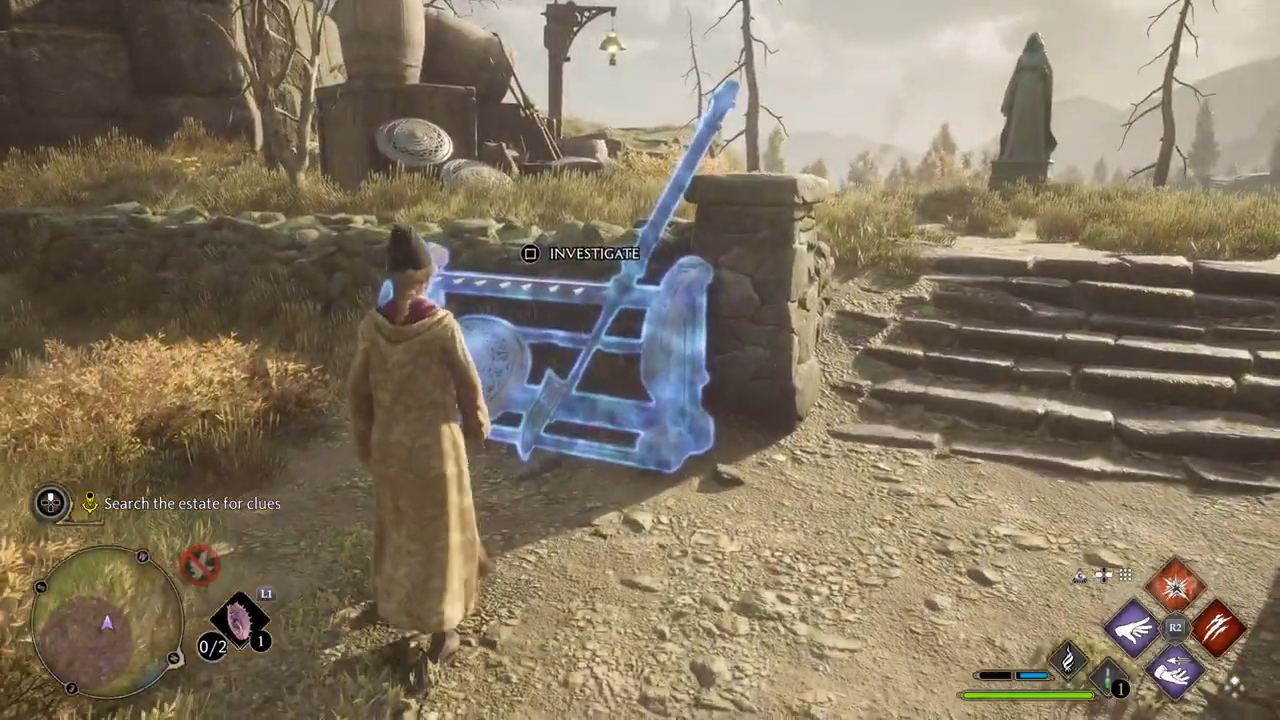
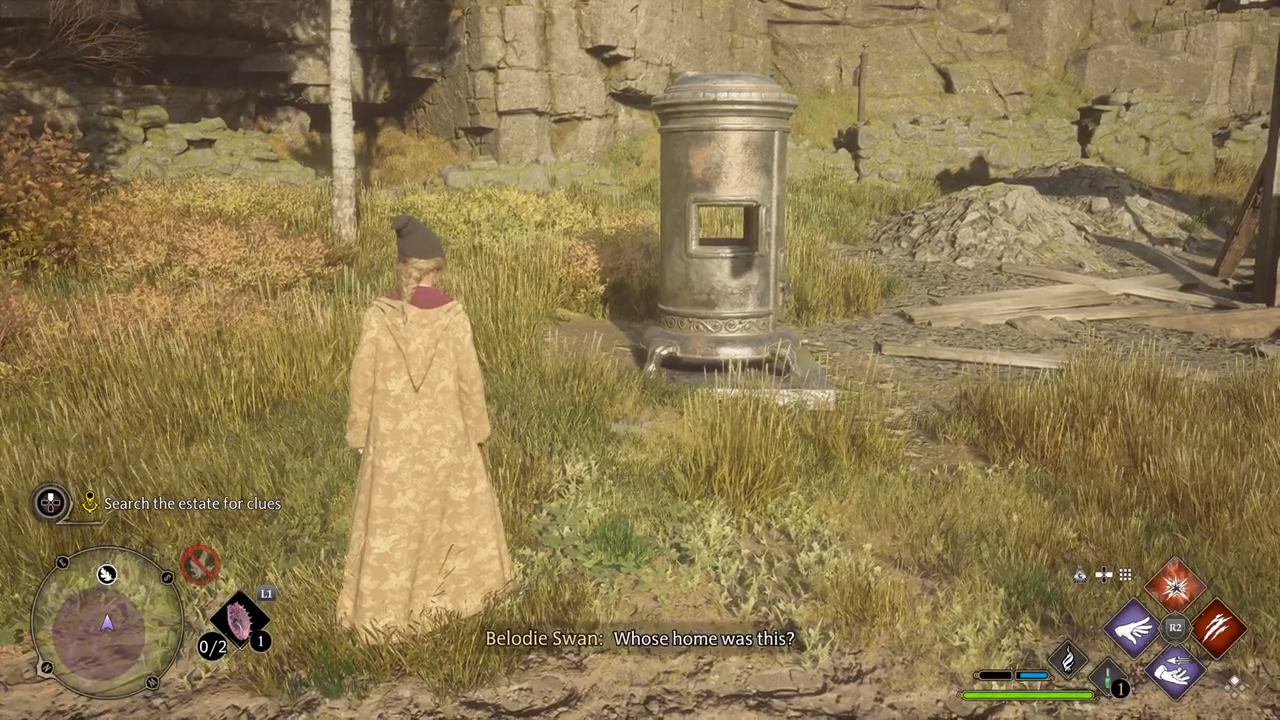
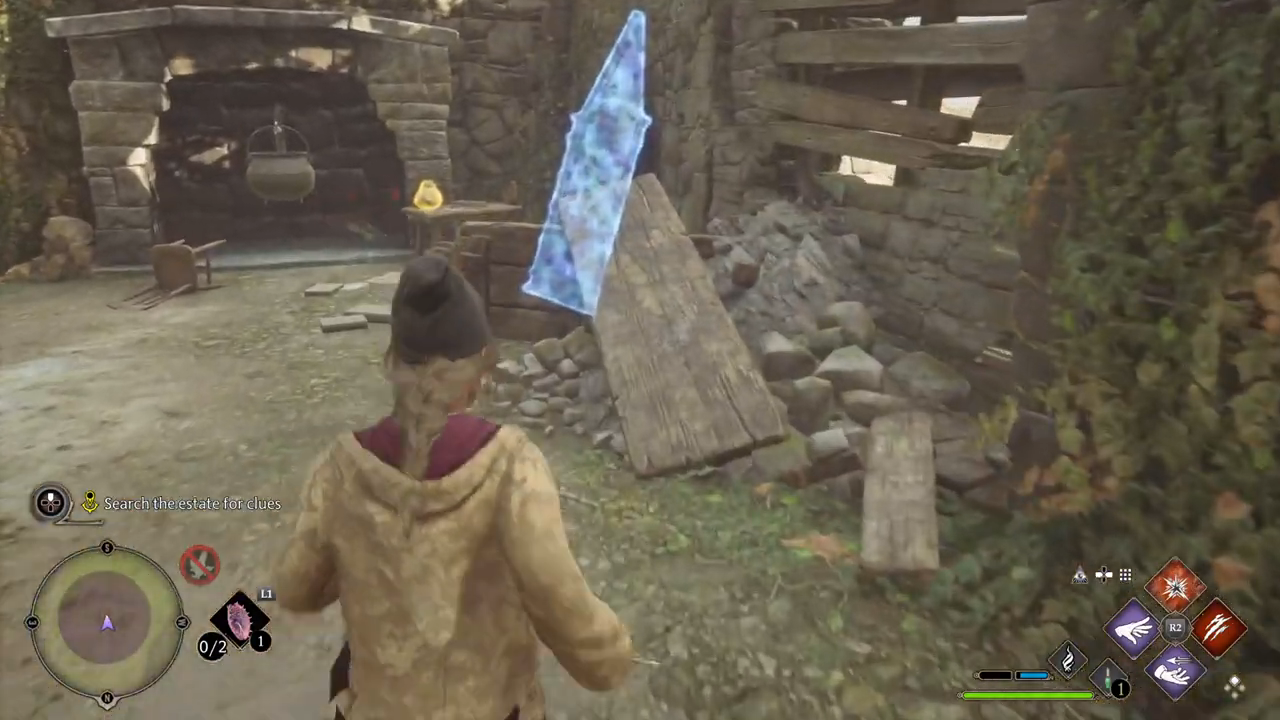
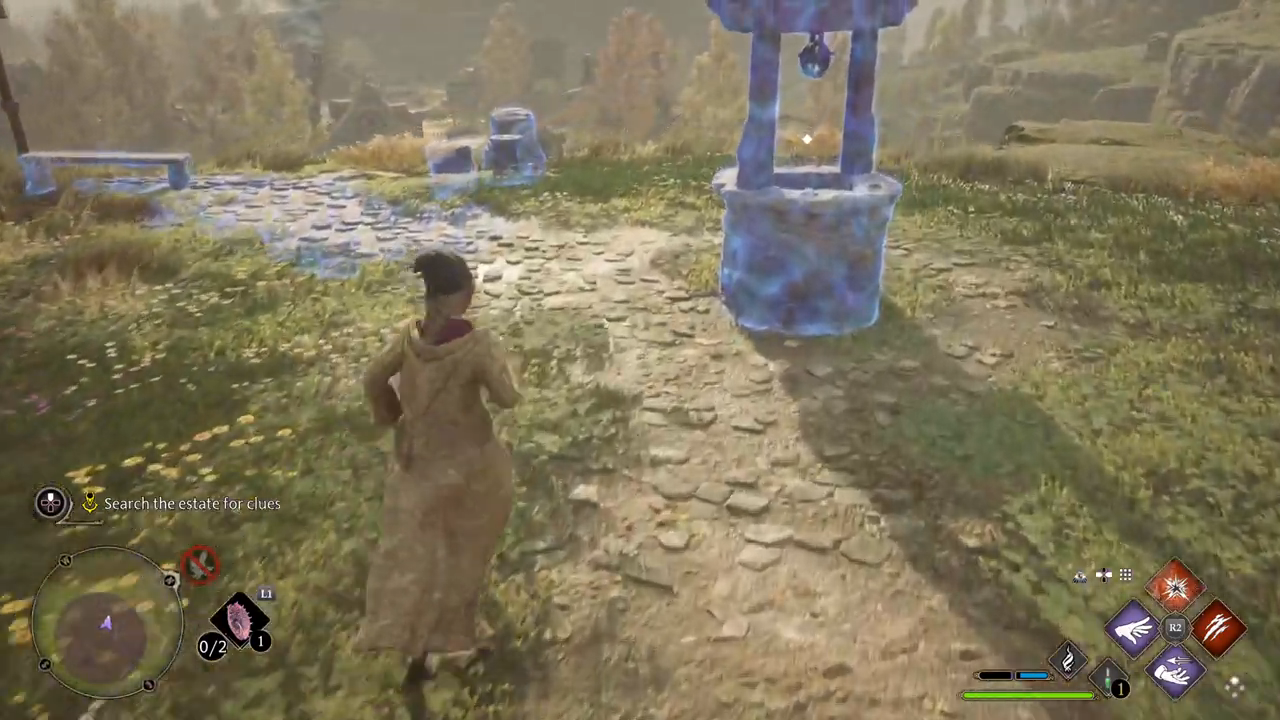
Search the estate for clues: with using Revelio there will light up to things. Investigate them both. Then you get to move on to the house. There you will find a painting, a well and a view. Talk then with Sebastian and use Depulso on the blocks that are blocking the way.
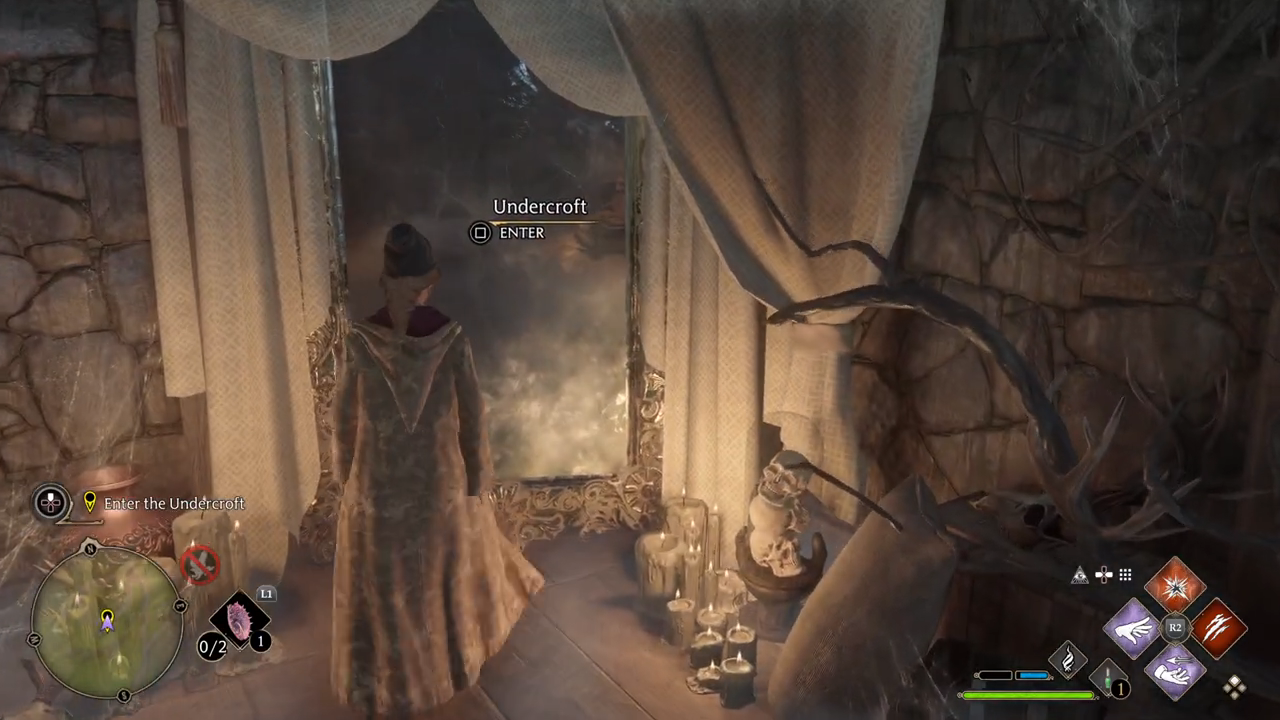
Explore the cellar: go down the stairs. Read all the notes that lie in the cellar. You have to sometimes use depulso to get further in the cellar. There you will find a way to the undercroft.
Speak to Sebastian: explain to Sebastian, what you have found.
Enter the Undercroft: go through the passage way.
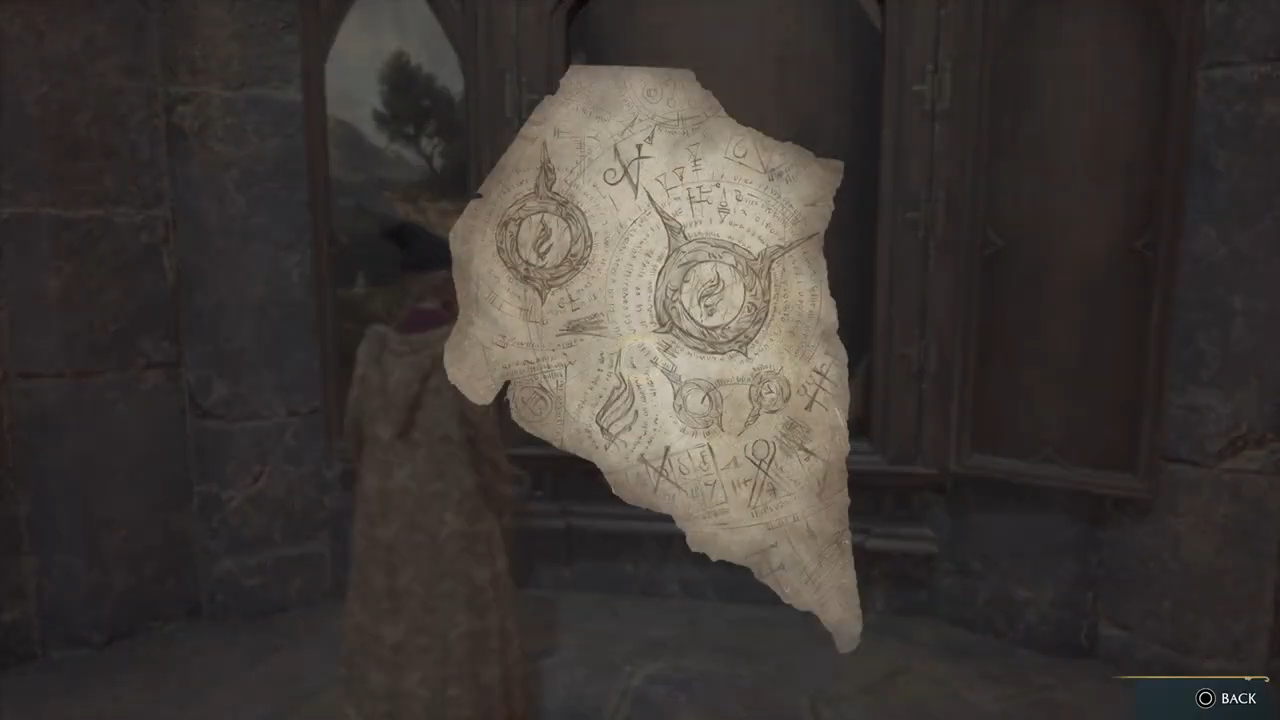
Examine the note: look at the note that appeared after getting back to the Undercroft.
Show the note to Sebastian: with talking to Sebastian, you show him the note and complete this quest.
At 02:50:04 starts The Shadow Of The Estate quest.
Investiating the estate
Investiating the estate
A painting
A well and a view
Passage way to the Undercroft
Note
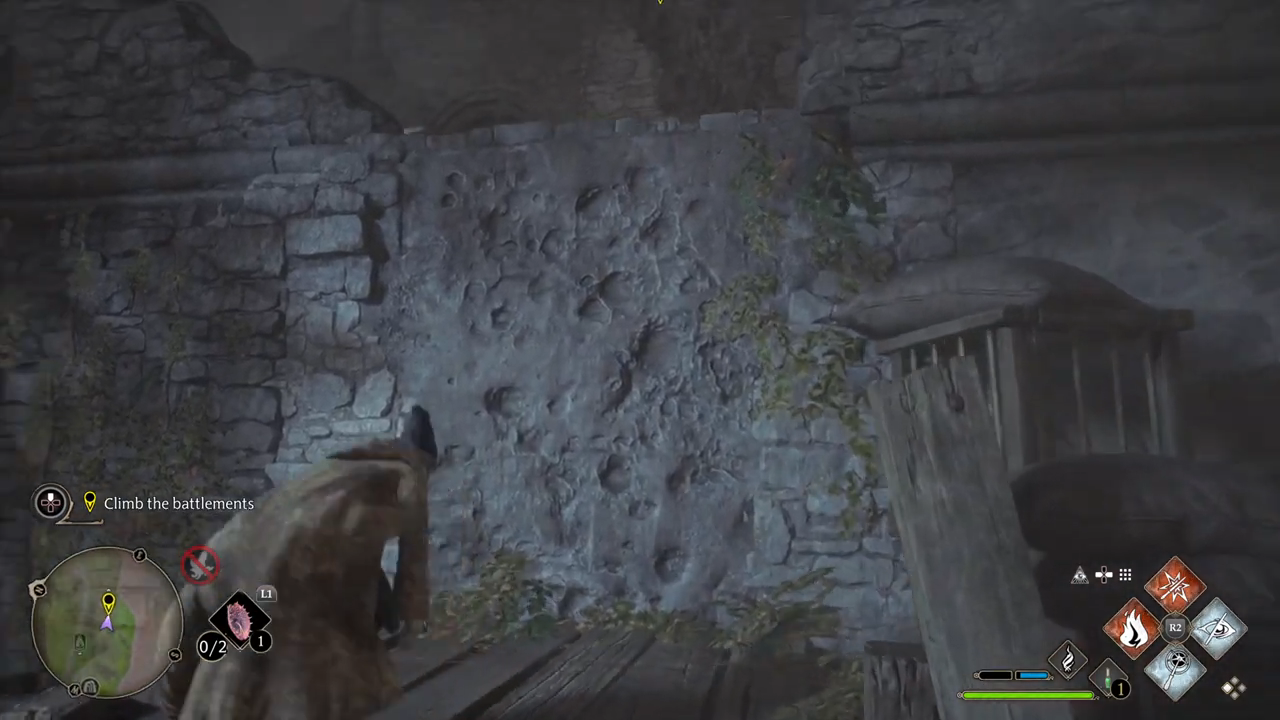
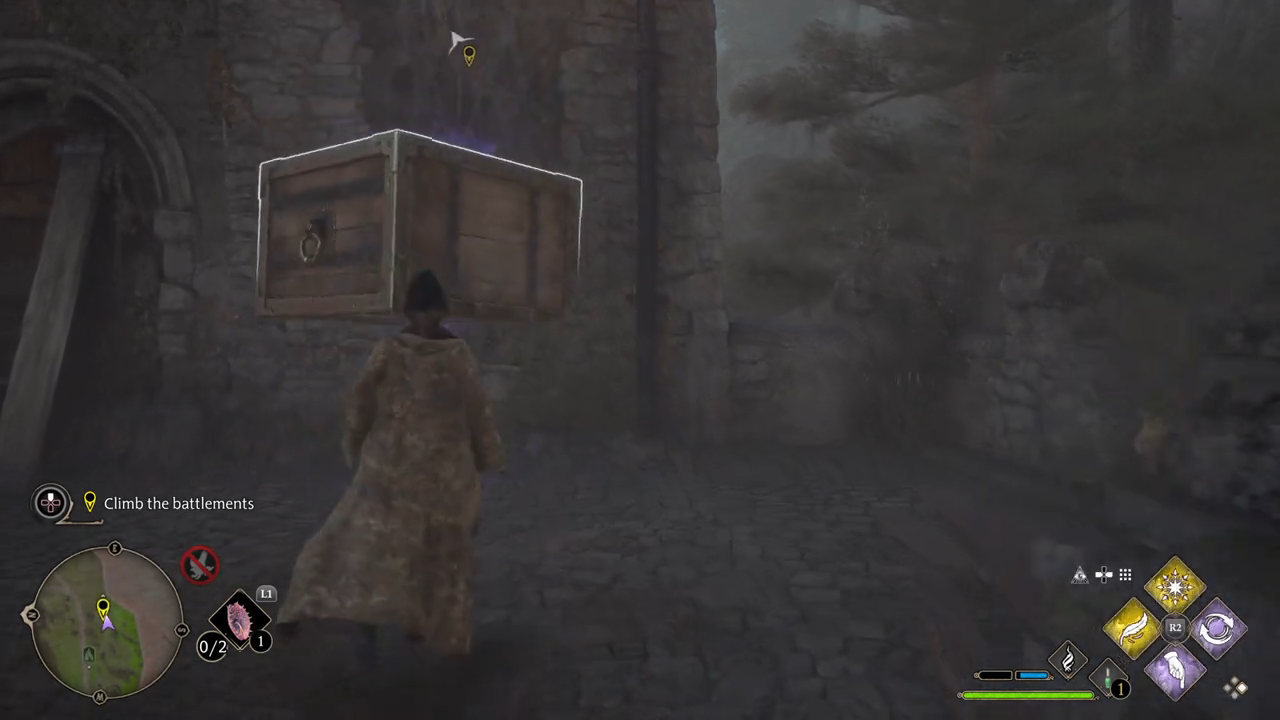
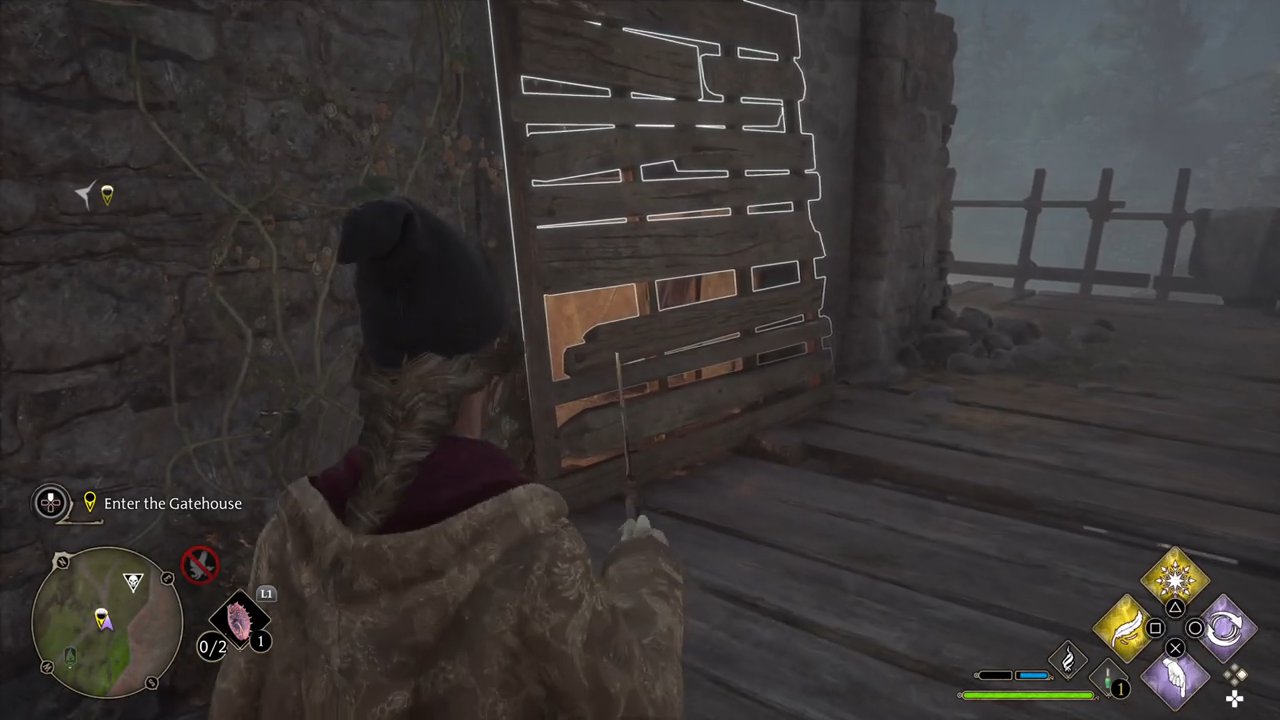
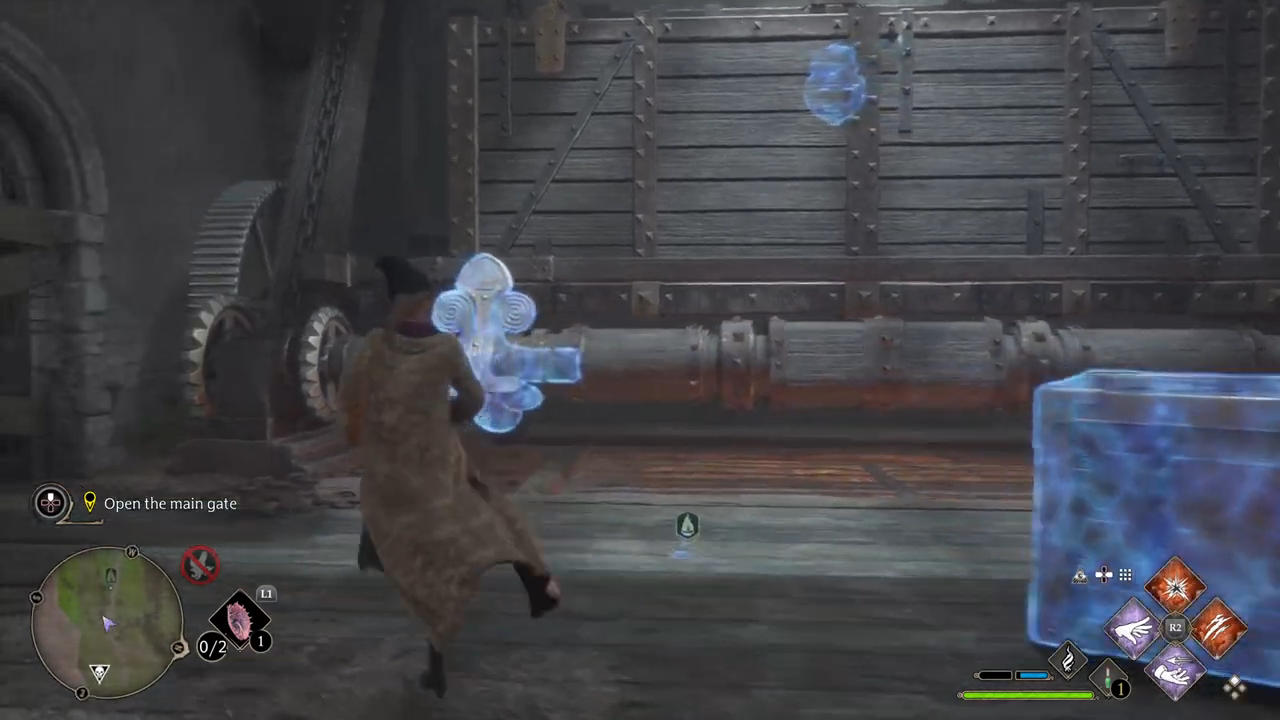
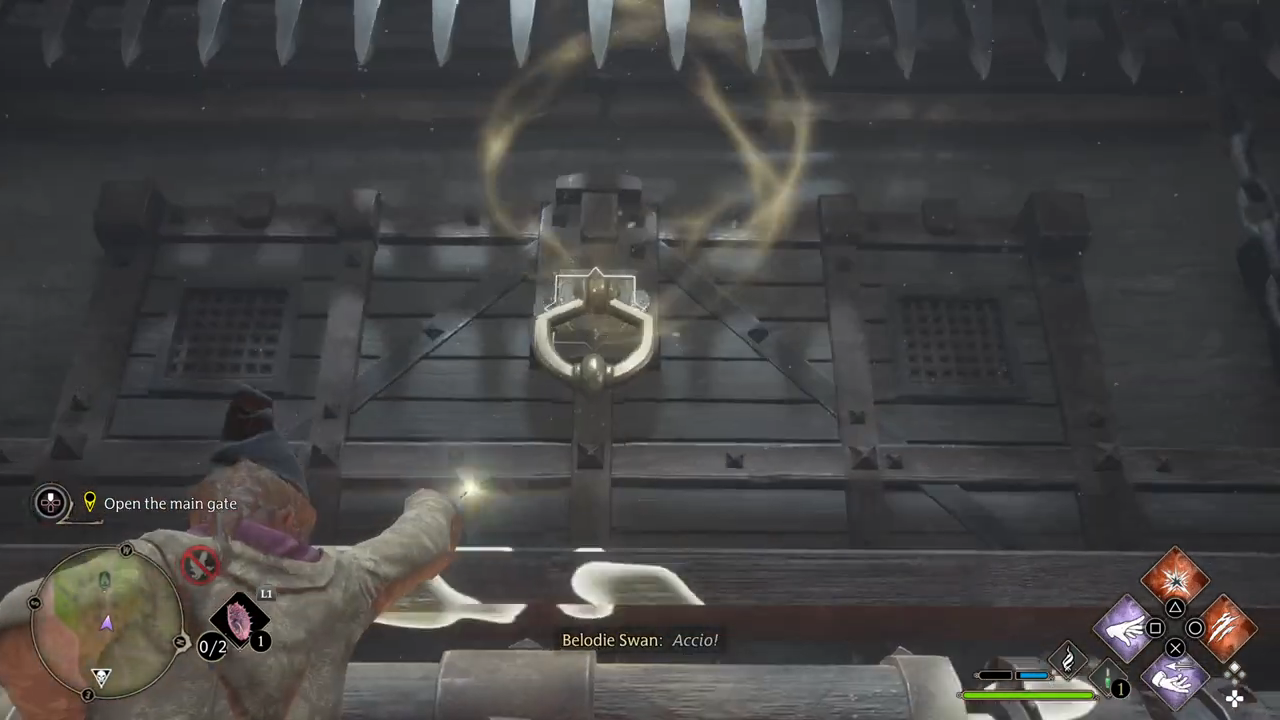
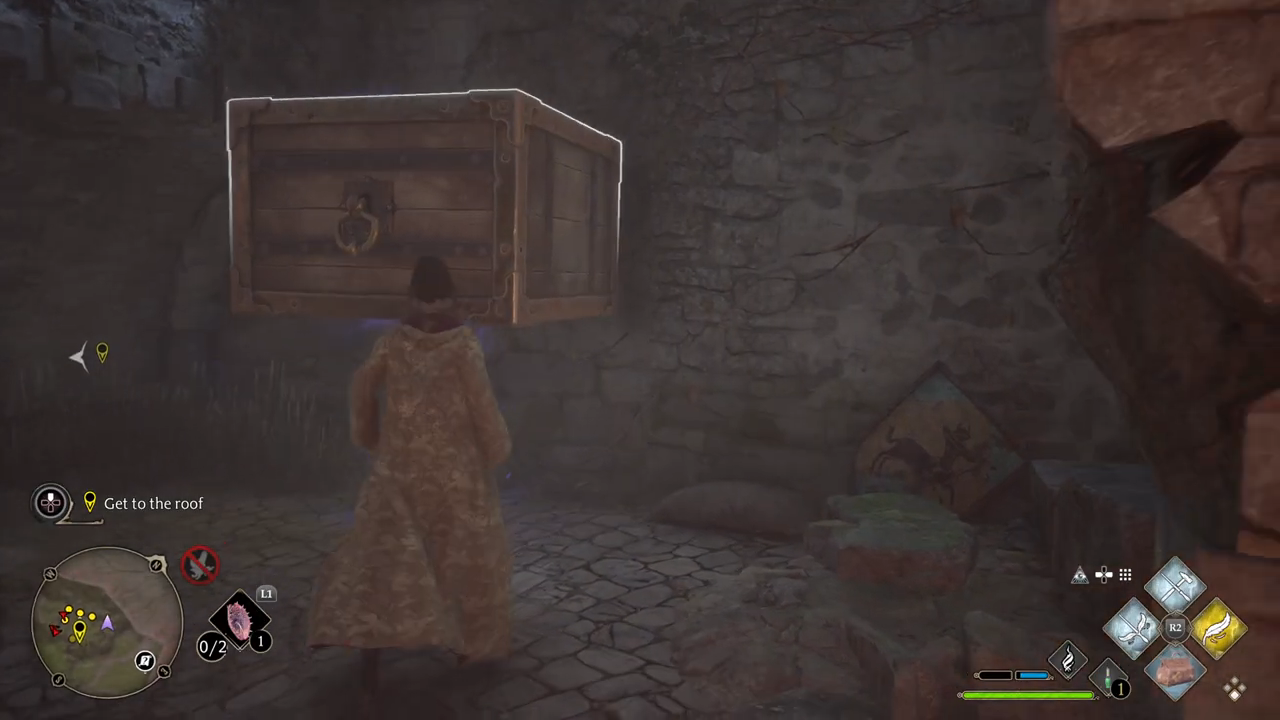
The High Keep Natty is waiting for you near a castle ruin. The main gate is locked. You should look for a way to climb the walls of the battlements and enter the Gatehouse. You need to find a way into the Gatehouse without attracting attention. Hopefully you can then find a way to let Natty inside. You need to open the gate long enough for Natty to get inside. Perhaps it can be manipulated with a spell. You were able to get the gate open long enough for Natty to slip inside. You should follow her lead. You just hope she knows what she’s doing. You can’t believe you missed your chance to slip through the doors with Natty. You will need to find another way inside and try to make your way to the roof. This is amazing! What a magnificent creature! This is quite different from flying on a broom. You should probably pay attention to what you are doing before you fall off. After completing this quest, you can fly on Highwing the hyppogriff whenever you wanted. Here you can find all your subjects for the quest and explanations behind it.
Meet Natty near Falbarton Castle: follow the map to the castle and talk with Natty.
Climb the battlements: go of the bridge to the right side. And use the crates to climb your way up. A floor higher the crate will be locked behind a door, use depulso to free the crate. Then use Levioso to put it at the right place.
Enter the Gatehouse: get inside by using disecendo on the wooden wand. Then use Levioso to get the crate out of the way.
Open the main gate: use depulso two times on the gate it will go up, then use accio on the handle.
Follow Natty: try to stay close to Natty.
Get to the roof: follow the map to find another way in. Use levioso, accio, alohomora, and depulso on the way. You also have to fight against some enemies on the way.
Follow Natty on Highwing: try to stay close to Natty. When you land, you will talk with each other and the quest will end.
At 03:31:04 starts The High Keep quest.
Climb the battlements
Climb the battlements
Enter the Gatehouse
Open the main gate
Open the main gate
Get to the roof
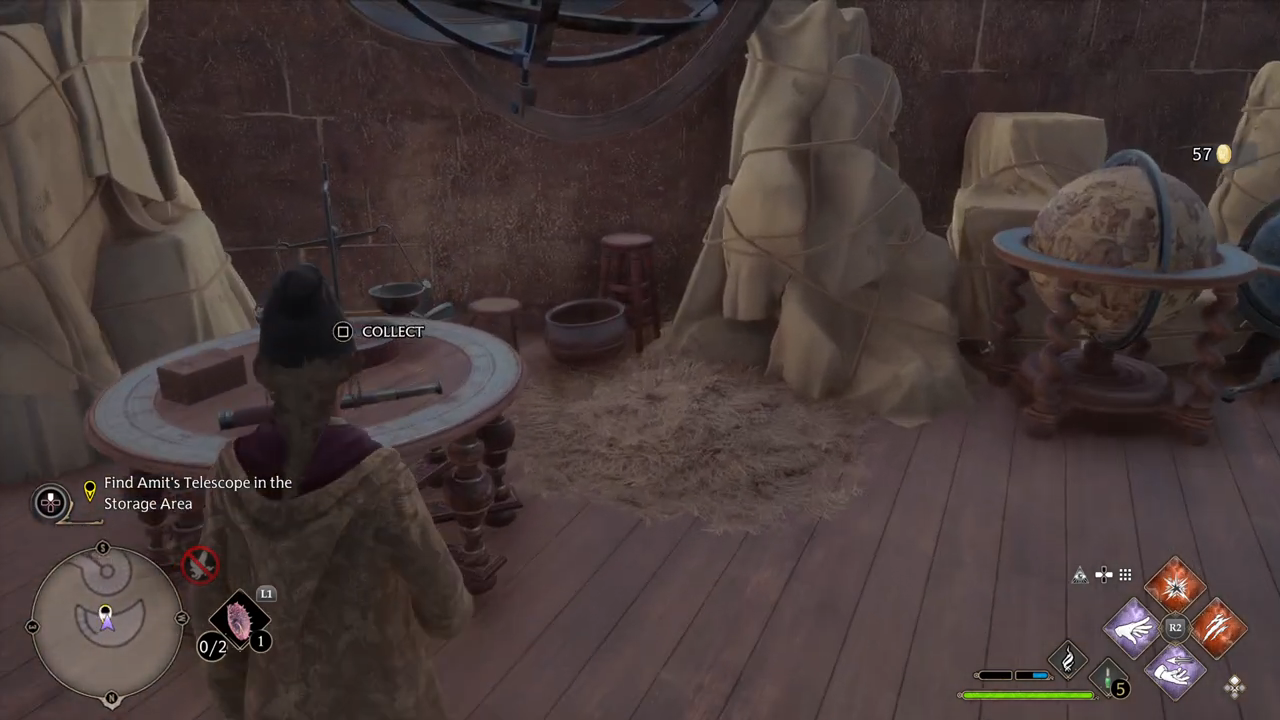
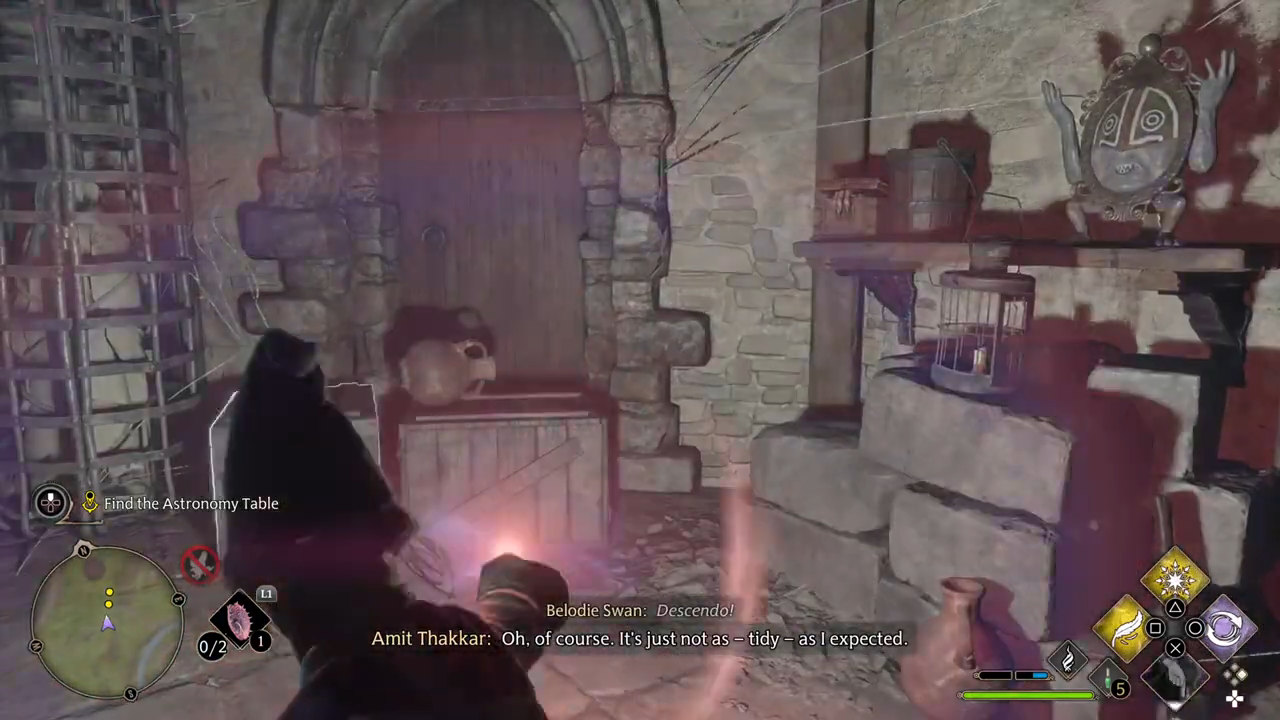
Astronomy Class Professor Shah’s class is at the top of the Astronomy Tower, upstairs from the entrance to the Room of Requirement. You should head there now. Amit offered you his old telescope. It’s (sic) somewhere in the storage area under the observation deck. Amit wanted to speak to you after you picked up his telescope. You should talk to him now. Amit says that one of the ancient Astronomy Tables can be found on the Hogwarts grounds. He would have gone in search alone but has heard chilling rumors. He wants you to accompany him. You should follow Amit and help him find the table. It appears that the ancient Astronomy Table is located on the castle walls. Amit and you will need to travel through the castle turrets to reach it. You should lead the way to help Amit get over his fears. We’ve discovered the Astronomy Table that Amit had read about. Now to see how it works. Here you can find all your subjects for the quest and explanations behind it.
Attend Astronomy Class: follow the map to your first astronomy class.
Find Amit’s Telescope in the Storage Area: follow the map to a below deck. There you find the telescope on a table.
Find Amit on the lower deck: follow the map to Amit and talk with him.
Follow Amit: try to stay close to Amit.
Find the Astronomy Table: lead the way to the table. You have to destroy spiderwebs and crates with Incendio and descendo,
Use the Astronomy Table: interact with the table and find out the right stand. Then You will talk with Amit and complete this quest.
At 04:15:41 starts Astronomy Class quest.
Find Amit's Telescope in the Storage Area
Find the Astronomy Table
Find the Astronomy Table
Use the astronomy table
Back On The Path Professor Fig is in the Map Chamber. You should speak to him about recent events. Here you can find all your subjects for the quest and explanations behind it.
Go to the Map Chamber: follow the map to the map chamber.
Talk to Professor Fig: after talking with the professor, you will complete this quest.
At 04:34:27 starts Back On The Path quest.
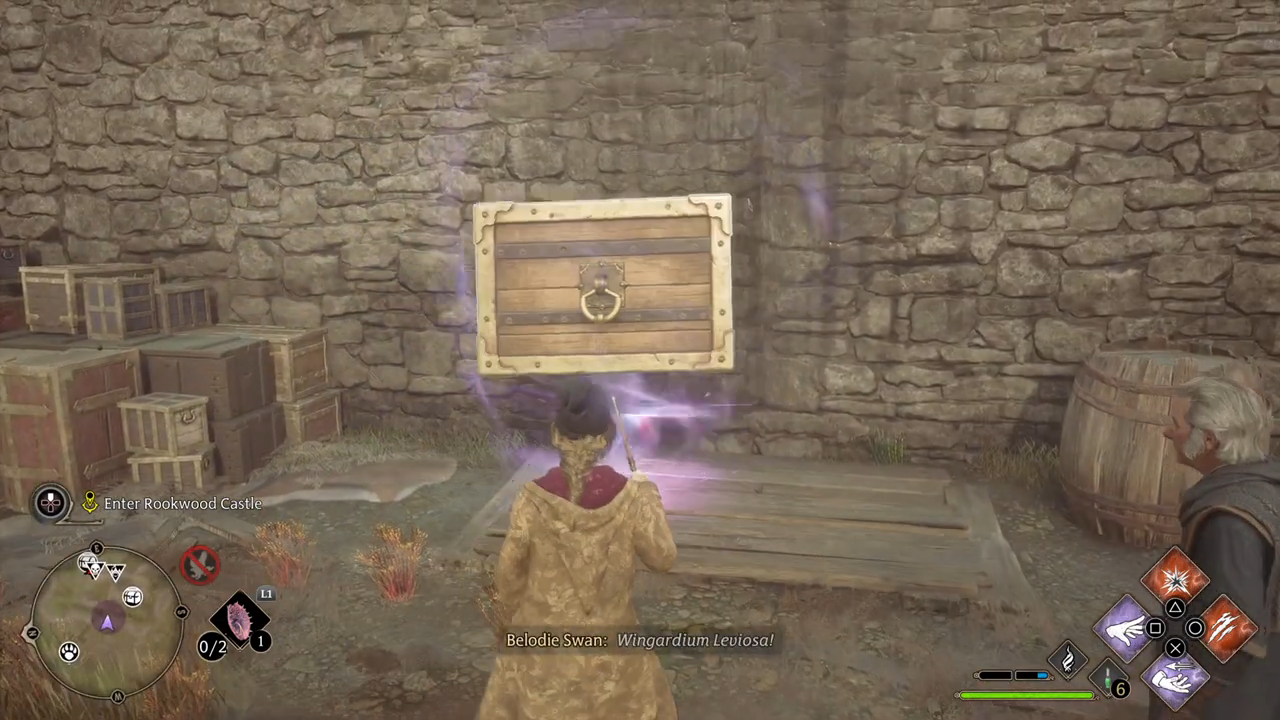
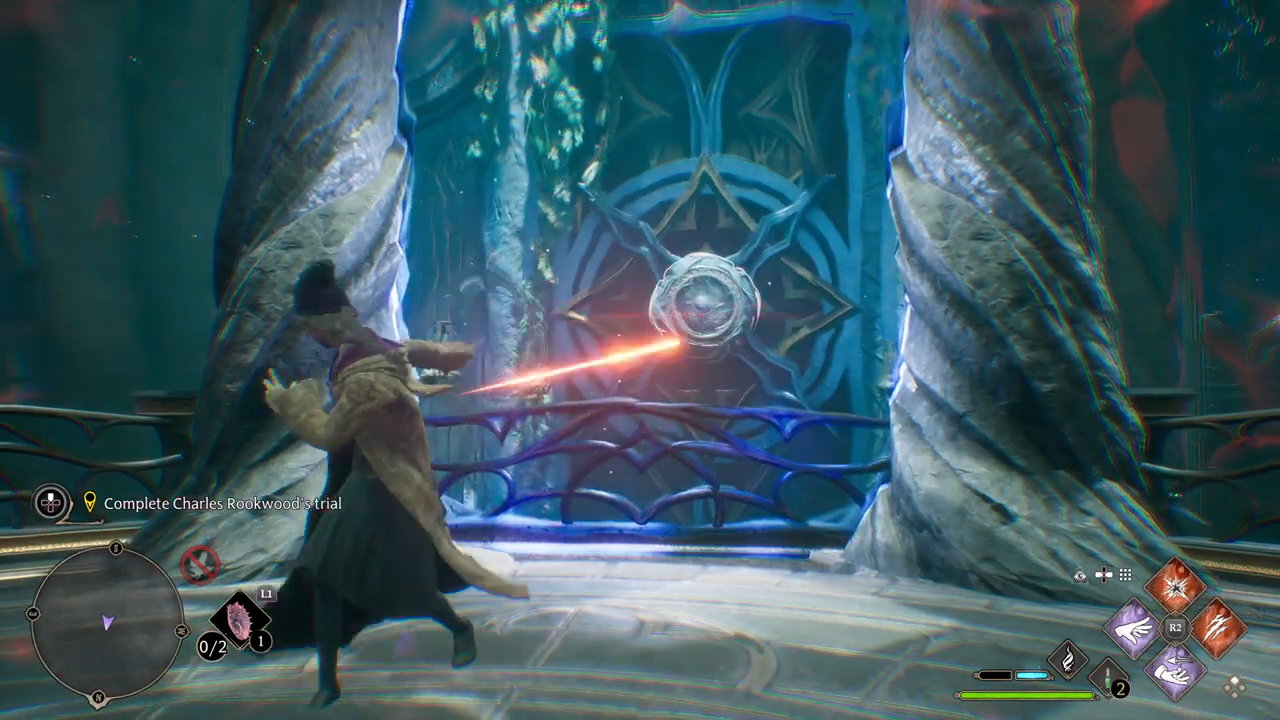
Charles Rookwood’s Trial Percival Rack ham and Charles Rookwood want you to complete Charles’s trial as soon as possible. You need to meet Professor Fig at Rookwood Castle. The castle is crawling with Victor Rookwood’s people and Ranrok’s Loyalists. We’ll need to get past them to get into the castle. Professor Fig and you made our way into Rookwood Castle. We overheard Ranrok and Victor Rookwood arguing over their failed attempts to find you. You need to find Charles Rookwood’s portrait, and quickly. Charles Rookwood said he has a portrait in the castle. You need to locate it and find out what he wants you to do next. You have found the entrance to Charles Rookwood’s trial. Professor Fig cannot go with you. You must enter alone. These trials are growing progressively difficult. You will need to keep your wits about you and rely on your ability to perceive ancient magic. Charles Rookwood left a Pensieve memory. You need to view it and learn what he wants you to know. You have completed the trial and viewed the Pensieve memory left by Professor Rookwood. You need to find the way out and return to the Map Chamber. After completing Charles Rookwood’s trial, You returned to the Map Chamber and spoke with the Keepers, including a third Keeper, Niamh Fitzgerald. She wants to ensure that you will be able to reach her trial before she sends me there. It would be wise to realign with Professor Fig on all of this. Here you can find all your subjects for the quest and explanations behind it.
Meet Fig at Rookwood Castle: follow the map to Rookwood Castle.
Speak with Professor Fig: he is at Rockwood Castle. Go talk with him.
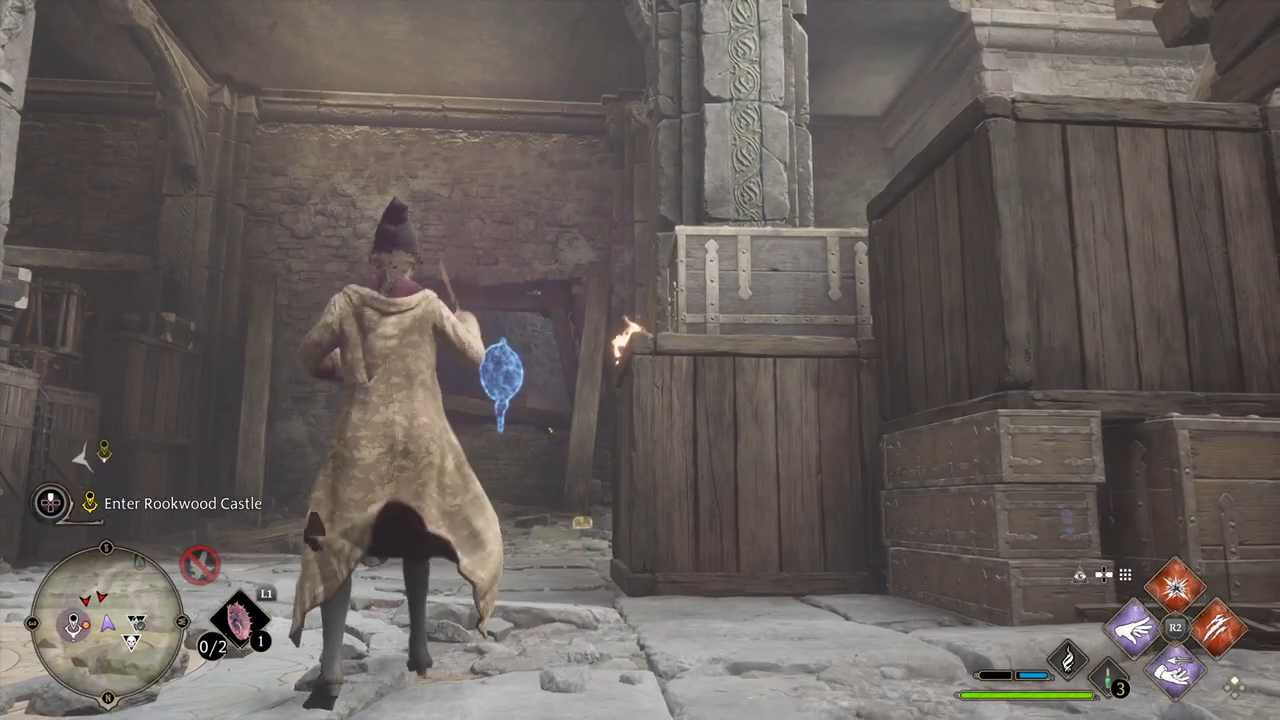
Enter Rookwood Castle: try to find a way through inside the castle by following the map. On the way, you have to fight with enemy’s, use Levioso on crates and opening doors by using basic spells.
Find Charles Rookwood’s portrait: you have to find the portrait yourself, the map won’t help. Go left into a second kind of room. Then in on the right side you will find a small way. By following that way, you will be able to find the portrait. Go talk with the portrait.
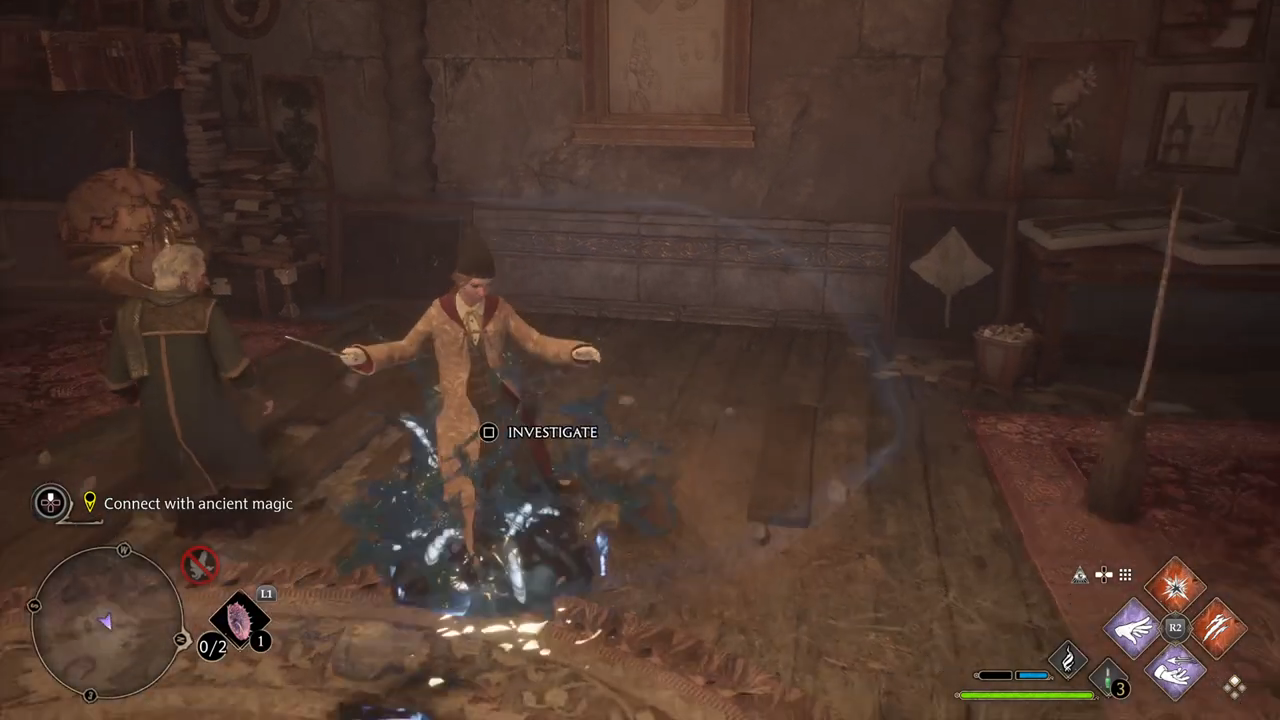
Connect with ancient magic: investigate with the ancient magic.
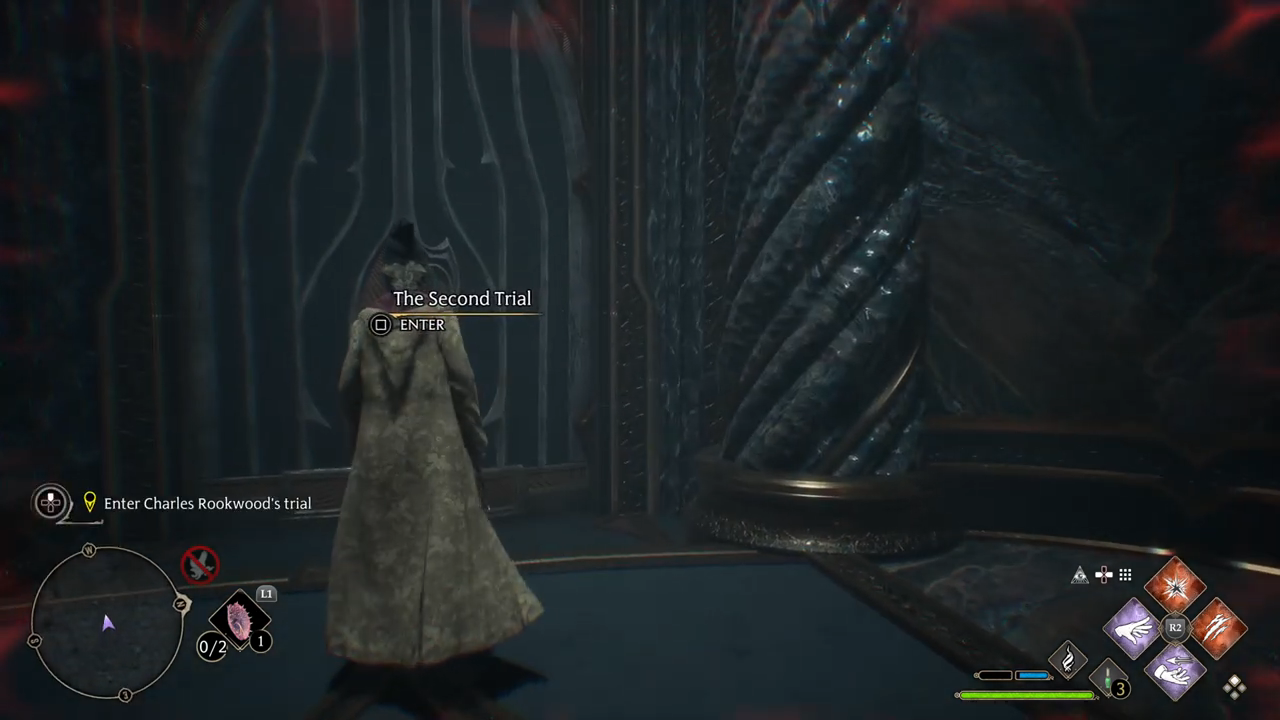
Enter Charles Rookwood’s trial: go through the portal.
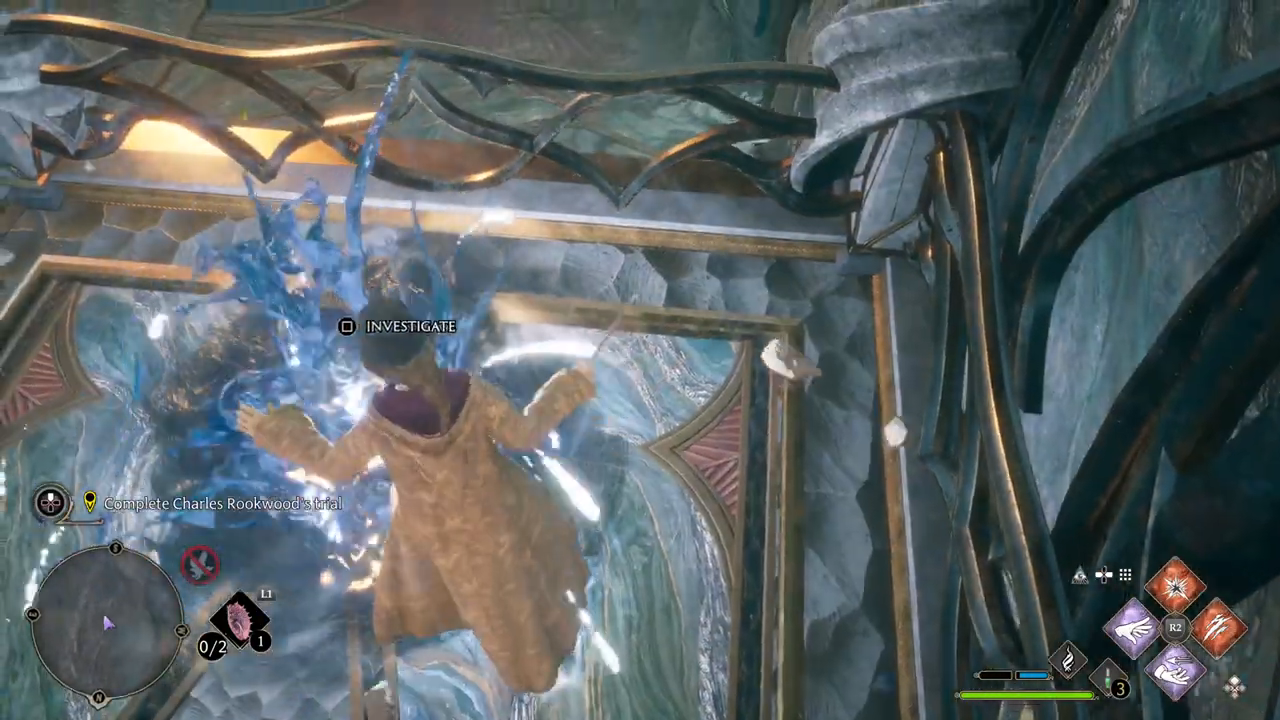
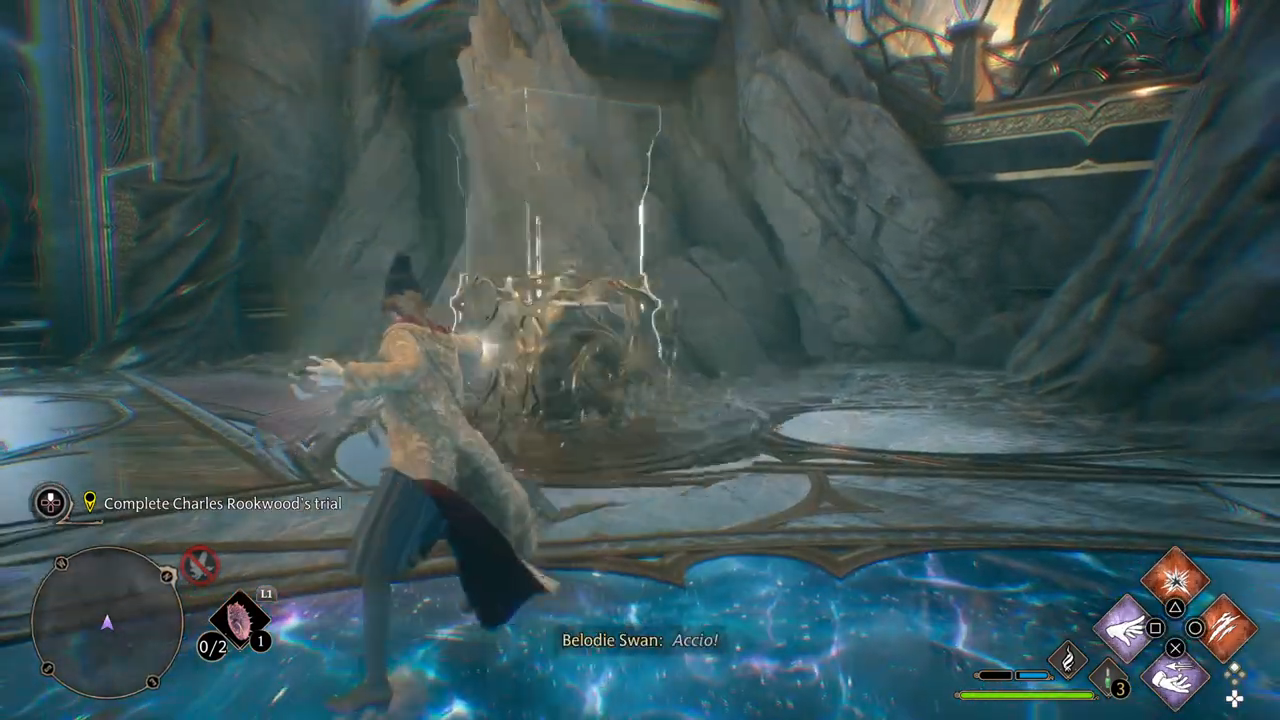
Complete Charles Rookwood’s trial: solve the puzzles in the trial. You need to investigate ancient magic, go through portals, use Accio and Levioso to move columns and use basic spells on panels. You have to fight against Statues.
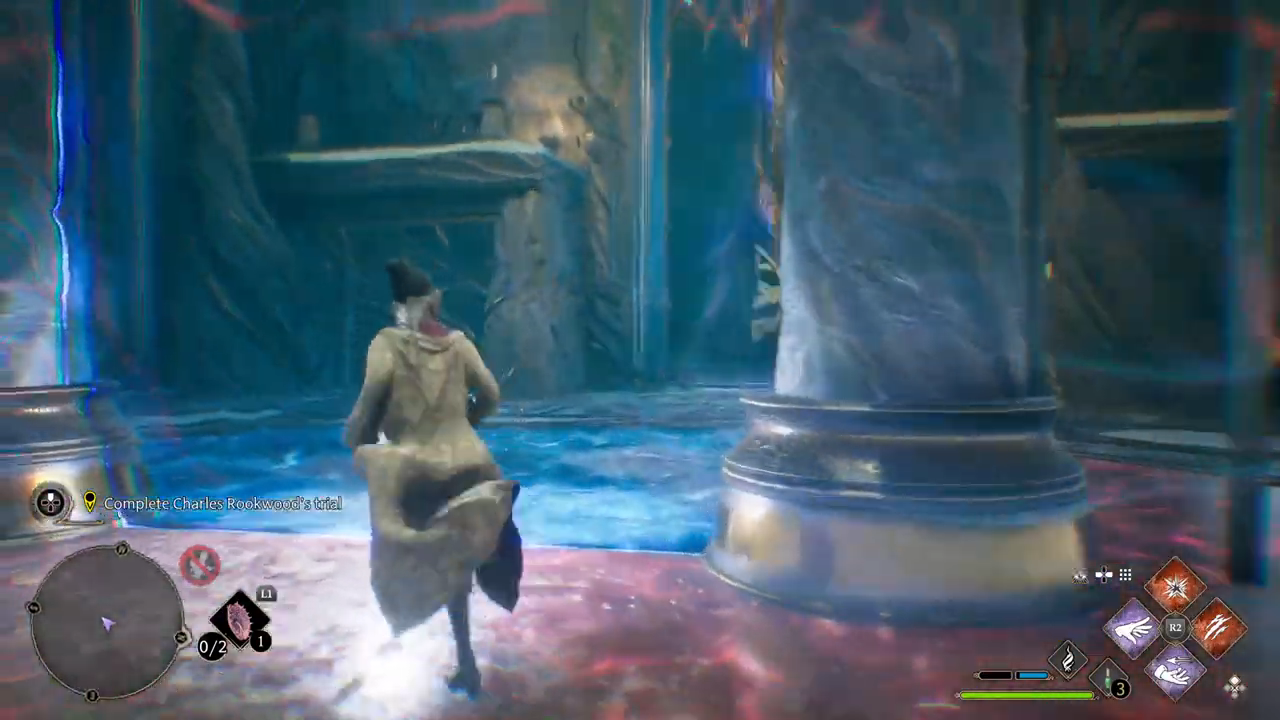
Continue exploring Charles Rockwood’s trial: after walking through the gate.
View the Pensieve memory: interact with the pensive.
Exit Charles Rockwood’s trial: go back through the gate to the Map Chamber.
Speak to Percival: go speak with him.
Speak with Professor Fig: after talking with Professor Fig, you have completed this quest.
At 04:44:11 starts Charles Rookwood’s Trial quest.